Part 1 – Learning to Piece Quilt Blocks
I recently decided to take on a new challenge: learning how to quilt. As part of my commitment to lifelong learning and healthy living, quilting has been a surprisingly powerful tool—it combines creativity, fine motor skills, problem-solving, and patience, all of which are great for brain health and personal growth.
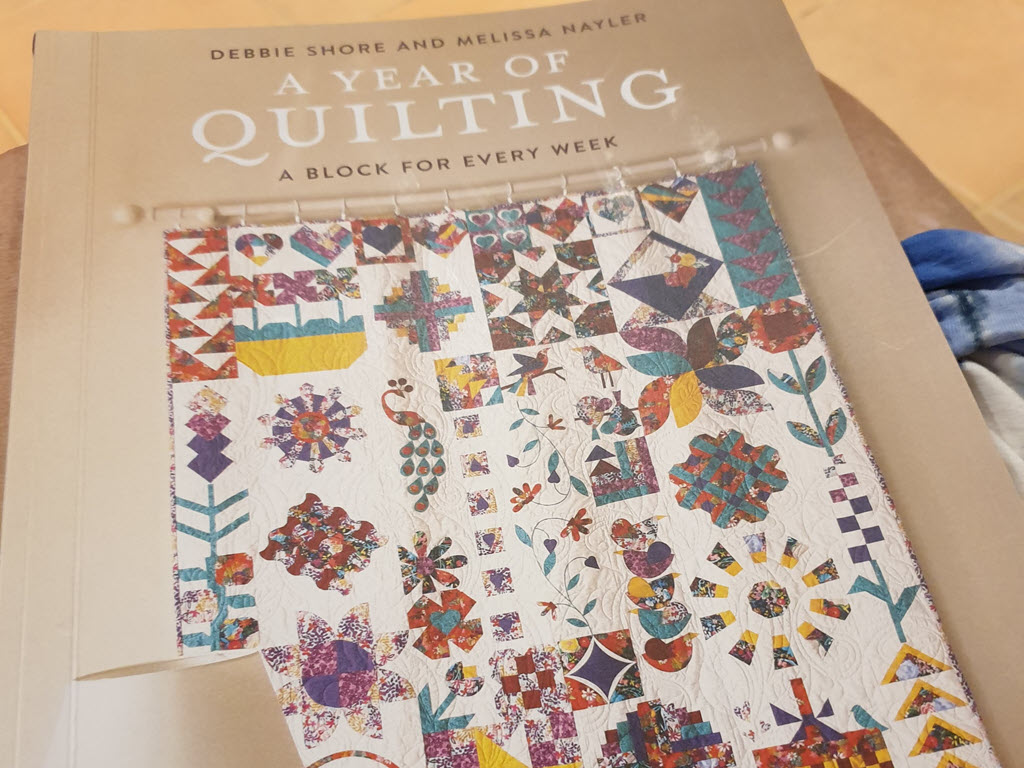
I’m using A Year of Quilting by Debbie Shore and Melissa Naylor to guide me through 52 different quilt blocks, one week at a time. In this post, I’m documenting what I’ve learned so far—from techniques and challenges to tips and tutorials—to celebrate progress, reflect on the process, and share helpful resources with others on a similar path.
Note: I updated this post as I completed blocks, and as of September 25, 2025, all 52 blocks are finished. I will no longer be updating this post. To continue following my quilting journey, see my follow-up post: Learning to Quilt: Quilting the Quilt Top – Part 2: A Beginner’s Struggle with “Quilt as Desired.”
Why Quilting?

I’ve pondered learning to quilt for decades. Quilting was one of the few forms of sewing that my family members hadn’t done, so it wasn’t a skill passed down—and I wasn’t entirely sure it was one I wanted to pursue.
I first gave quilting a try about 20 years ago, when I hand-stitched a mini quilt.
Now, with more time available, it feels like the right moment to reassess whether quilting is something I truly want to take up.
Without a sewing machine of my own, I began by borrowing my niece’s—one that my mum had given her about 20 years ago and then spent several months sewing a variety of items for the house. After gaining confidence with those projects, I decided I was ready to start learning to quilt.
My Quilting Project
I chose Debbie Shore and Melissa Naylor’s A Year of Quilting for my quilting project because:
- The idea of creating a new block each week felt manageable, and the book is designed with beginners in mind. I found her other sewing books well-written for beginners.
- It includes a variety of quilting techniques—ranging from simple machine piecing and appliqué to English paper piecing and foundation paper piecing—so that each block will introduce me to different patchwork or quilting method.
- I liked the look of the quilt design.

Important Note on Pattern Corrections
Please note that there are some mistakes in the measurements in Debbie Shore and Melissa Naylor’s A Year of Quilting. Fortunately, the authors have provided a list of corrections, which you can download here . I highly recommend checking the updated measurements before cutting into your good fabric—especially if you’re a beginner like me and relying on the book’s instructions closely.
I also found the following correction needed that isn’t in the updated measurement list:
Important Note on Pattern Corrections
Please note that there are some mistakes in the measurements in Debbie Shore and Melissa Naylor’s A Year of Quilting. Fortunately, the authors have provided a list of corrections, which you can download here . I highly recommend checking the updated measurements before cutting into your good fabric—especially if you’re a beginner like me and relying on the book’s instructions closely.
I also found the following corrections needed that aren’t in the correction list:
Week 4: Small Flower 1 (page 58)
- The white background square (WW) should be cut at 5½ inches, not 5¾ inches.
- The longer leaf fabric (Fabric B) should be cut at 4¾ x 1½ inches (not 4½ x 1½ inches).


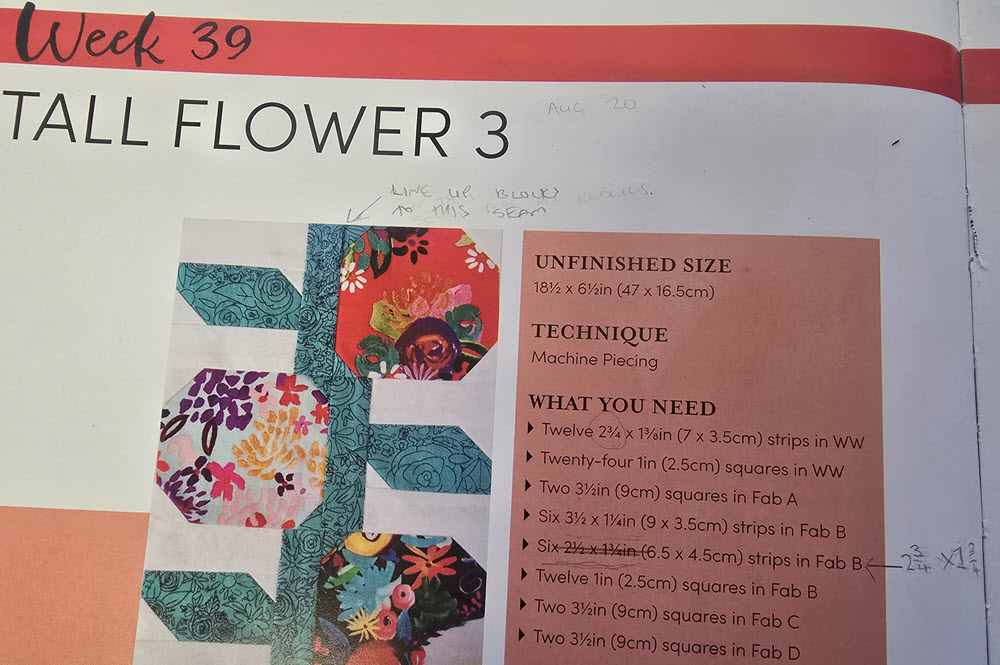
Week 39 Tall Flower 3 (page 116)
- The instructions say to cut twelve 2¾” × 1⅜” strips in WW and sew these to the top and bottom of the 2½” × 1¾” Fabric B strips.
- Fabric B should be six 2¾” × 1¾”, not six 2½” × 1¾”

Week 41 Dresden 2 (page 120)
- The octagon shape made from the template on page 175 was too small and didn’t cover the center of the Dresden. Recommend placing the octagon template over the center of the Dresden to confirm it is large enough before preparing it. It might have been an issue with my Dresden and to fix it, I enlarged the octagon template by photocopying it at 125%, which increased the size to 3¾”.
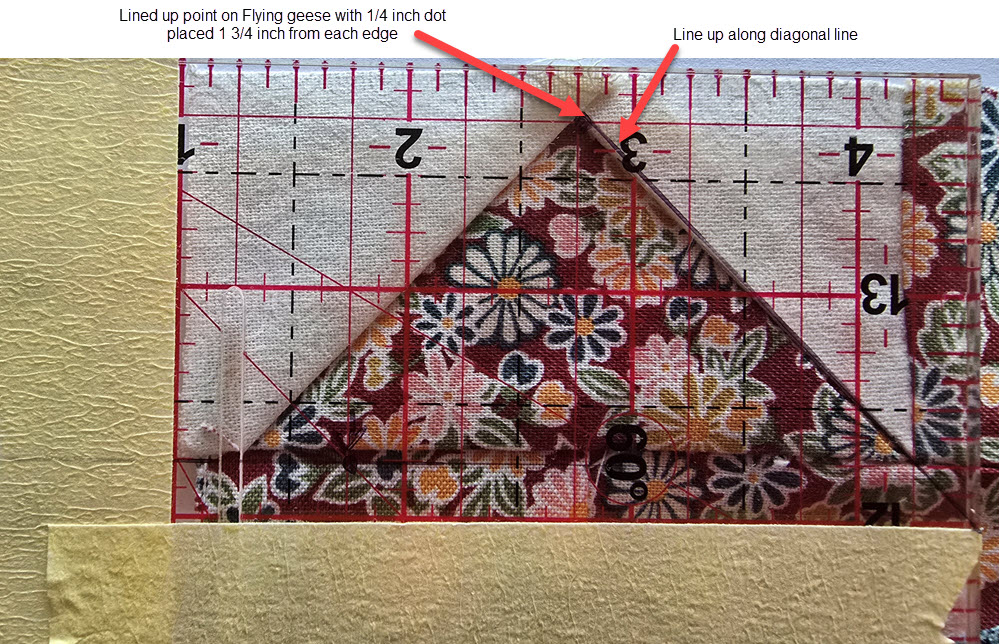
Week 46 Flying Geese 4 (page 130)
- Unfinished size should be 18½” by 6½”, not 18½” by 12½”
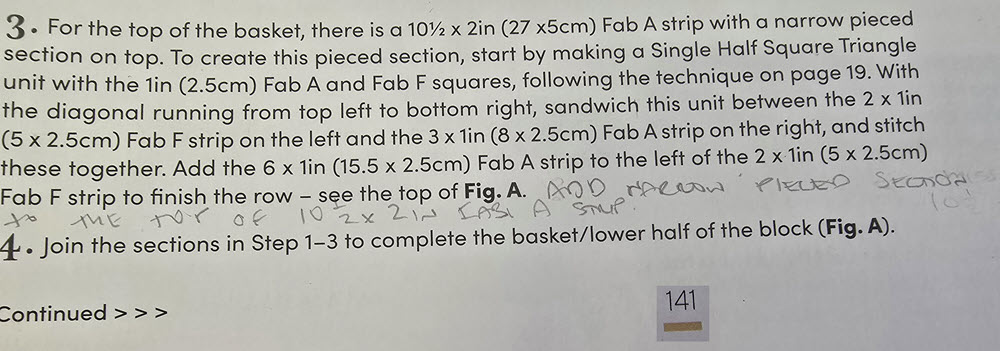
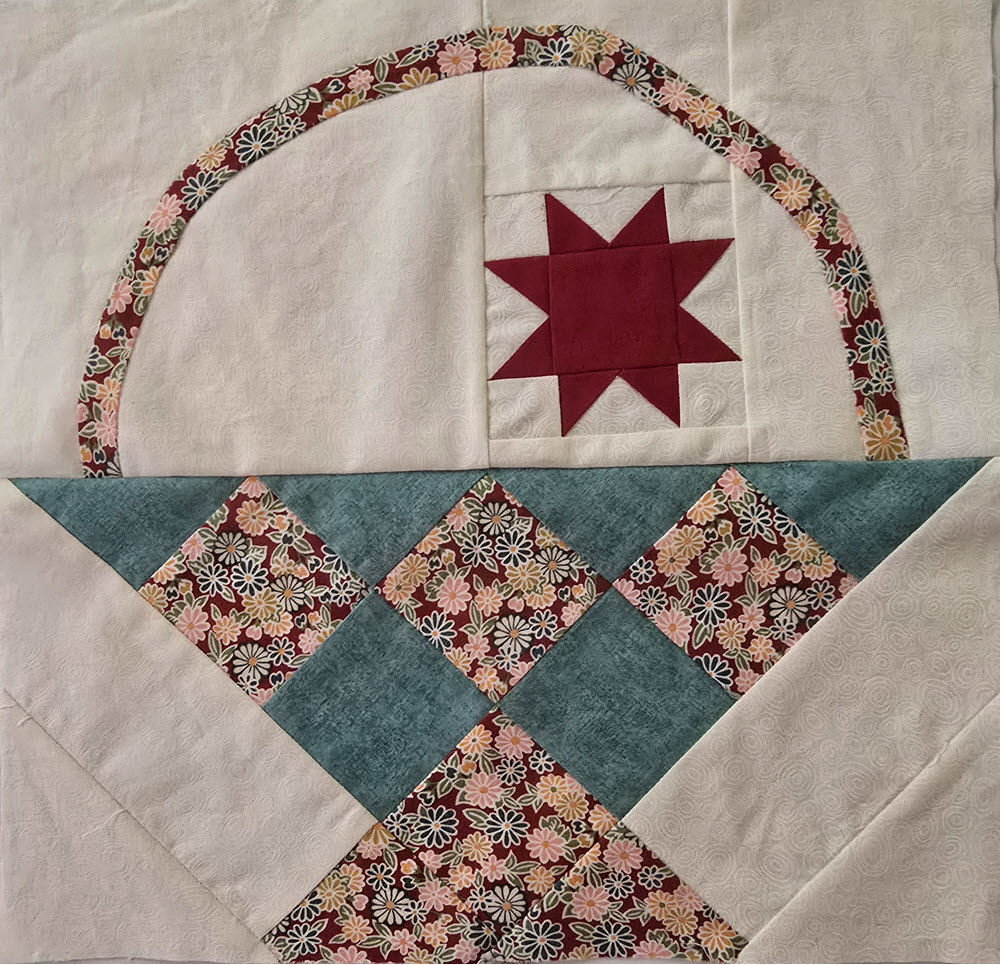
Week 50 Basket 4 (page 141 and page 142).
- Step 3 (page 141). At the end of step 3 it should add stich the 10½ by 2 inch Fab A strip to the bottom of the narrow pieced section.
- Step 6 (page 142). After making the half square triangles using the two-in-one half square triangle technique it should say trim all units to 2 inches square if necessary (not trim all units to 1½ inch square if necessary).

Week 51 Curved Piecing (page 143).
- Template 1 should be written as Template A, and Template 2 should be written as Template B to match the naming convention used on template page 171.
Leveraging My Instructional‑Design Background
Much of my professional life has been in instructional design—teaching new skills across various fields—so I’m accustomed to deconstructing skills into teachable steps. Quilting involves many techniques, and I knew from experience that no single book, however well written, could cover every skill in depth.
Next Step: Curated YouTube Tutorials
After purchasing the book, I turned to YouTube to supplement my learning by finding videos that demonstrated the key skills I’d needed to get started, such as:
I also watched Just Get It Done Quilts’ videos on color theory, but decided it was safer to ask staff at a quilt store to help me choose fabrics for this project— their eye for color felt more reliable.
What I Bought To Get Started: The Fun (and Overwhelming) Part
Before starting my first block, I needed to pick up some essential tools. While it was tempting to buy everything, I tried to strike a balance between getting what I truly needed and avoiding the trap of over-buying supplies I might not use right away. Some items I already had from previous sewing projects; others were specific to quilting.
Here’s what I bought to get started:
- Fiskars 45 mm Rotary Cutter – not 100 % happy with it. Switched to an Olfa 45 mm Rotary Cutter and much happier.
- 18 x 24 inch self healing cutting mat
- 14 x 14 inch Rotating self healing cutting mat – not essential but handy to have for trimming blocks next to sewing machine.
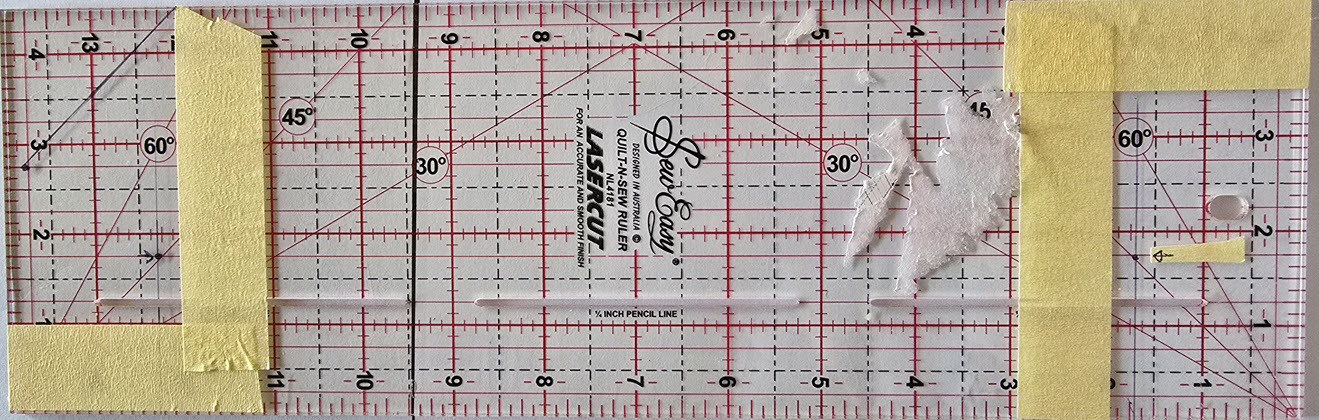
- Quilting rulers
- 6 x 24 inch ruler – length makes it perfect for cutting full width fabric strips as it fits the standard quilting fabric when folded.
- 4.5 x 14 inch ruler – not essential but easier for working with smaller fabric pieces.
- 6.5 inch square ruler and a 12.5 inch square ruler – Debbie Shore and Melissa Naylor’s A Year of Quilting recommended getting one large square ruler like a 12.5 or 16 inch. Their blocks are mainly 6.5 inch square or 12.5 inch square. I decided to buy both rulers as quilters have differing opinions on which size to use. I’ve found both sizes have been helpful. The smaller 6.5 inch square ruler is easier for trimming half square triangles.
- 1/4 plus ruler – not essential but very handy for marking sewing lines and checking 1/4 inch.
- Sewline Marker pencil – for marking sewing lines.
- Seam ripper – Essential for fixing inevitable mistakes.
- Sewing machine needles – Size 80/12 suitable for piecing.
- That Purple Thang Sewing Tool – helpful for guiding fabric when machine sewing.
- Sewline Fabric Glue pen – for Foundation paper piecing and English Paper Piecing.
- Mary Ellen’s Best Press – when instructions recommend starch is needed like with English Paper Piecing.
- Fabric Adhesive Sheets – for applique.
- Freezer paper – for certain types of applique.
- Threads
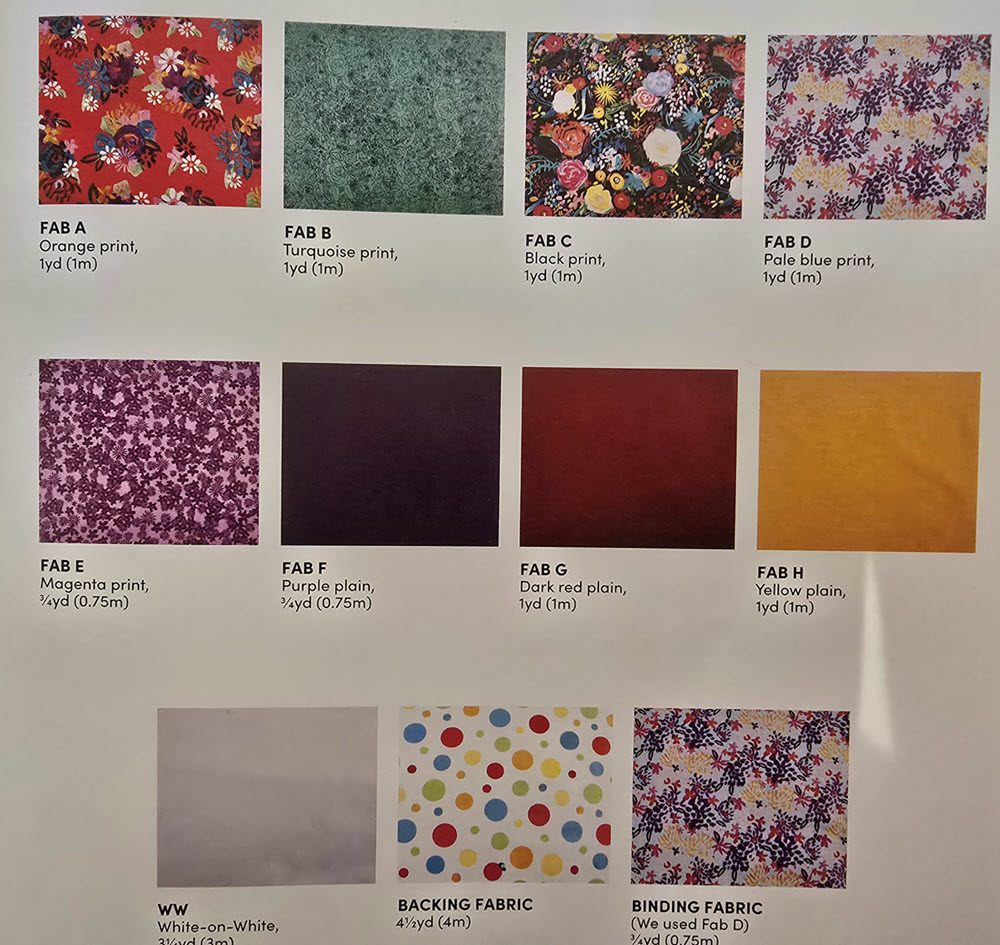
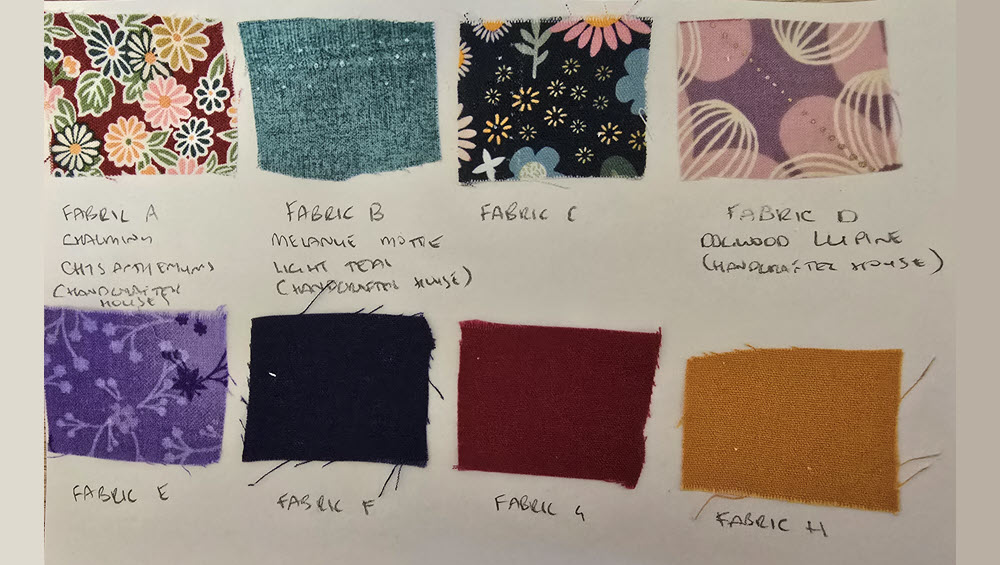
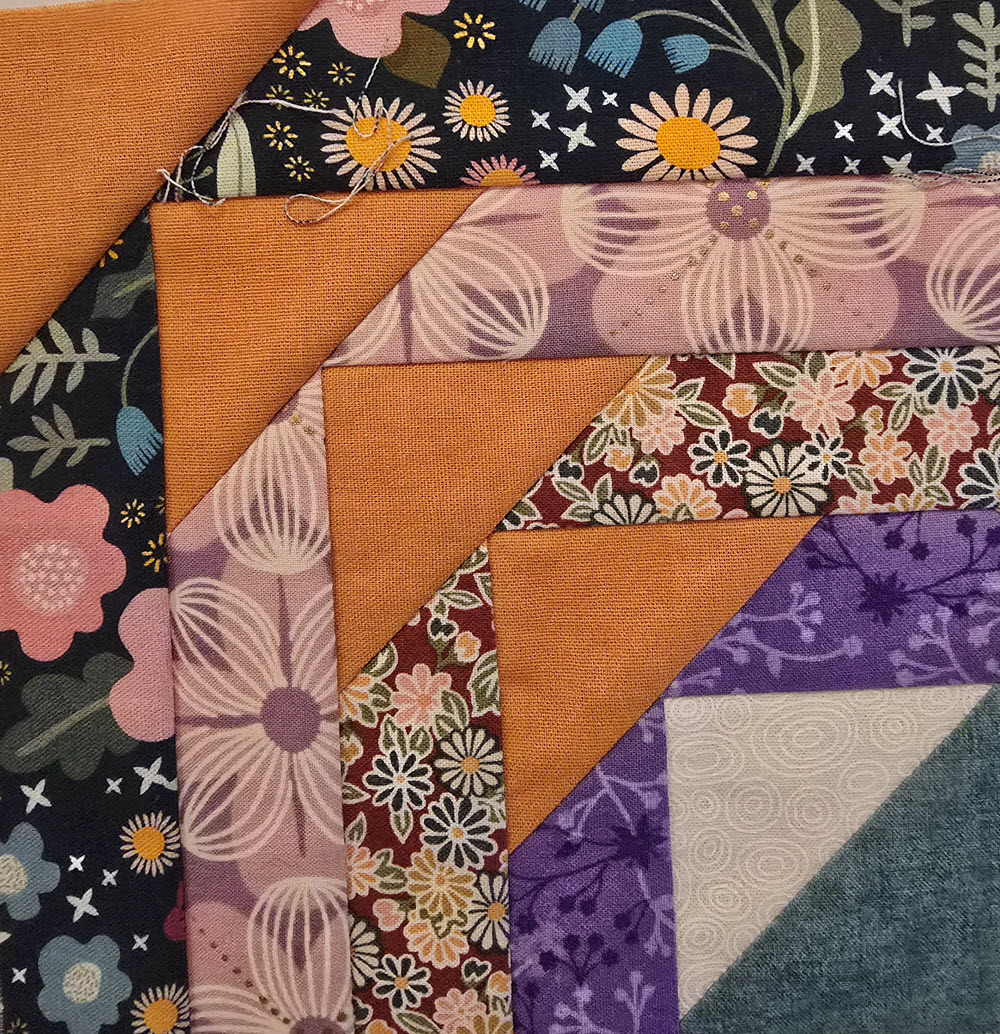
- Fabrics – purchased the nine fabrics required for the blocks.
Block by Block: My First Steps into Quilting
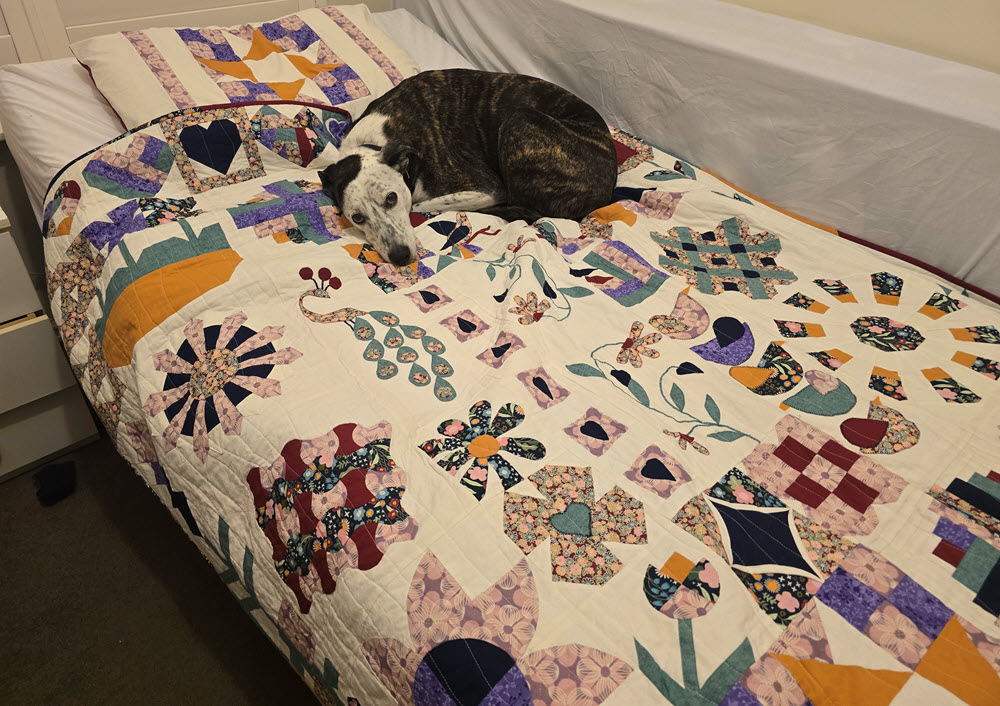
I’ve now completed all 52 blocks from Debbie Shore and Melissa Naylor’sA Year of Quilting which has take approximately 6 months. To build my skills and gain confidence with each new technique, I initially tested every block pattern by first creating a practice block using spare fabric. Once I’m happy with the result, I then make the final version using my chosen good fabric. This approach helps me avoid mistakes and lets me experiment without the pressure of getting it perfect on the first try. As my skills increased, there was less need to create a practice block, and I was able to create the final version.
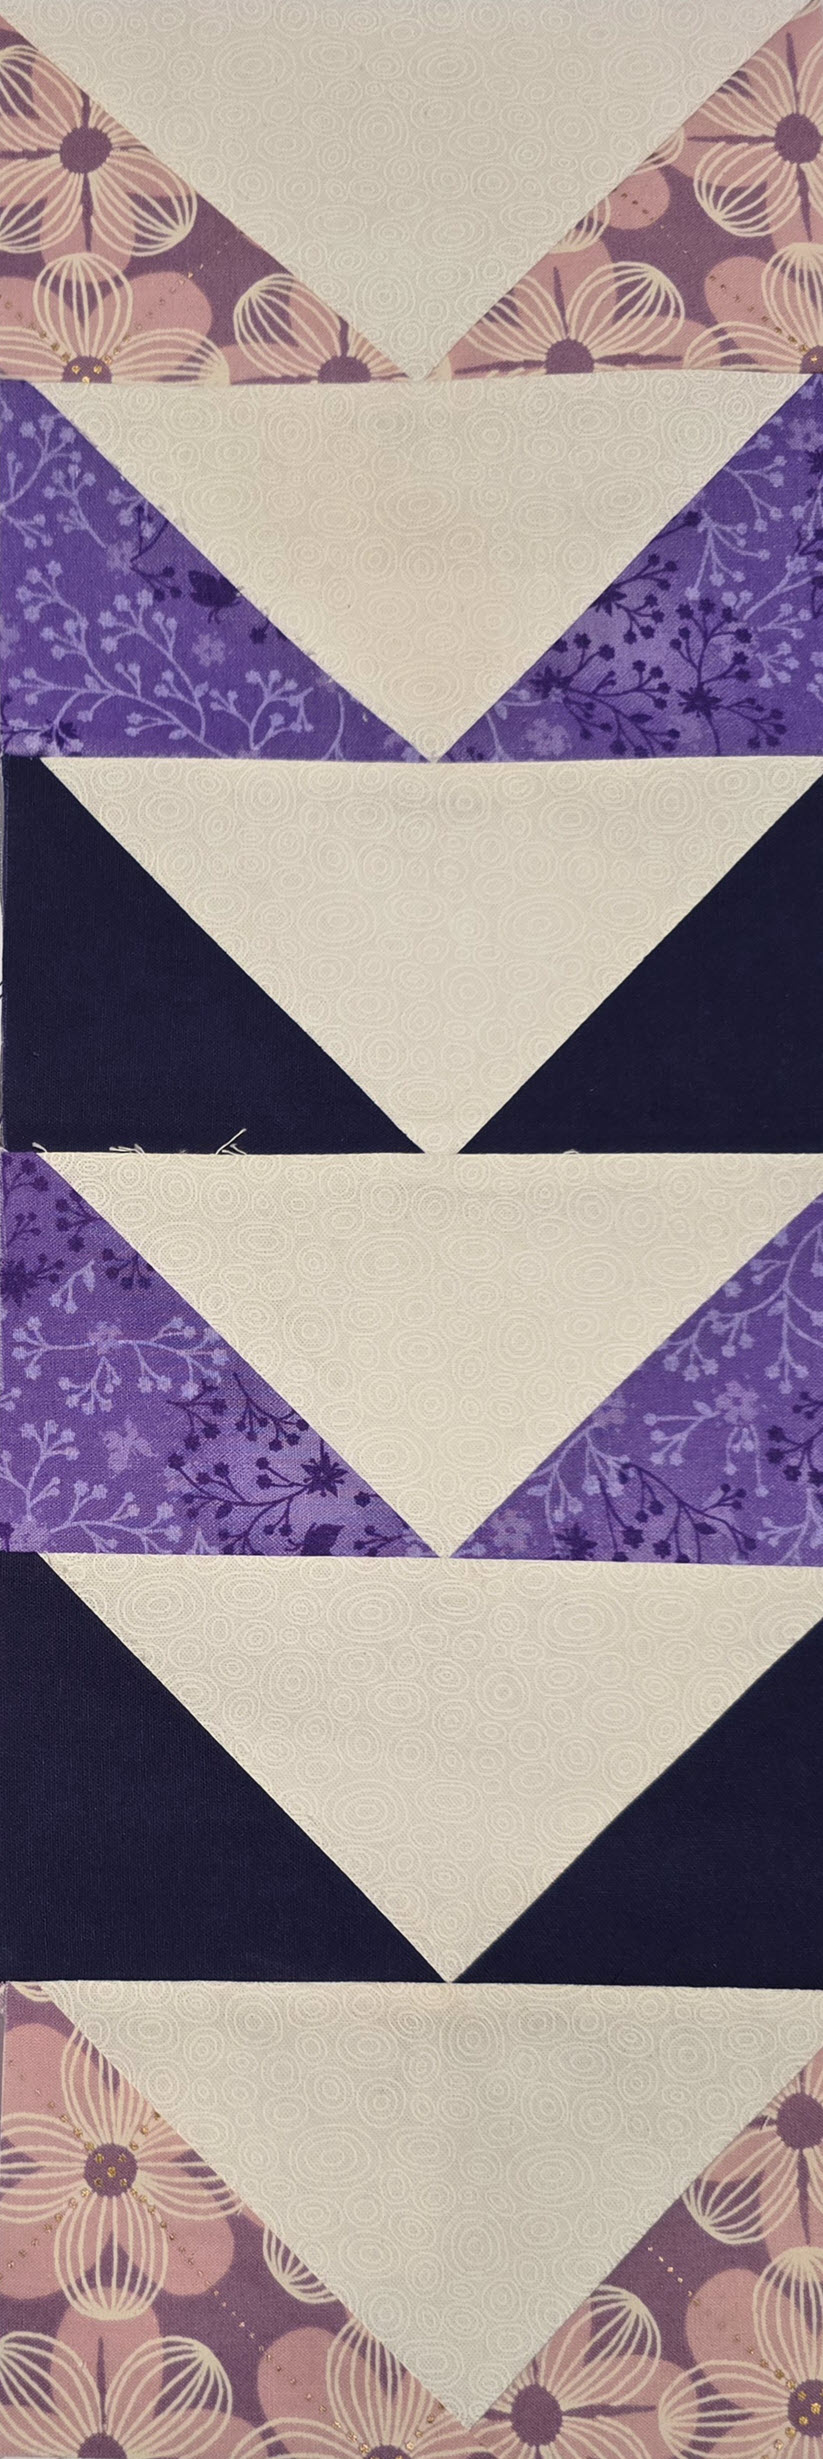
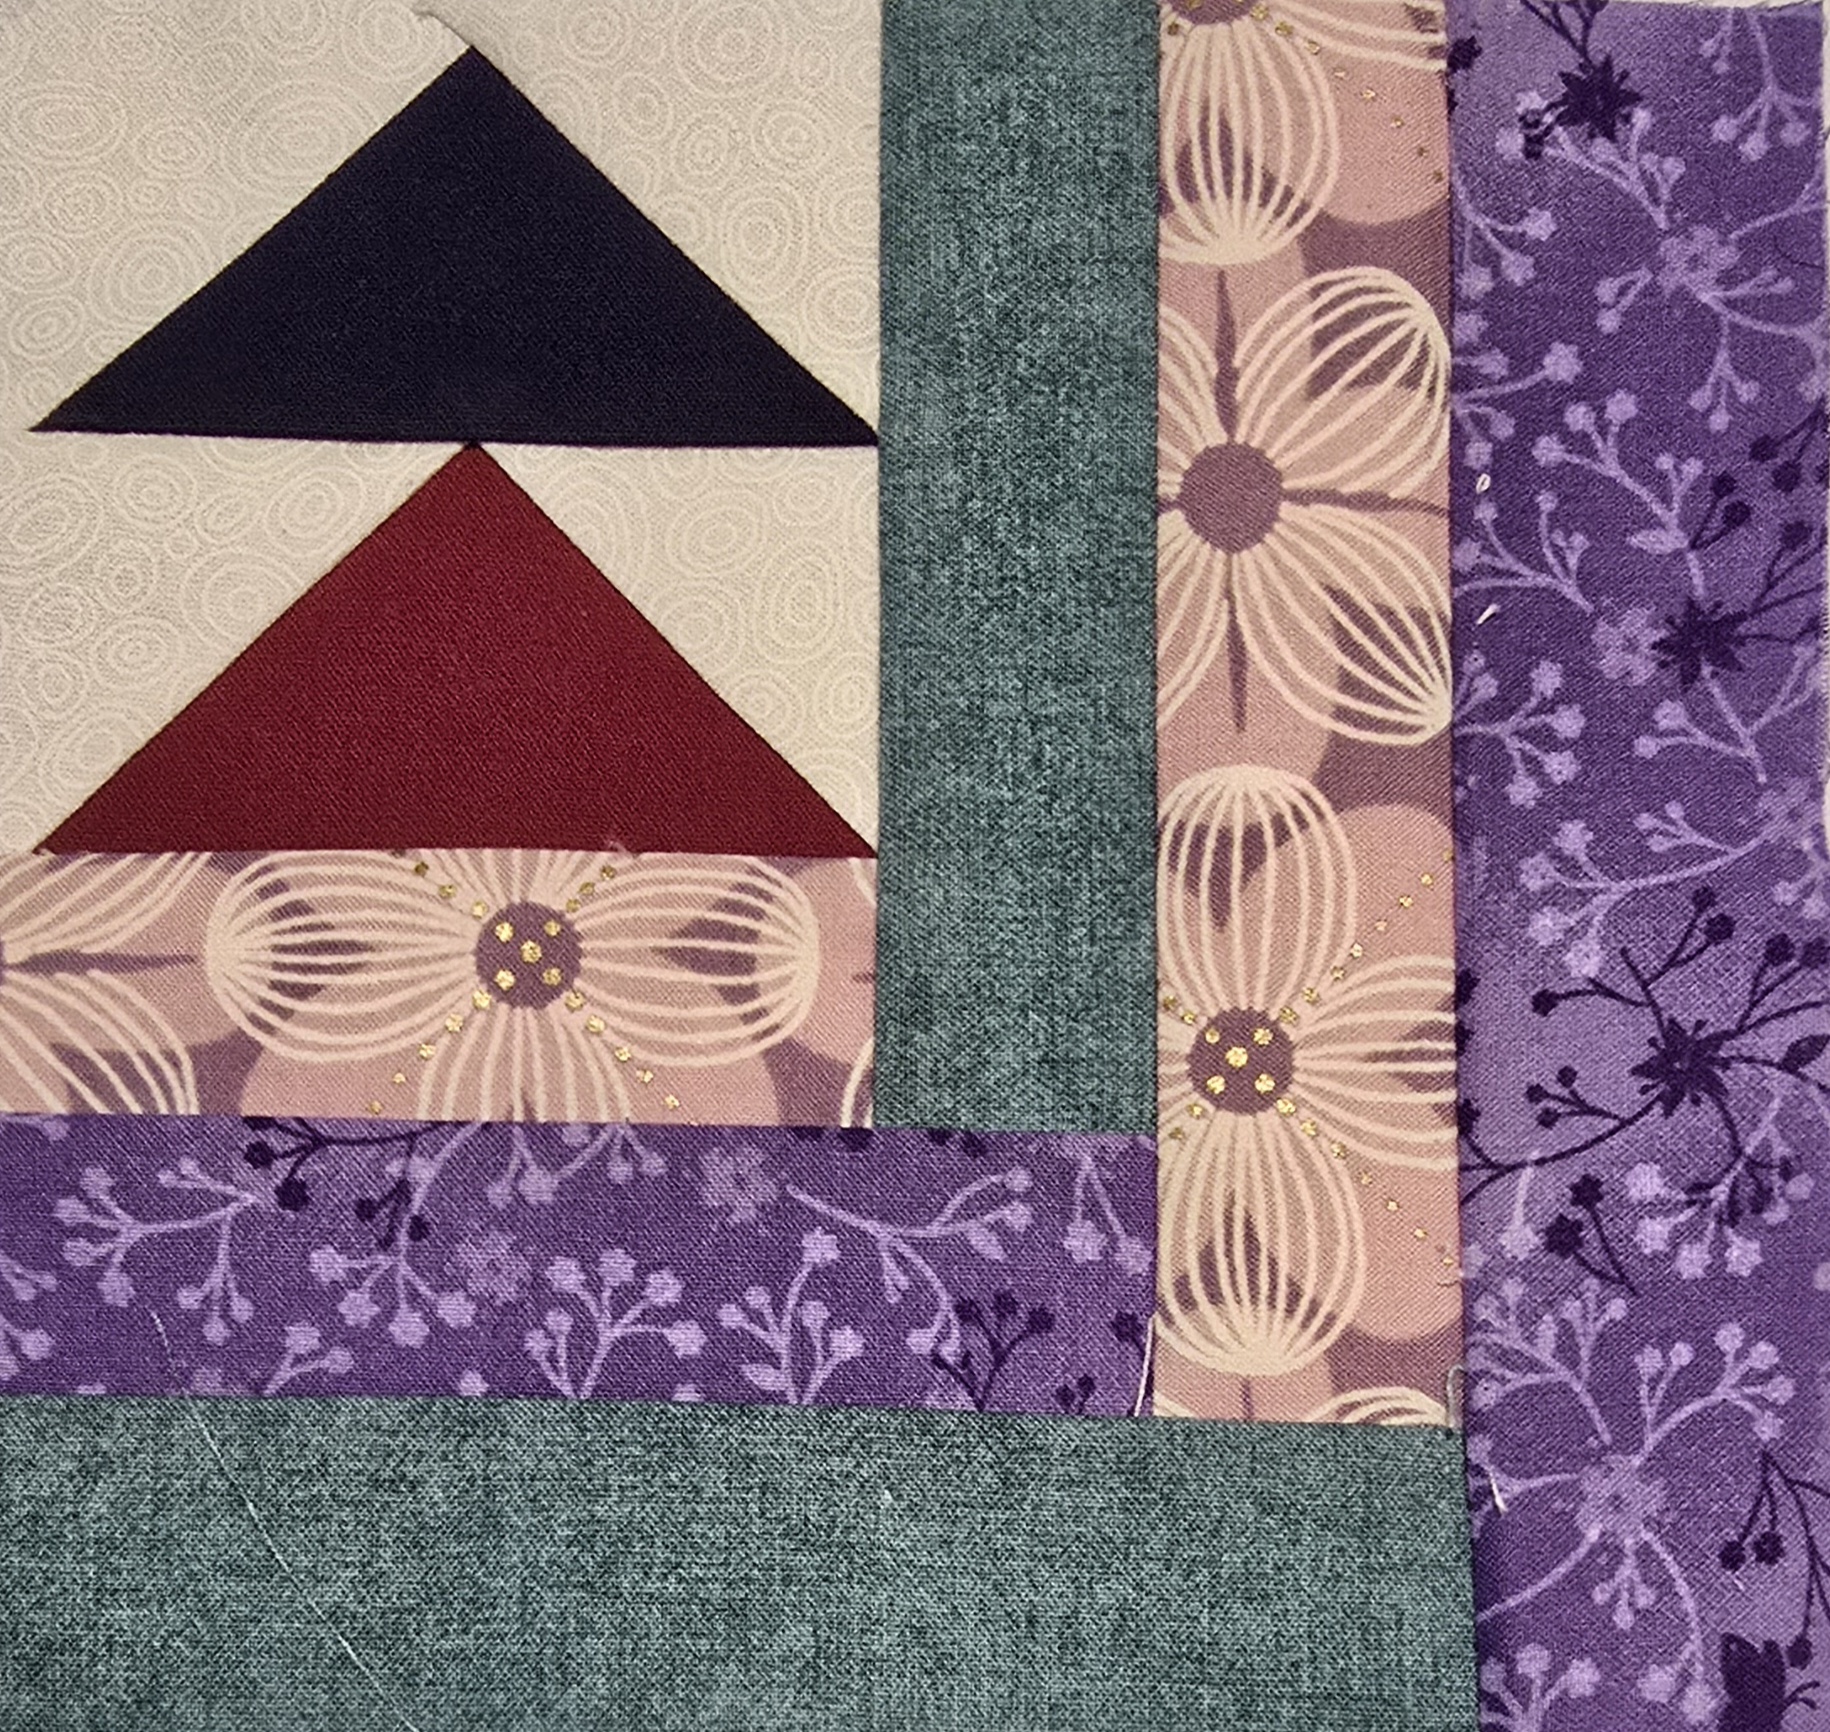
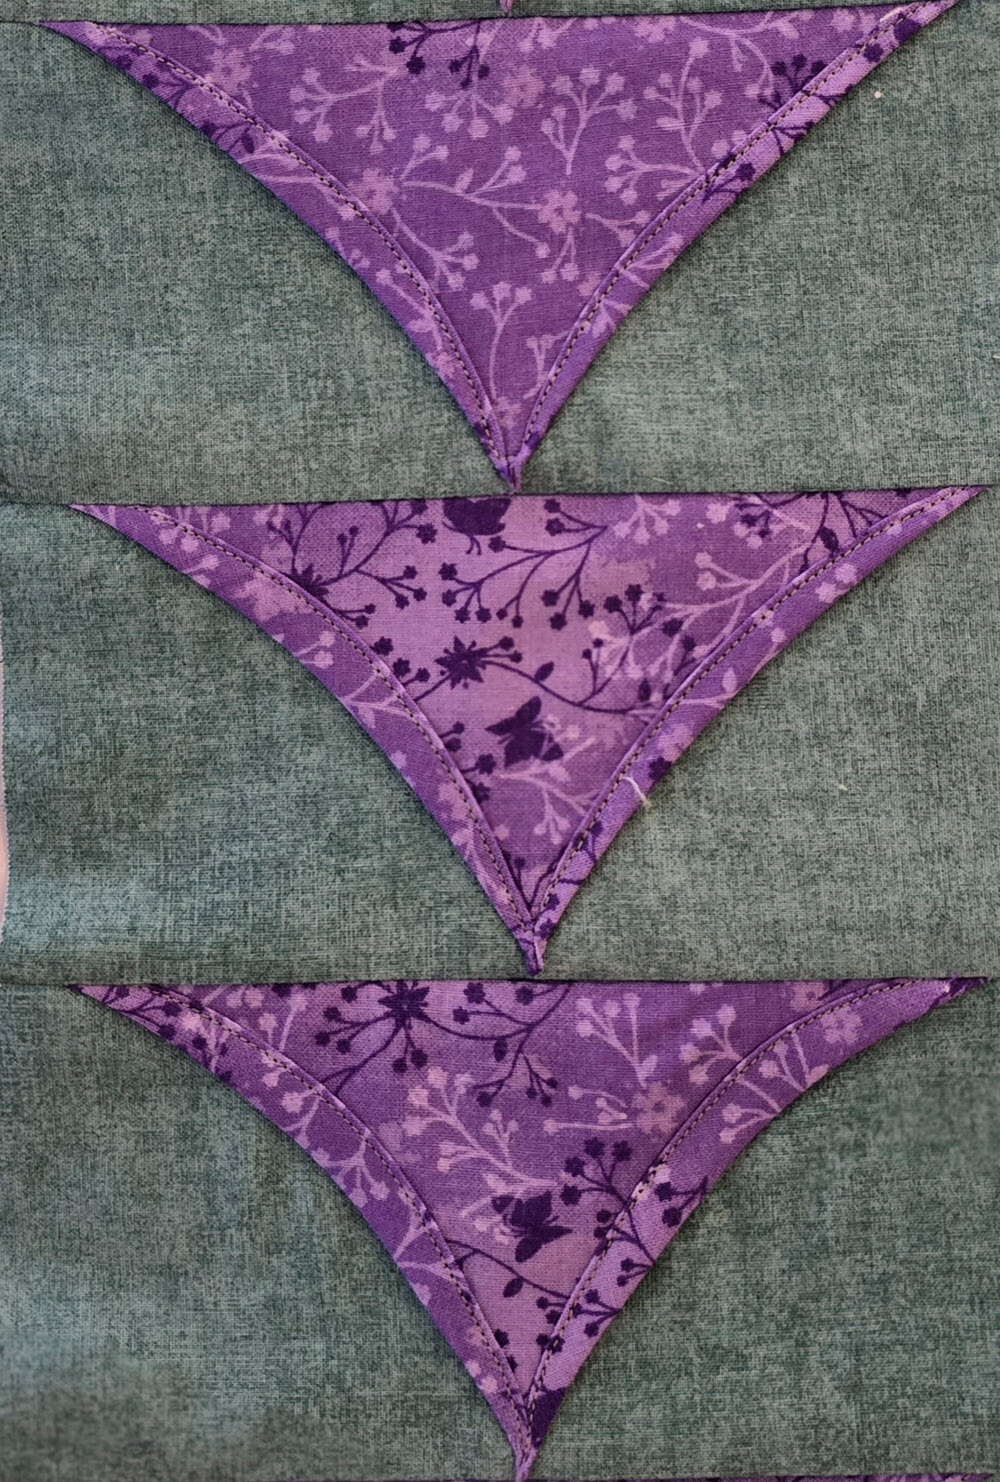
Flying Geese Blocks
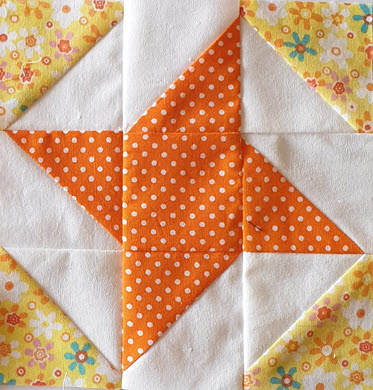
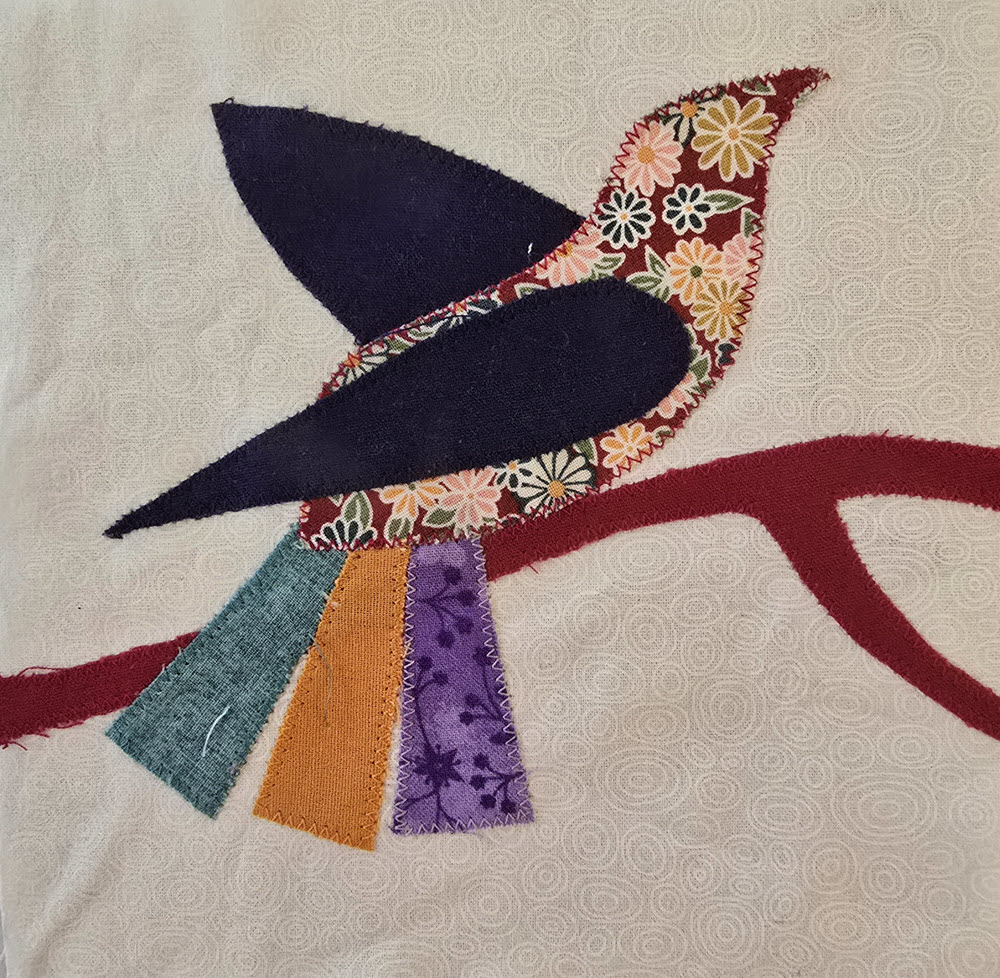
I completed four blocks that included the standard Flying Geese technique — Flying Geese 1 Block (Week 1) , Bird 1 block (Week 6), Small Flower 4 Block (Week 26), and Heart 6 (Week 28).
Starting my quilting journey with a Flying Geese block for week 1’s task was a bit of a challenge—I’m not sure it’s the easiest block for a beginner! Thankfully, I managed okay in the end. Instead of using the traditional method, I followed the technique from Just Get It Done Quilts video, “Flying Geese: Beginner to Advanced“, as I thought it might help improve my precision.
After completing my practice block, I quickly learned the importance of checking the measurements of each individual flying geese unit before sewing them together into the final block. Erica Arndt video, “How to Make a Flying Geese Block” was also really helpful, especially for understanding how to check and trim the block to the right size.
The Week 6 Bird 1 Flying Geese One-at-a-time block involved making two flying geese units and then adding a series of strips to the right side and bottom to bring the unfinished size to 6 ½ inches square. Once again, I used the technique from Just Get It Done Quilts video, “Flying Geese: Beginner to Advanced“, which I find helps with my precision. I was able to put this block together fairly quickly, thanks to the flying geese created in Week 1.
The Week 26 Small Flower 4 involved making flying geese using the Four-in-One Flying Geese method. I used Just Get It Done Quilts, Four-in -one method from her video “Flying Geese: Beginner to Advanced” to create the flying geese and increased my fabric sizes cut to 4¾ inch square Fabric A and 3 inch squares for WW as recommended in her video to allow extra fabric for trimming.
I didn’t have any trouble making the Four-in-one flying geese, but it took some time for me to work out how I wanted to trim the flying geese to the finished size. I ended up trimming the flying geese to a finished size of 3½ by 2 inches by marking a trimming guide on both ends of my 4.5 x 14-inch ruler.
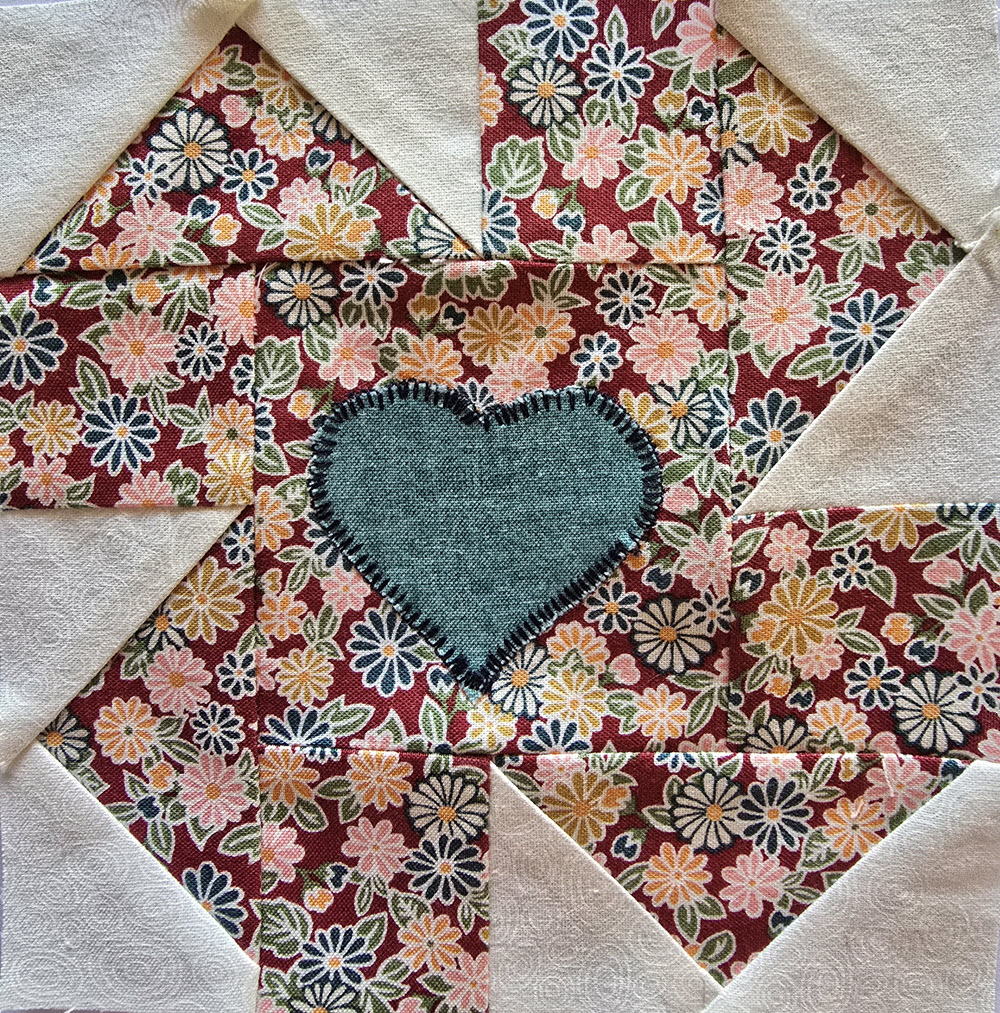
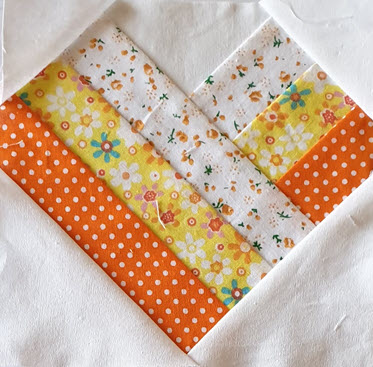
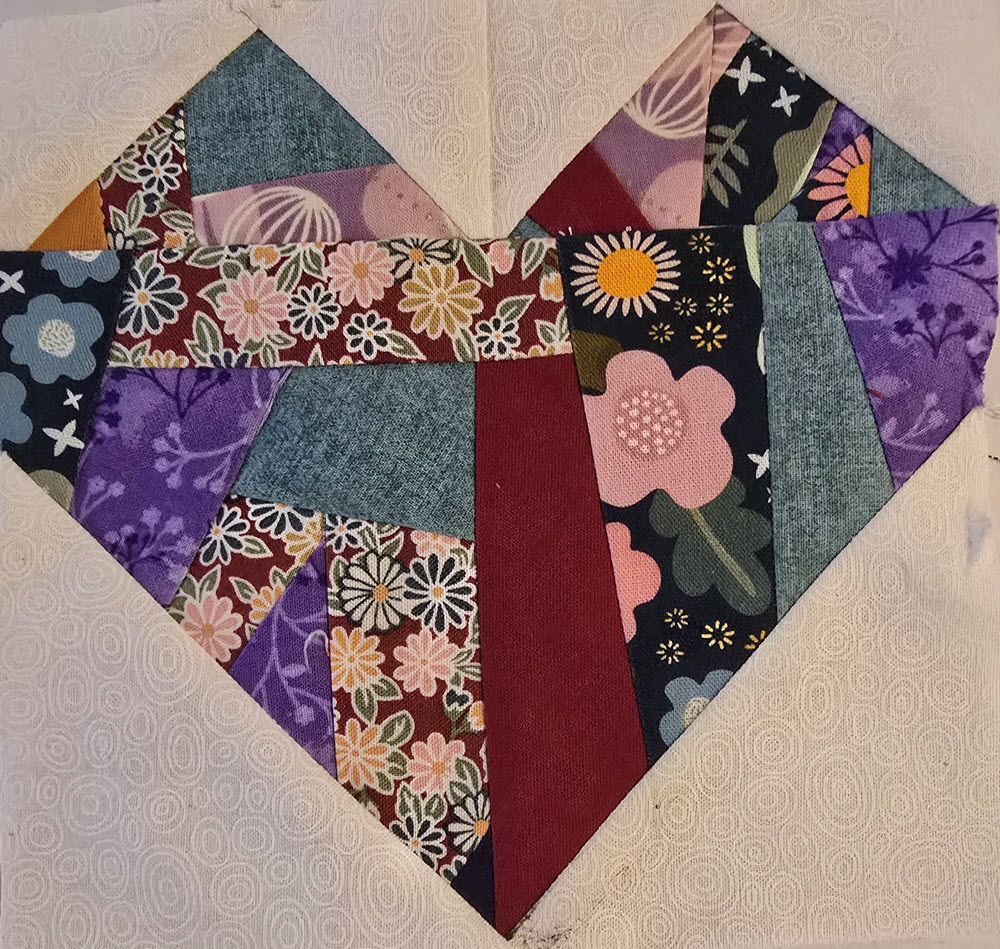
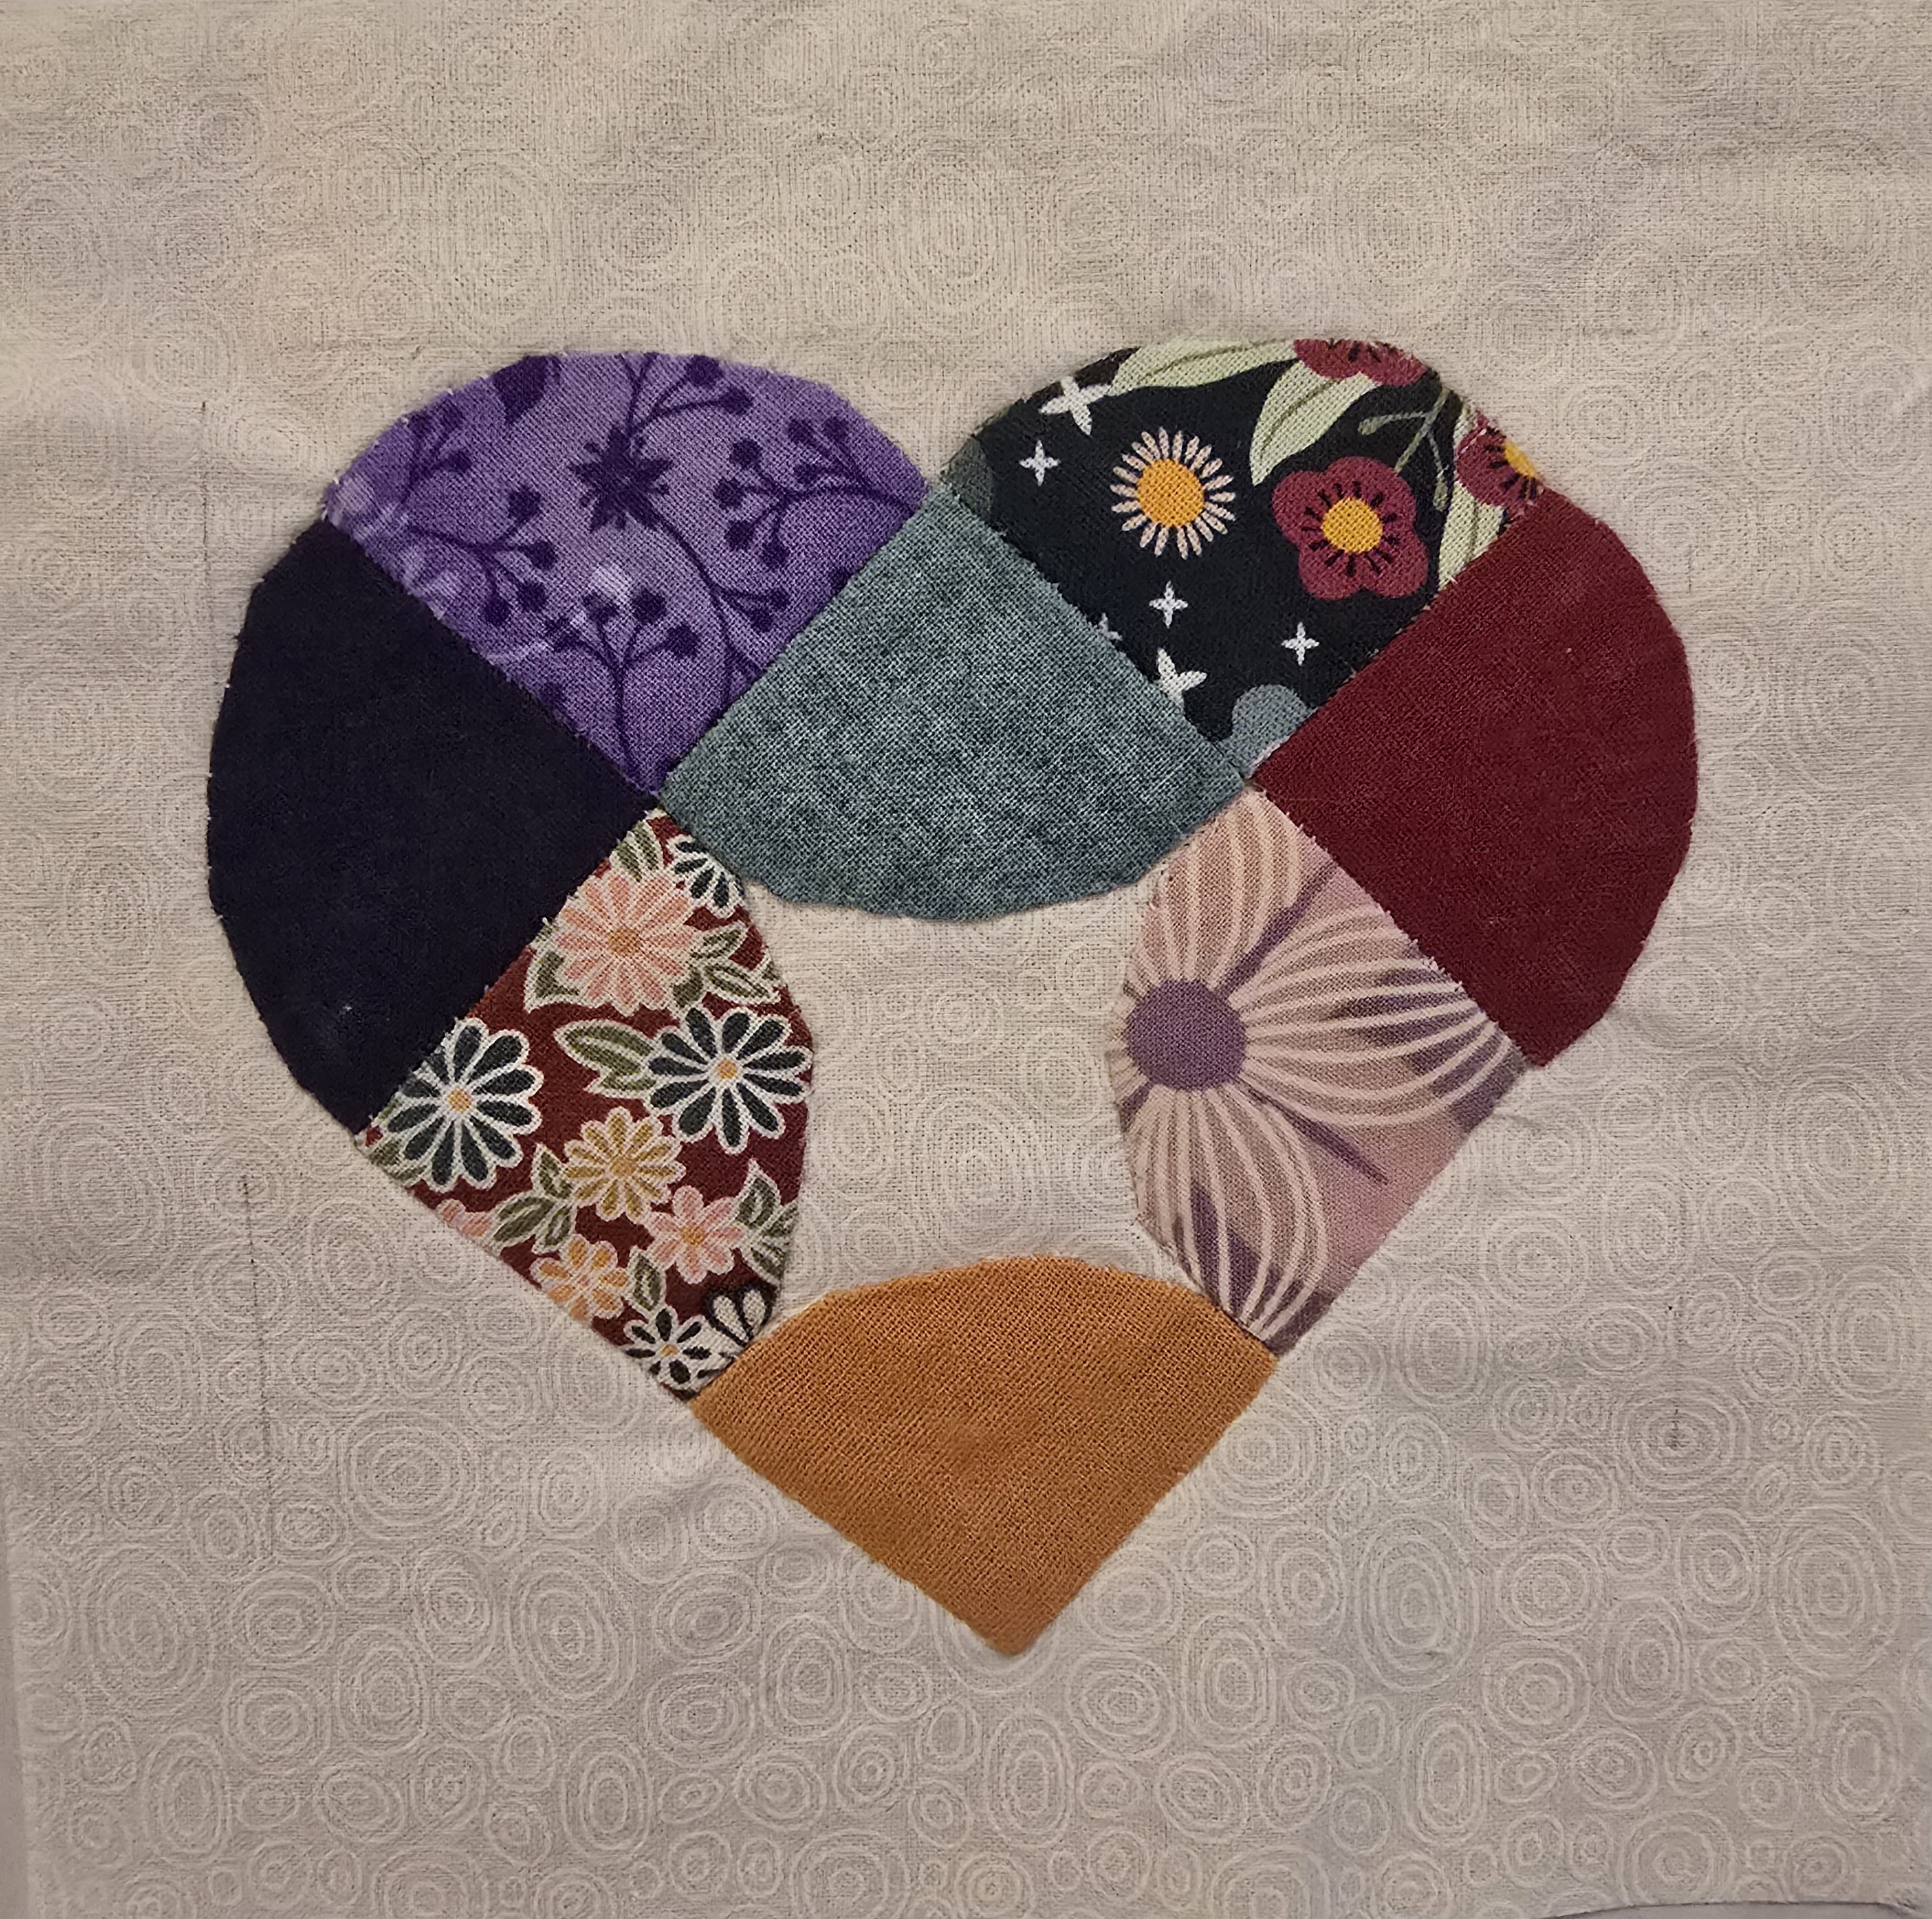
I used crazy patchwork to create the flying geese for Week 28 Heart 6.
The book also includes three other techniques for making flying geese:
- 3D Curved Flying Geese.
- Foundation paper piecing.
- Machine Piecing using the Snowball technique.


Curved Flying Geese
I created one block using curved flying geese (also known as 3D curved flying geese) – Flying Geese 2 (Week 30).
The trickiest part of the curved flying geese was wrapping my head around how they’re sewn. Thankfully, Teresa DownUnder‘s video on the two types — small and large — made it click for me. After that, they came together just as easily as the Small Flower 3 block (week 21), which uses a similar technique to create that lovely curved shape.
Half-Square Triangles (HST)
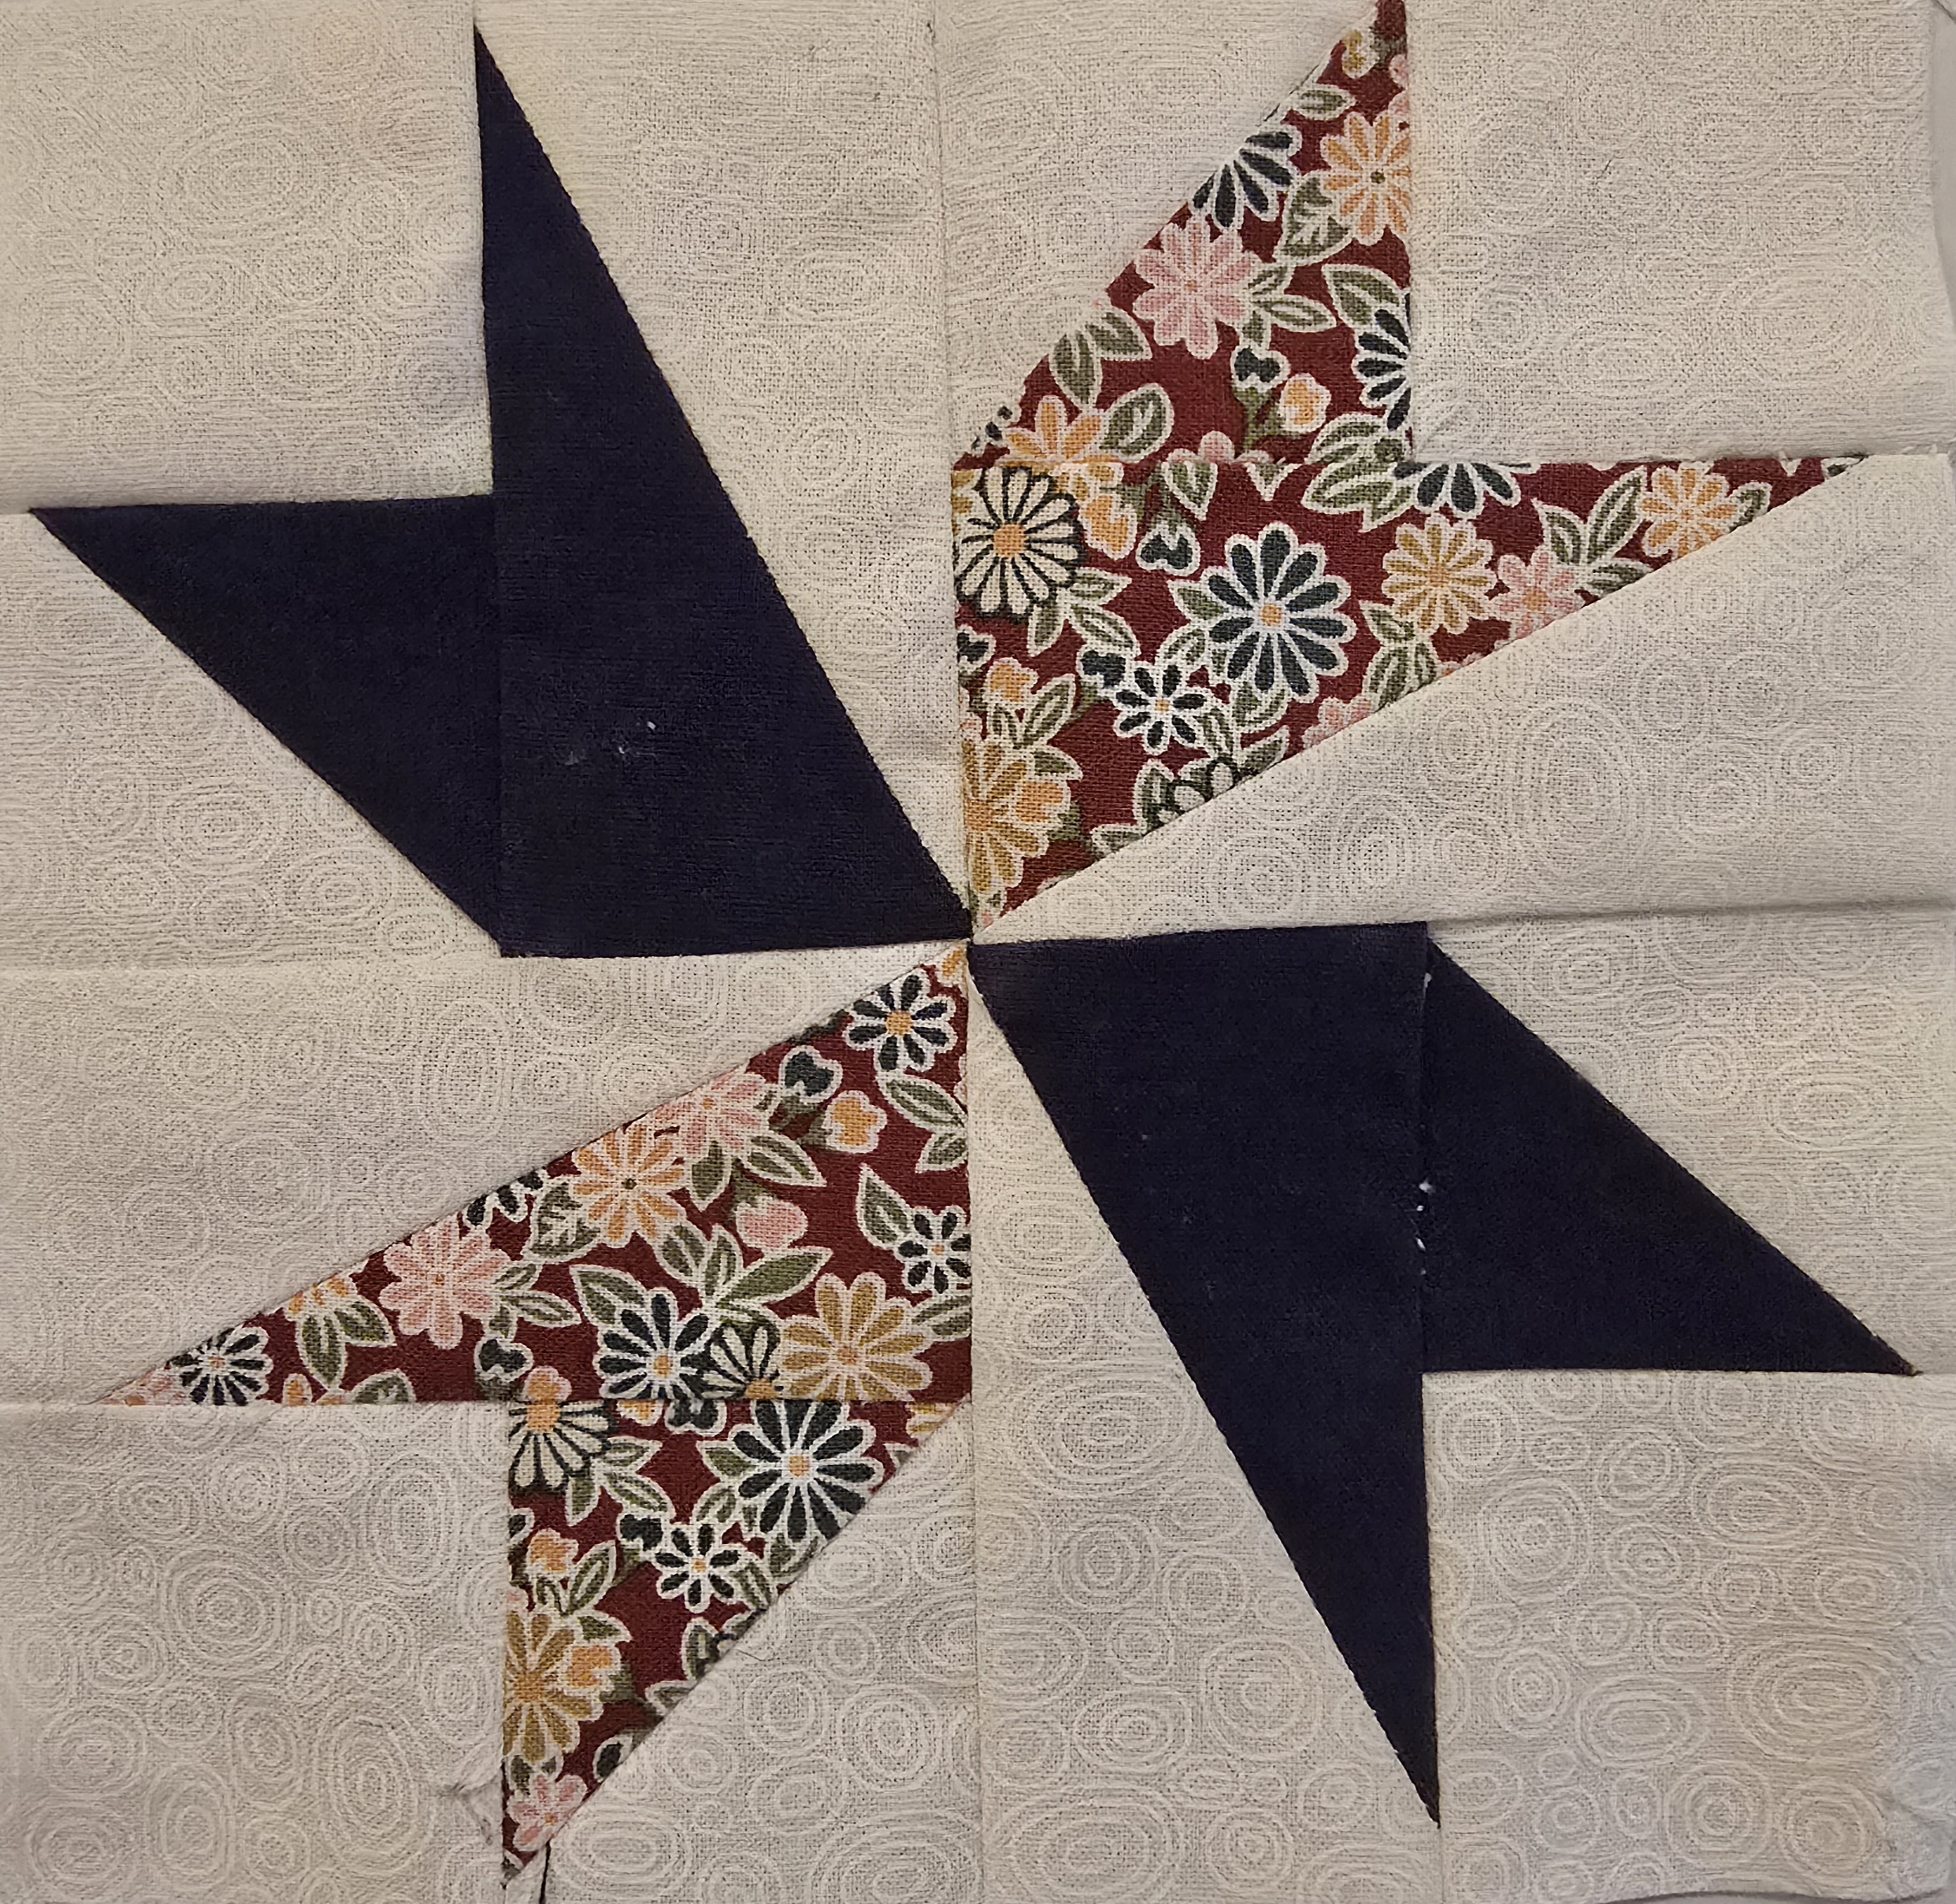
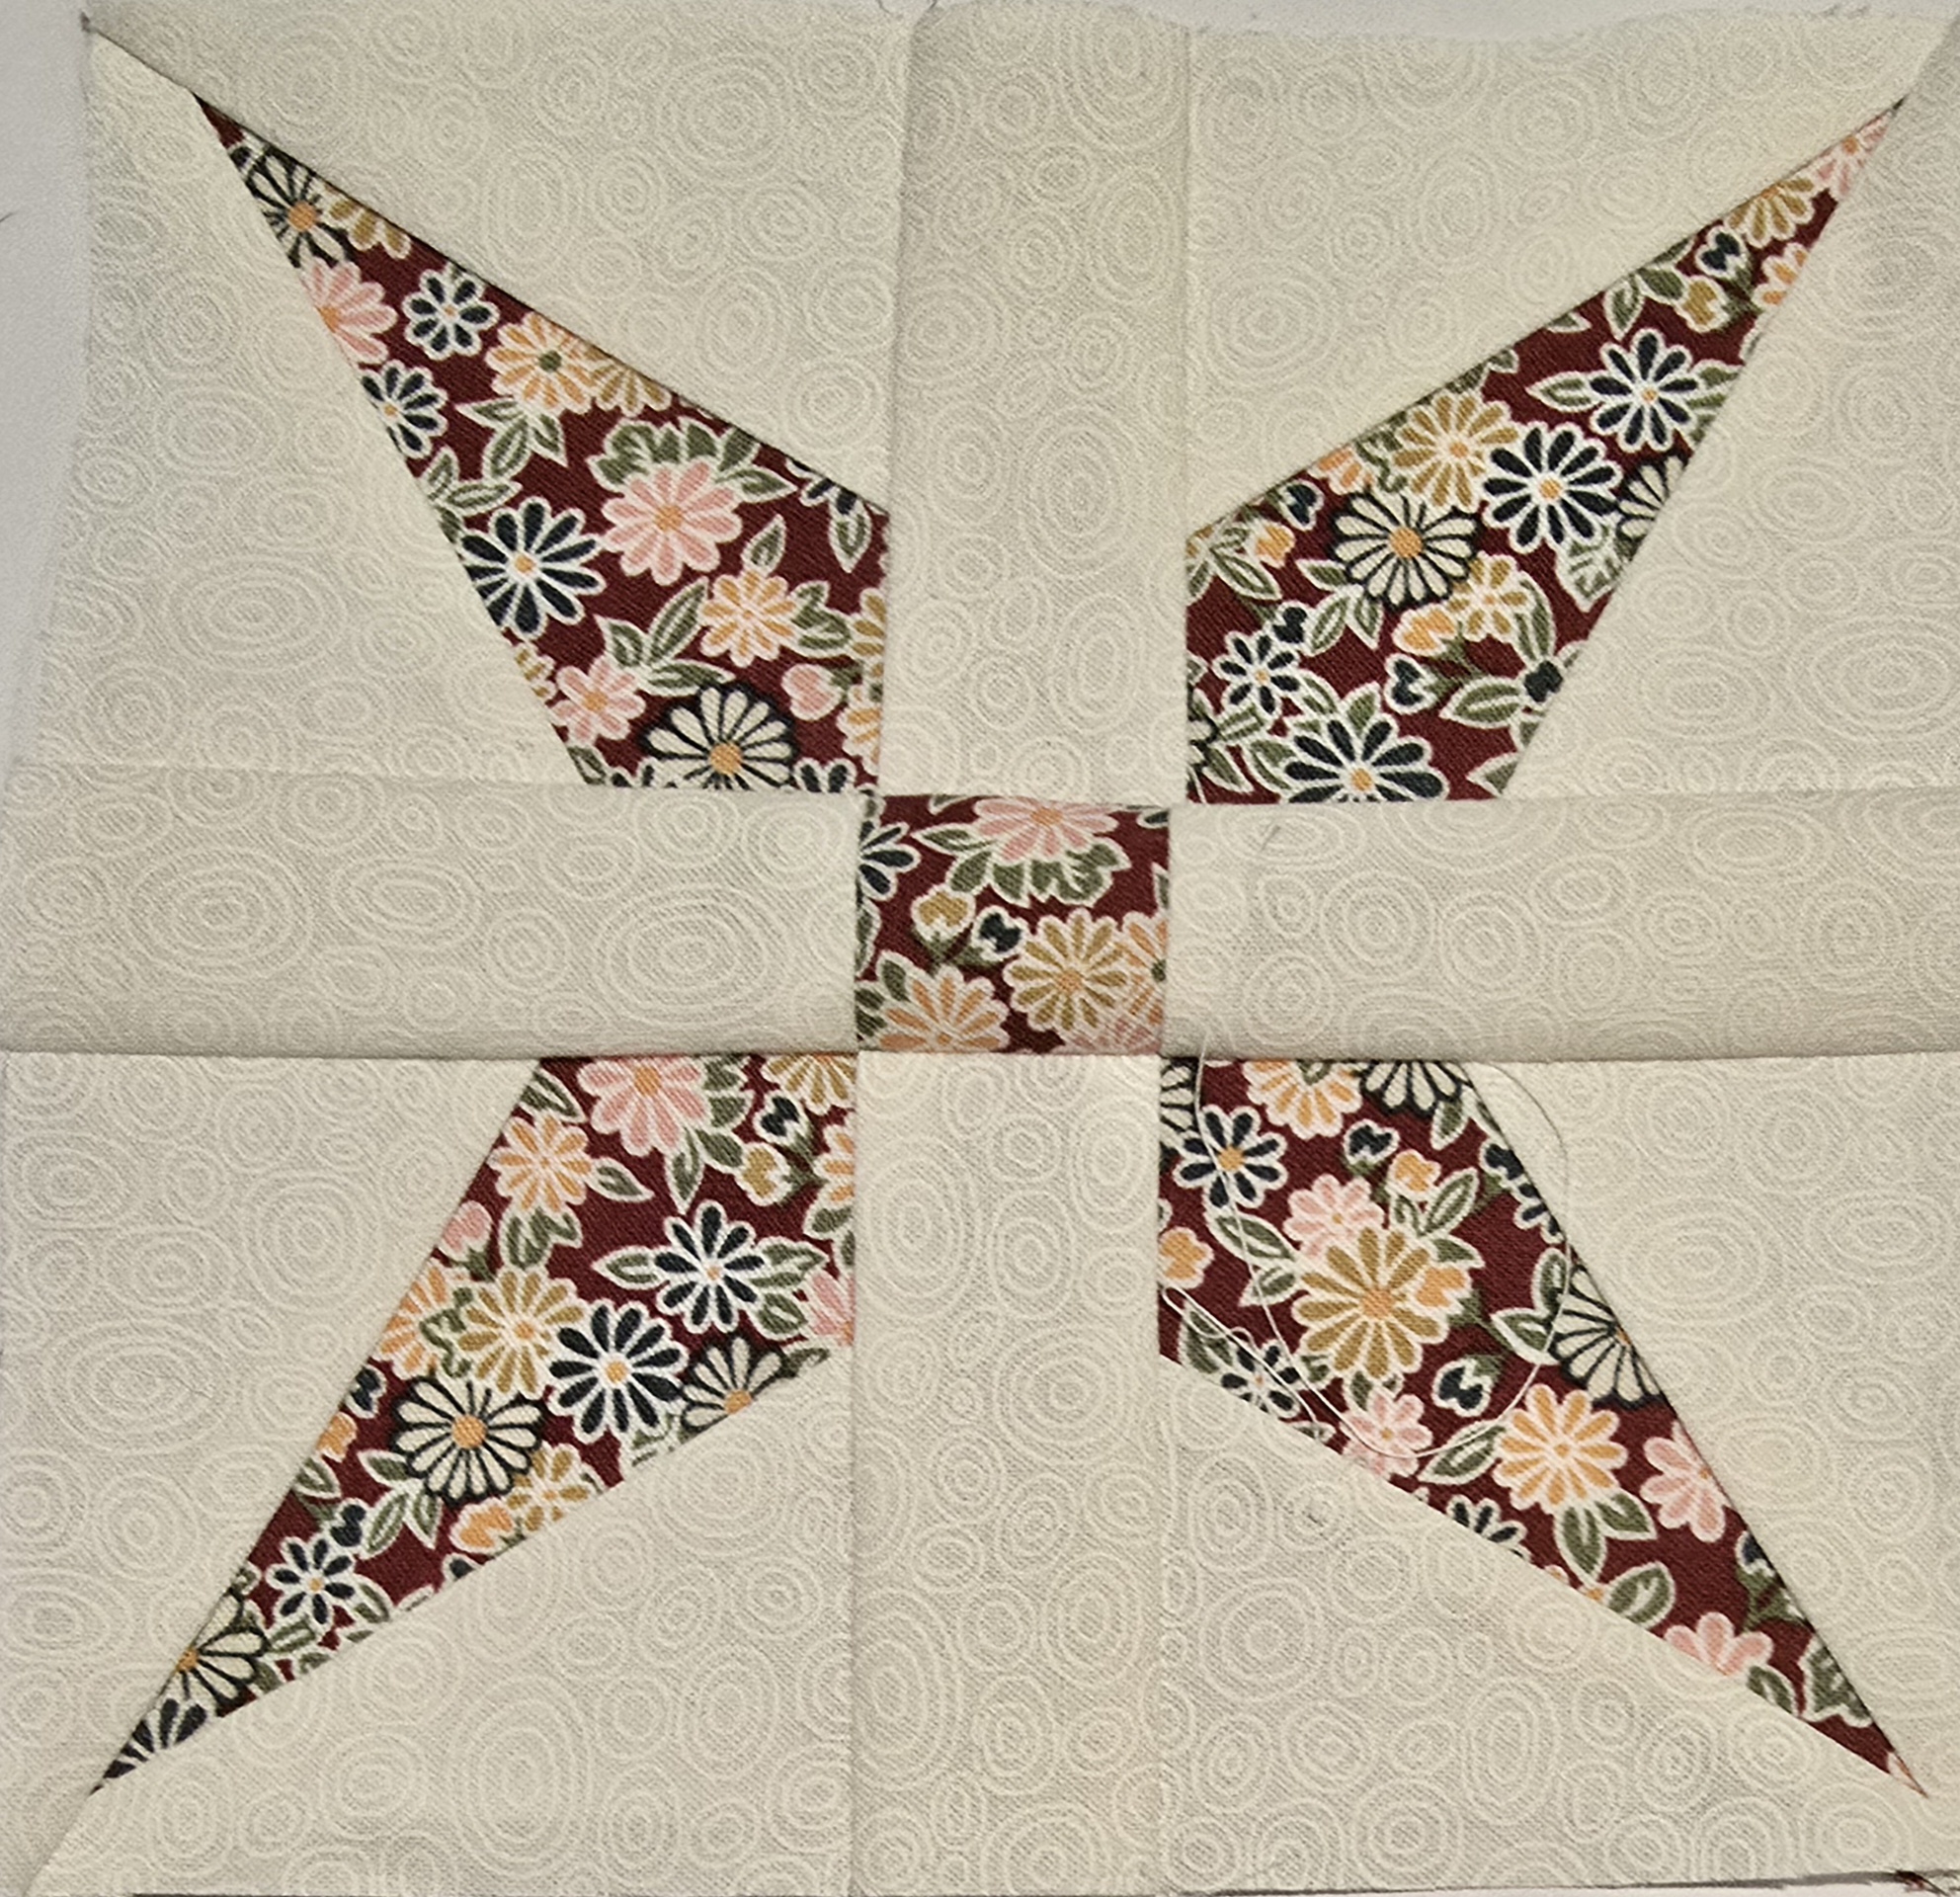
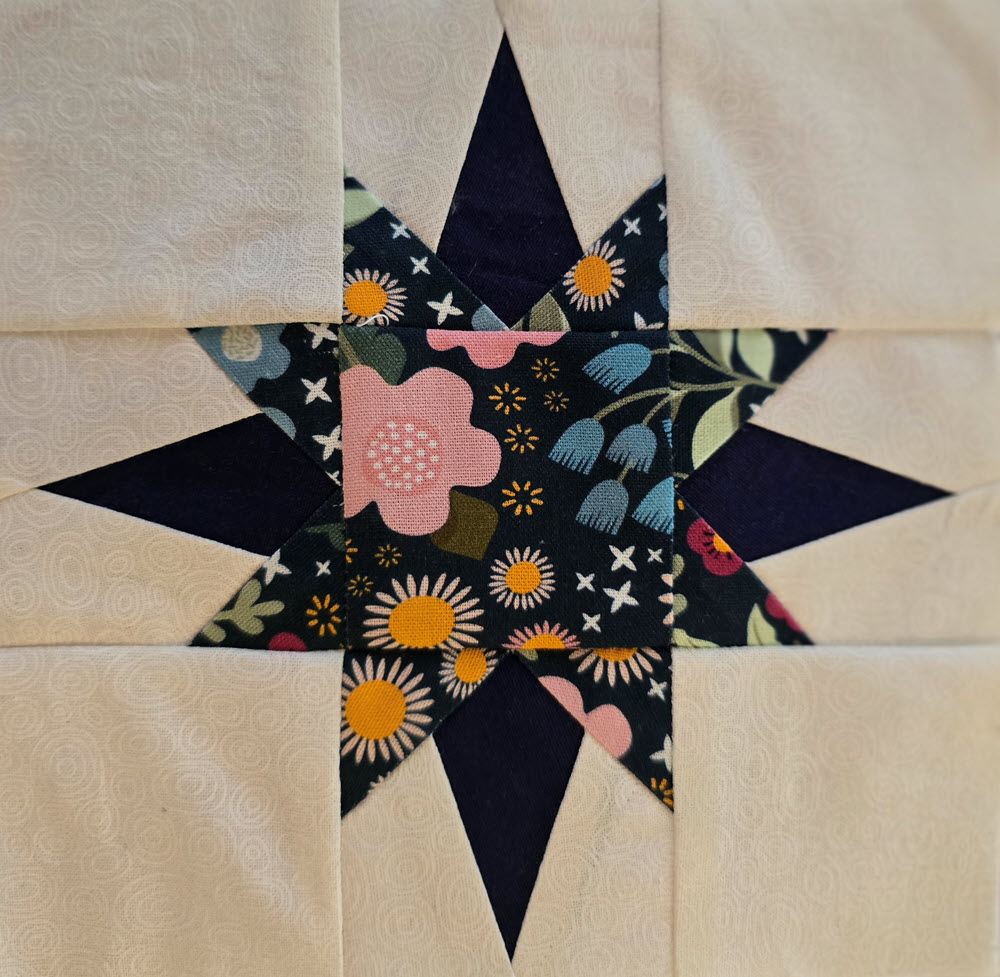
I completed nine blocks that included Half-Square Triangles (HST) — Star 1 block (Week 3), Heart 2 block (Week 5), large pieced block (week 11), Bird 2 block (week 14), Star 4 (week 16), Star 5 (week 23) and Star 6 (week 31), large pieced block 2 (week 35) and basket 4 (week 50).
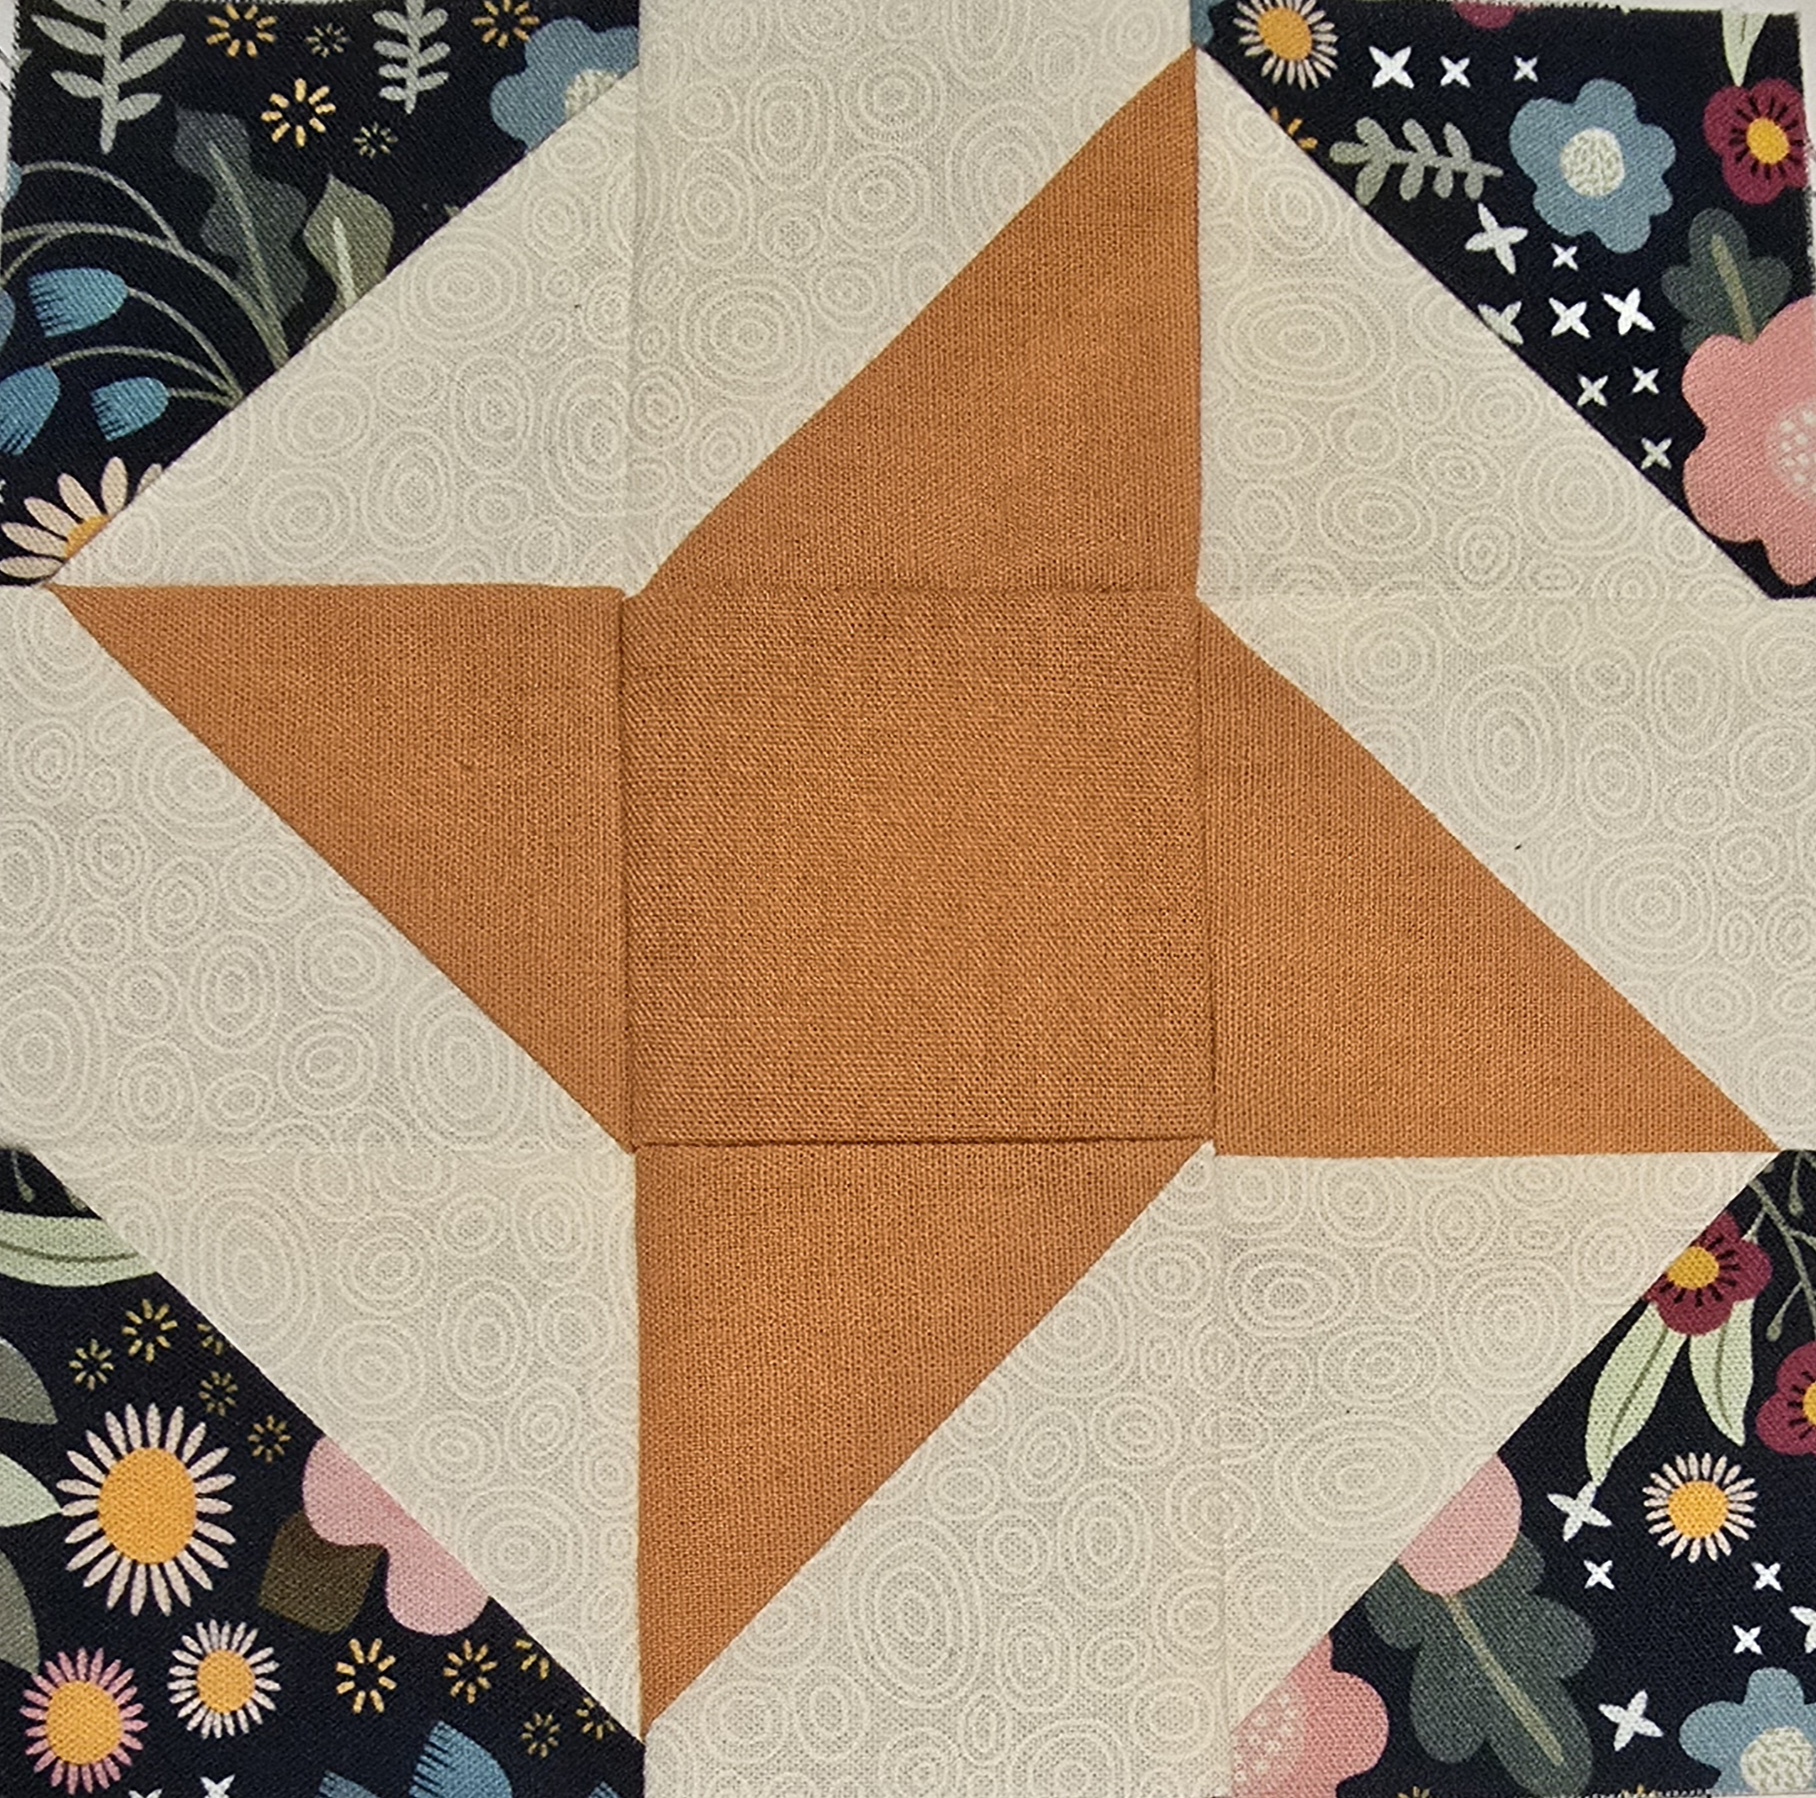
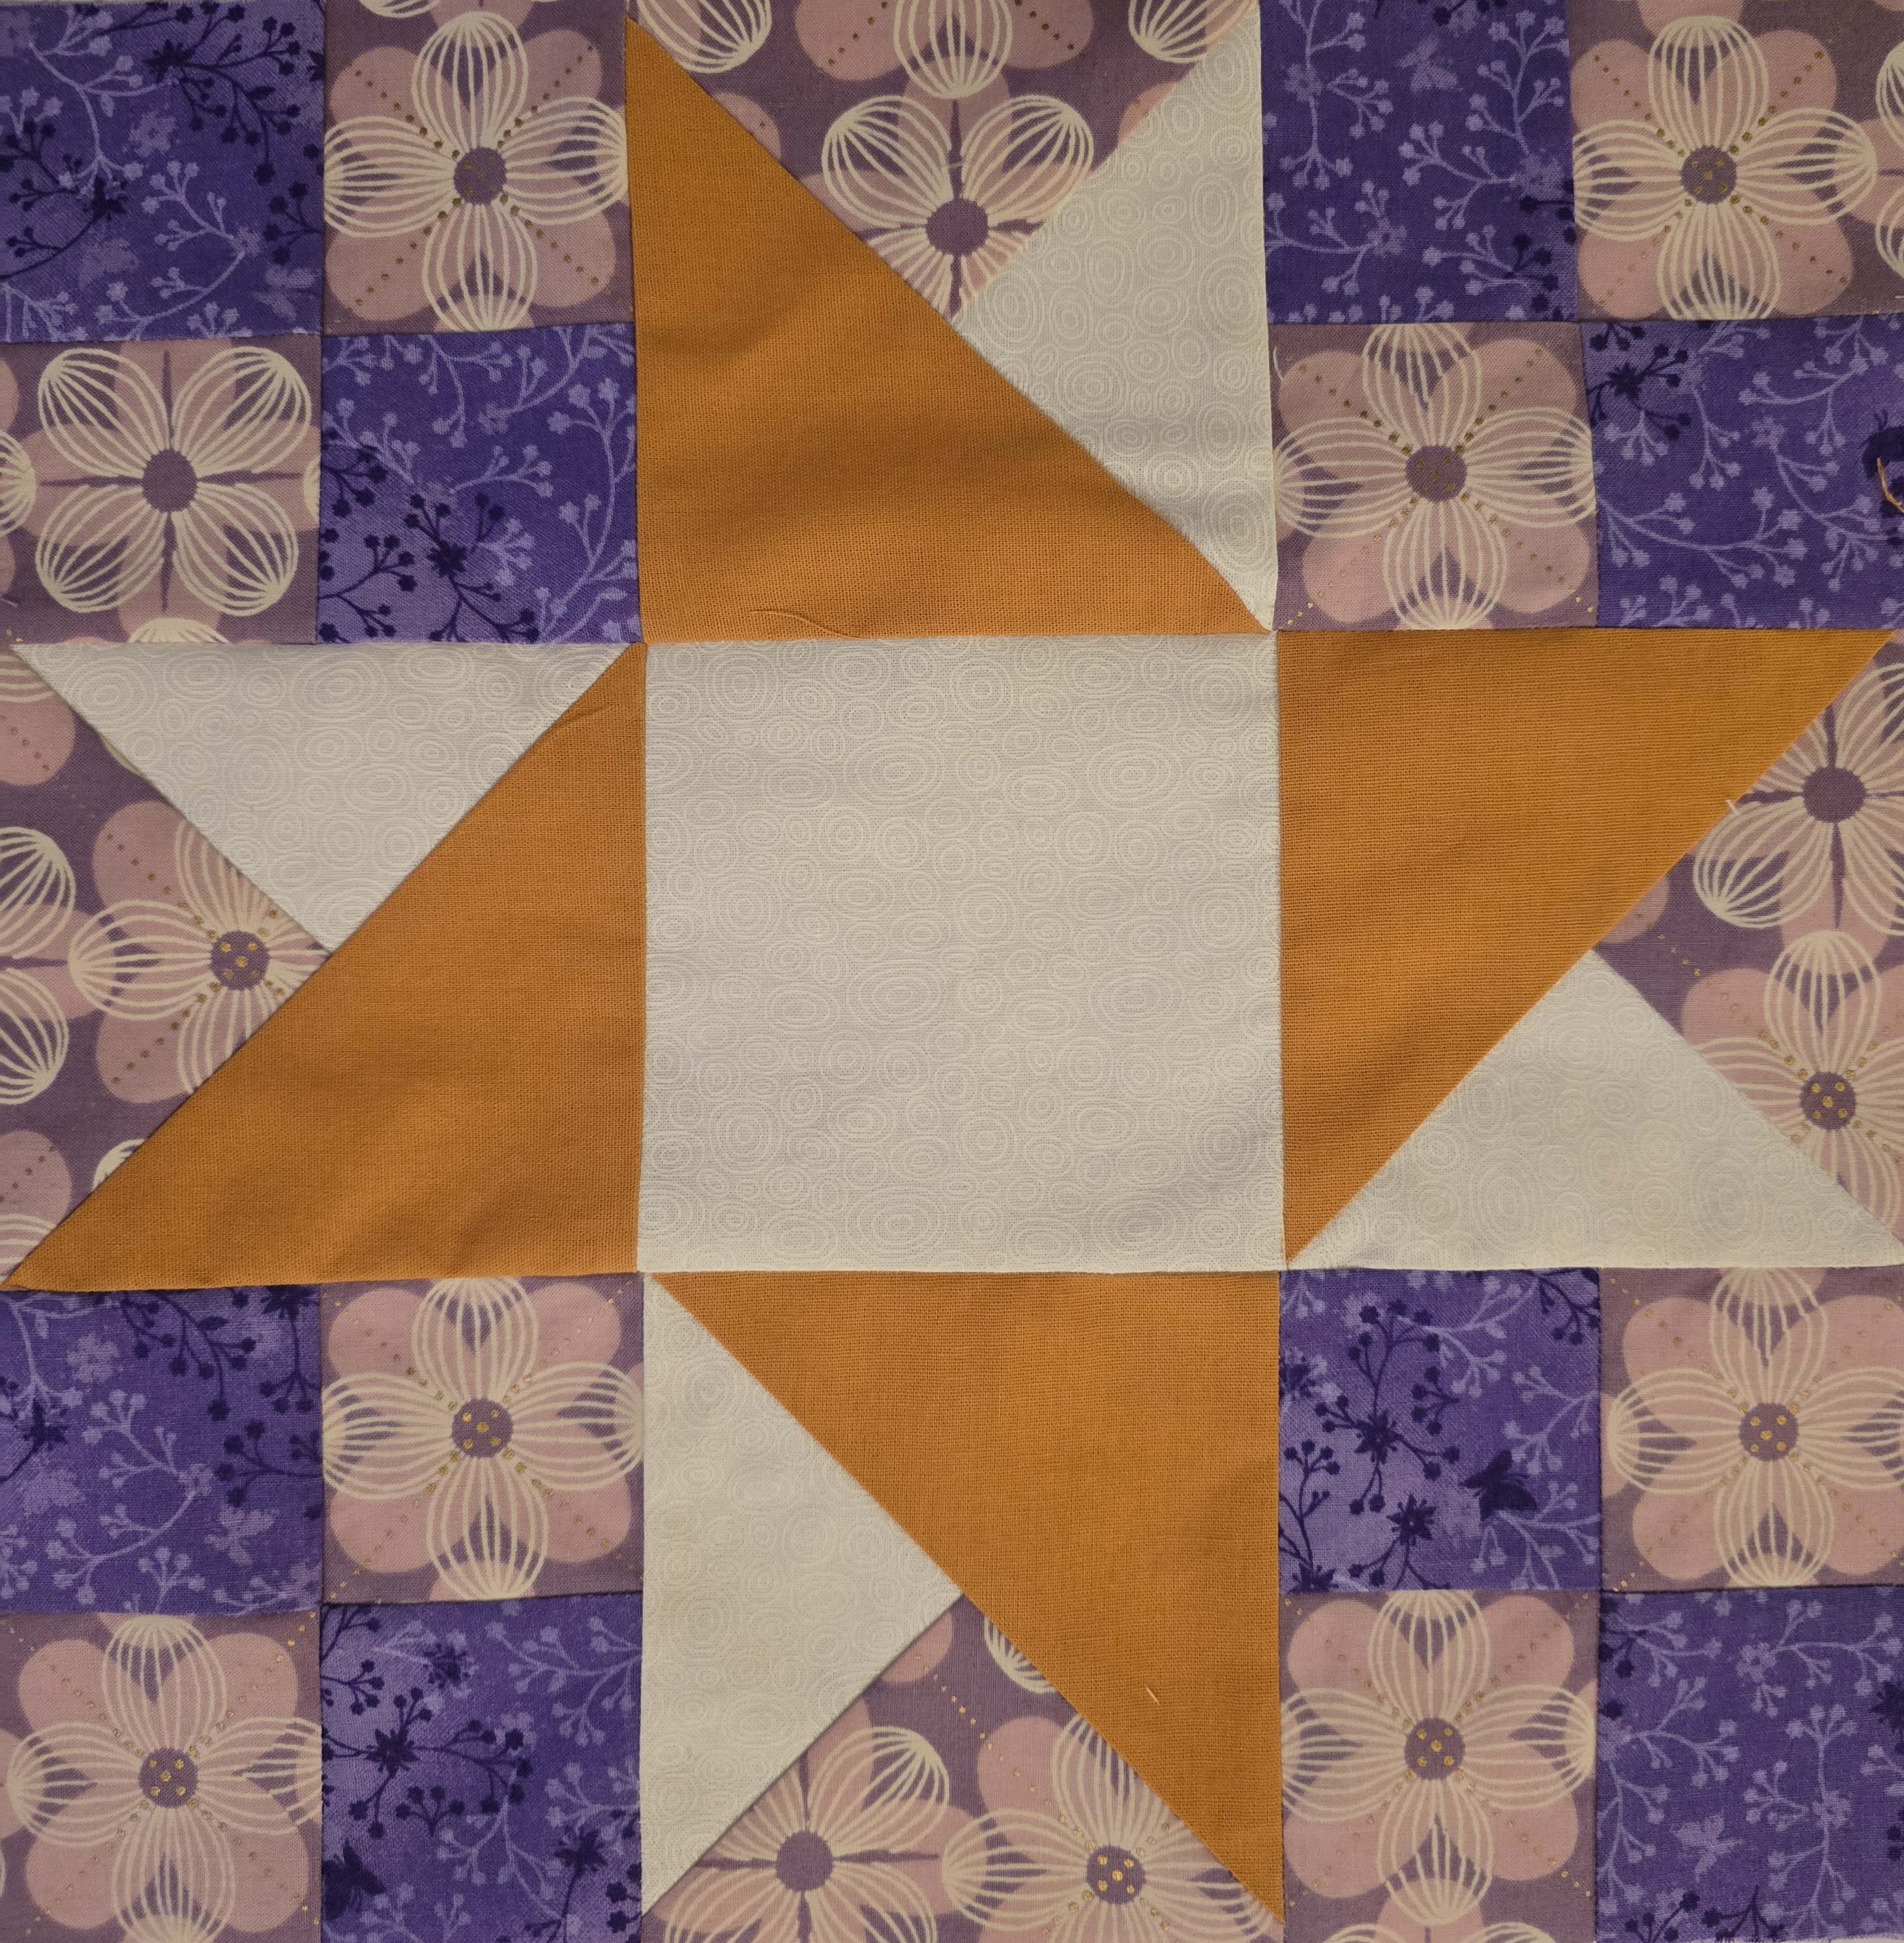


The Star 1 block (week 3) featured a star design created using Half-Square Triangles (HSTs) with the four-at-a-time method. However, after watching Just Get It Done Quilts video, How to Make a Half Square Triangle – 10 Ways to Make a HST, I decided to switch to the two-at-a-time method instead.
As a beginner, I felt that the four-at-a-time method, which creates HSTs on the bias, is riskier as they are more prone to stretching and distortion during piecing. The two-at-a-time method felt much more manageable. I just needed to adjust the fabric measurements accordingly, which was a simple trade-off for more control and accuracy.
To switch from making four-at-a-time HSTs to two-at-a-time HSTs, I add ½ inch to the final trimmed size of the unit. For example:
- If I need the finished HST to be 3.5 inches square, I start by cutting 4-inch squares.
- If I need the finished HST to be 2.5 inches square, I start by cutting 3-inch squares.
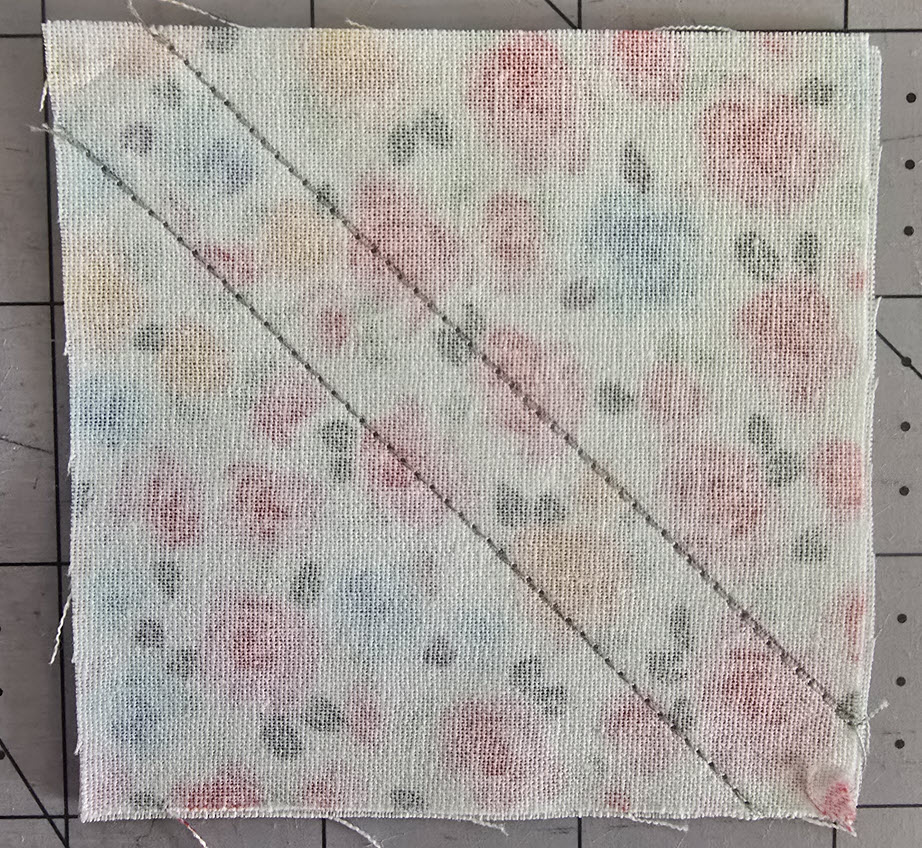
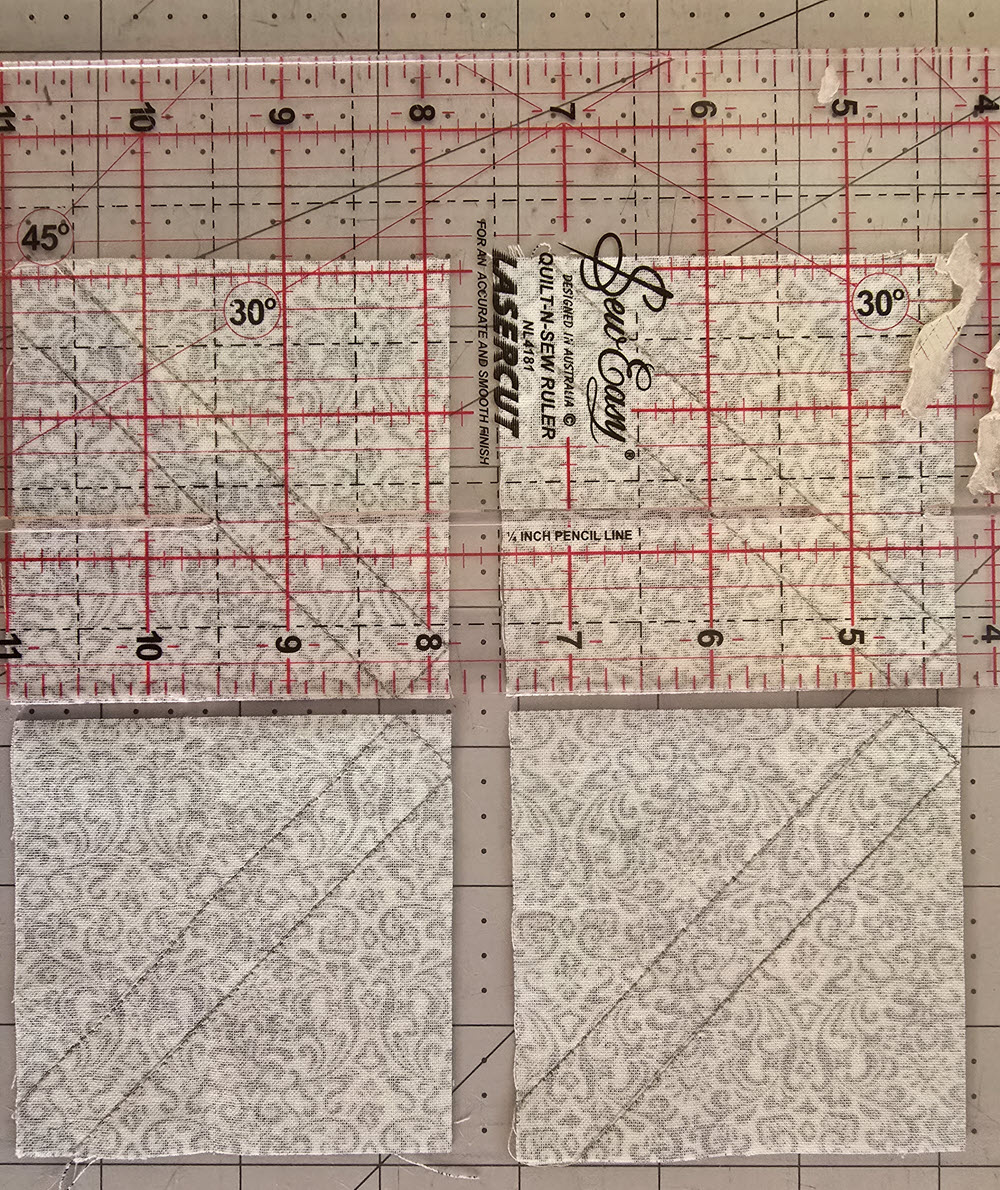
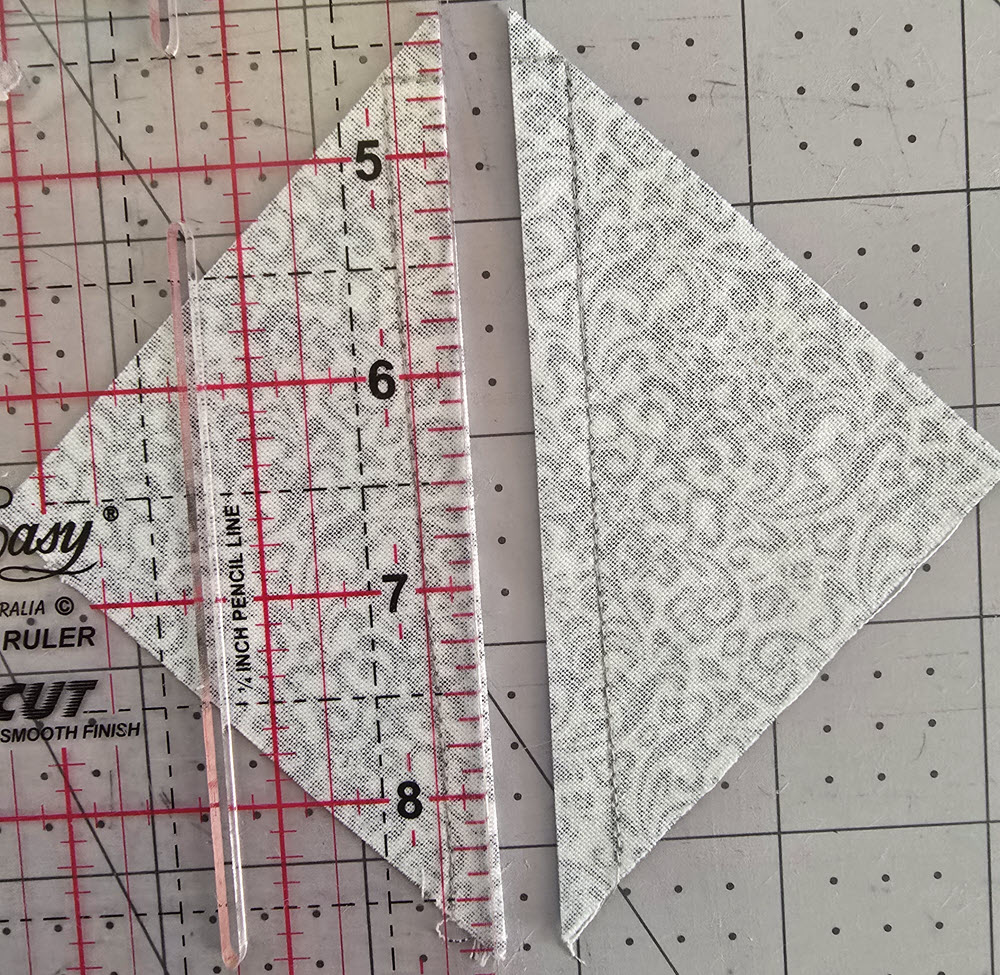
My Step-by-step Instructions for making Half-Square Triangles (HSTs) using the two-at-a-time method
Step 1: Mark the sewing lines
Draw ¼-inch diagonal lines on either side of the centre diagonal line on one of your fabric squares.
Step 2: Sew along the marked lines
Sew directly on each ¼-inch line to create your stitched HST units.
Step 3: Cut along the centre diagonal
Cut along the centre diagonal line to separate the two halves into individual HSTs.
Step 4: Press the HSTs
Open the two HSTs and press the seams. Pressing towards one side or open depends on your preference or pattern instructions.
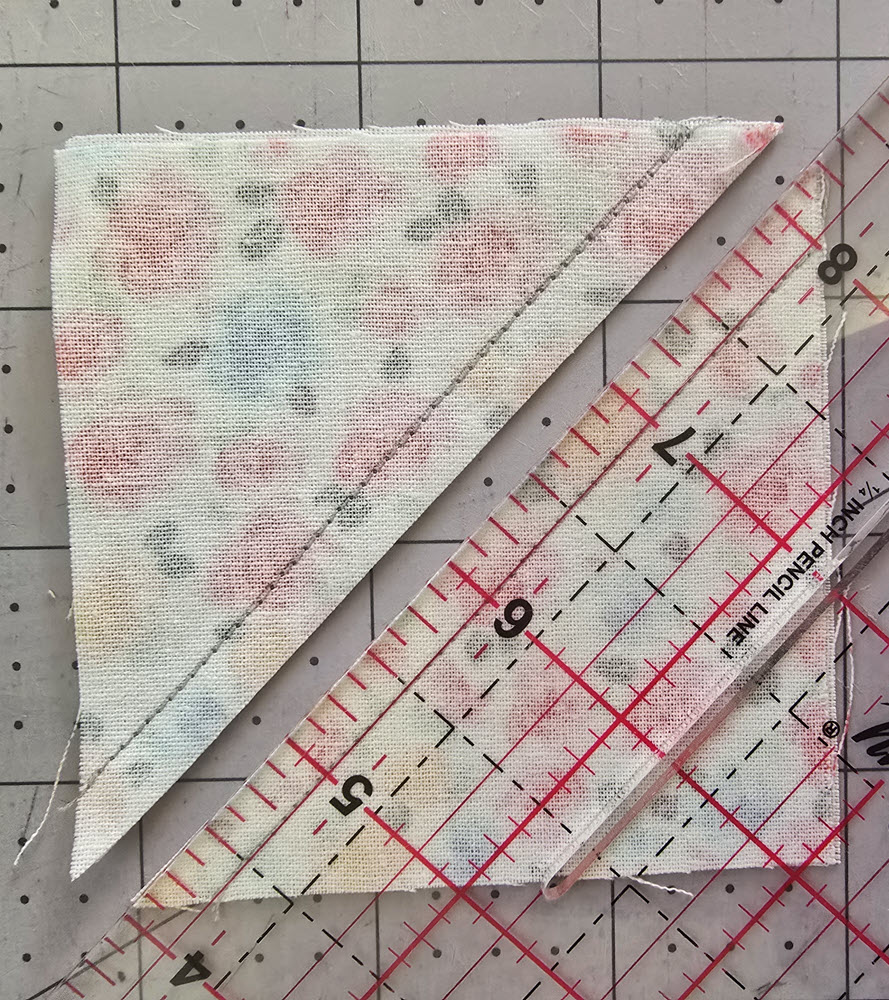
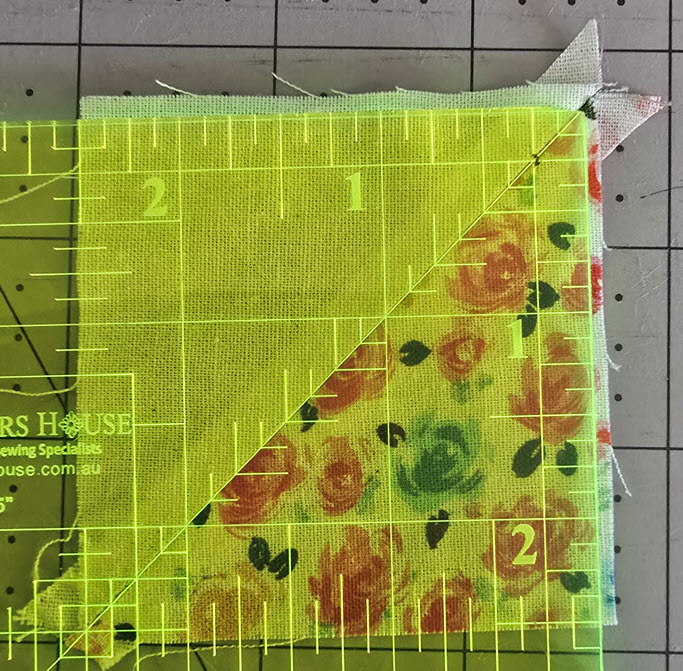
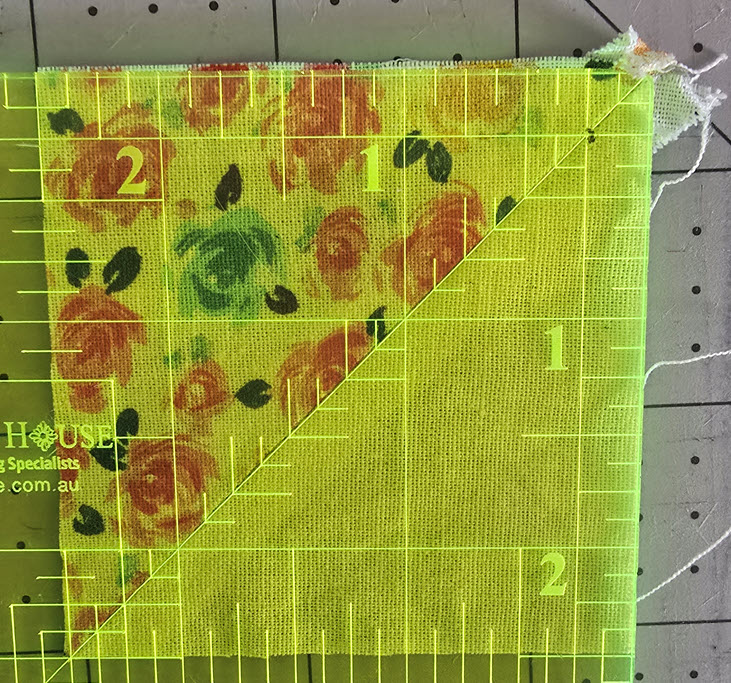
Step 5: Trim HSTs to the required size
Use a square ruler with a 45-degree line:
- Place the 45-degree mark on the ruler along the diagonal seam.
- Align the bottom and left edges with the desired finished size (for example, 2.5 inches).
- Trim the excess fabric from the top and right edges.
- Rotate the square 180° and repeat: align the 45-degree mark on the diagonal, line up the bottom and left edges, and trim the remaining excess.
The Heart 2 block (Week 5) featured a heart design made with Half-Square Triangles (HSTs) using the two-at-a-time method. While working on the practice block, I realized I needed to improve how I line up the peaks when sewing HSTs together, and how to sew rows so the blocks align accurately. Stephanie Soebbing’s Quilt Addicts Anonymous video, “Use this pinning method to join triangles perfectly,” helped me understand how to pin and nest seams more effectively for better alignment.
The large pieced block 2 (week 35) involved making HSTs using the Eight-in-one half square triangles method, which I quickly worked out from Just Get It Done Quilts video, demonstration of the Eight-in one method from How to Make a Half Square Triangle – 10 Ways to Make a HST.
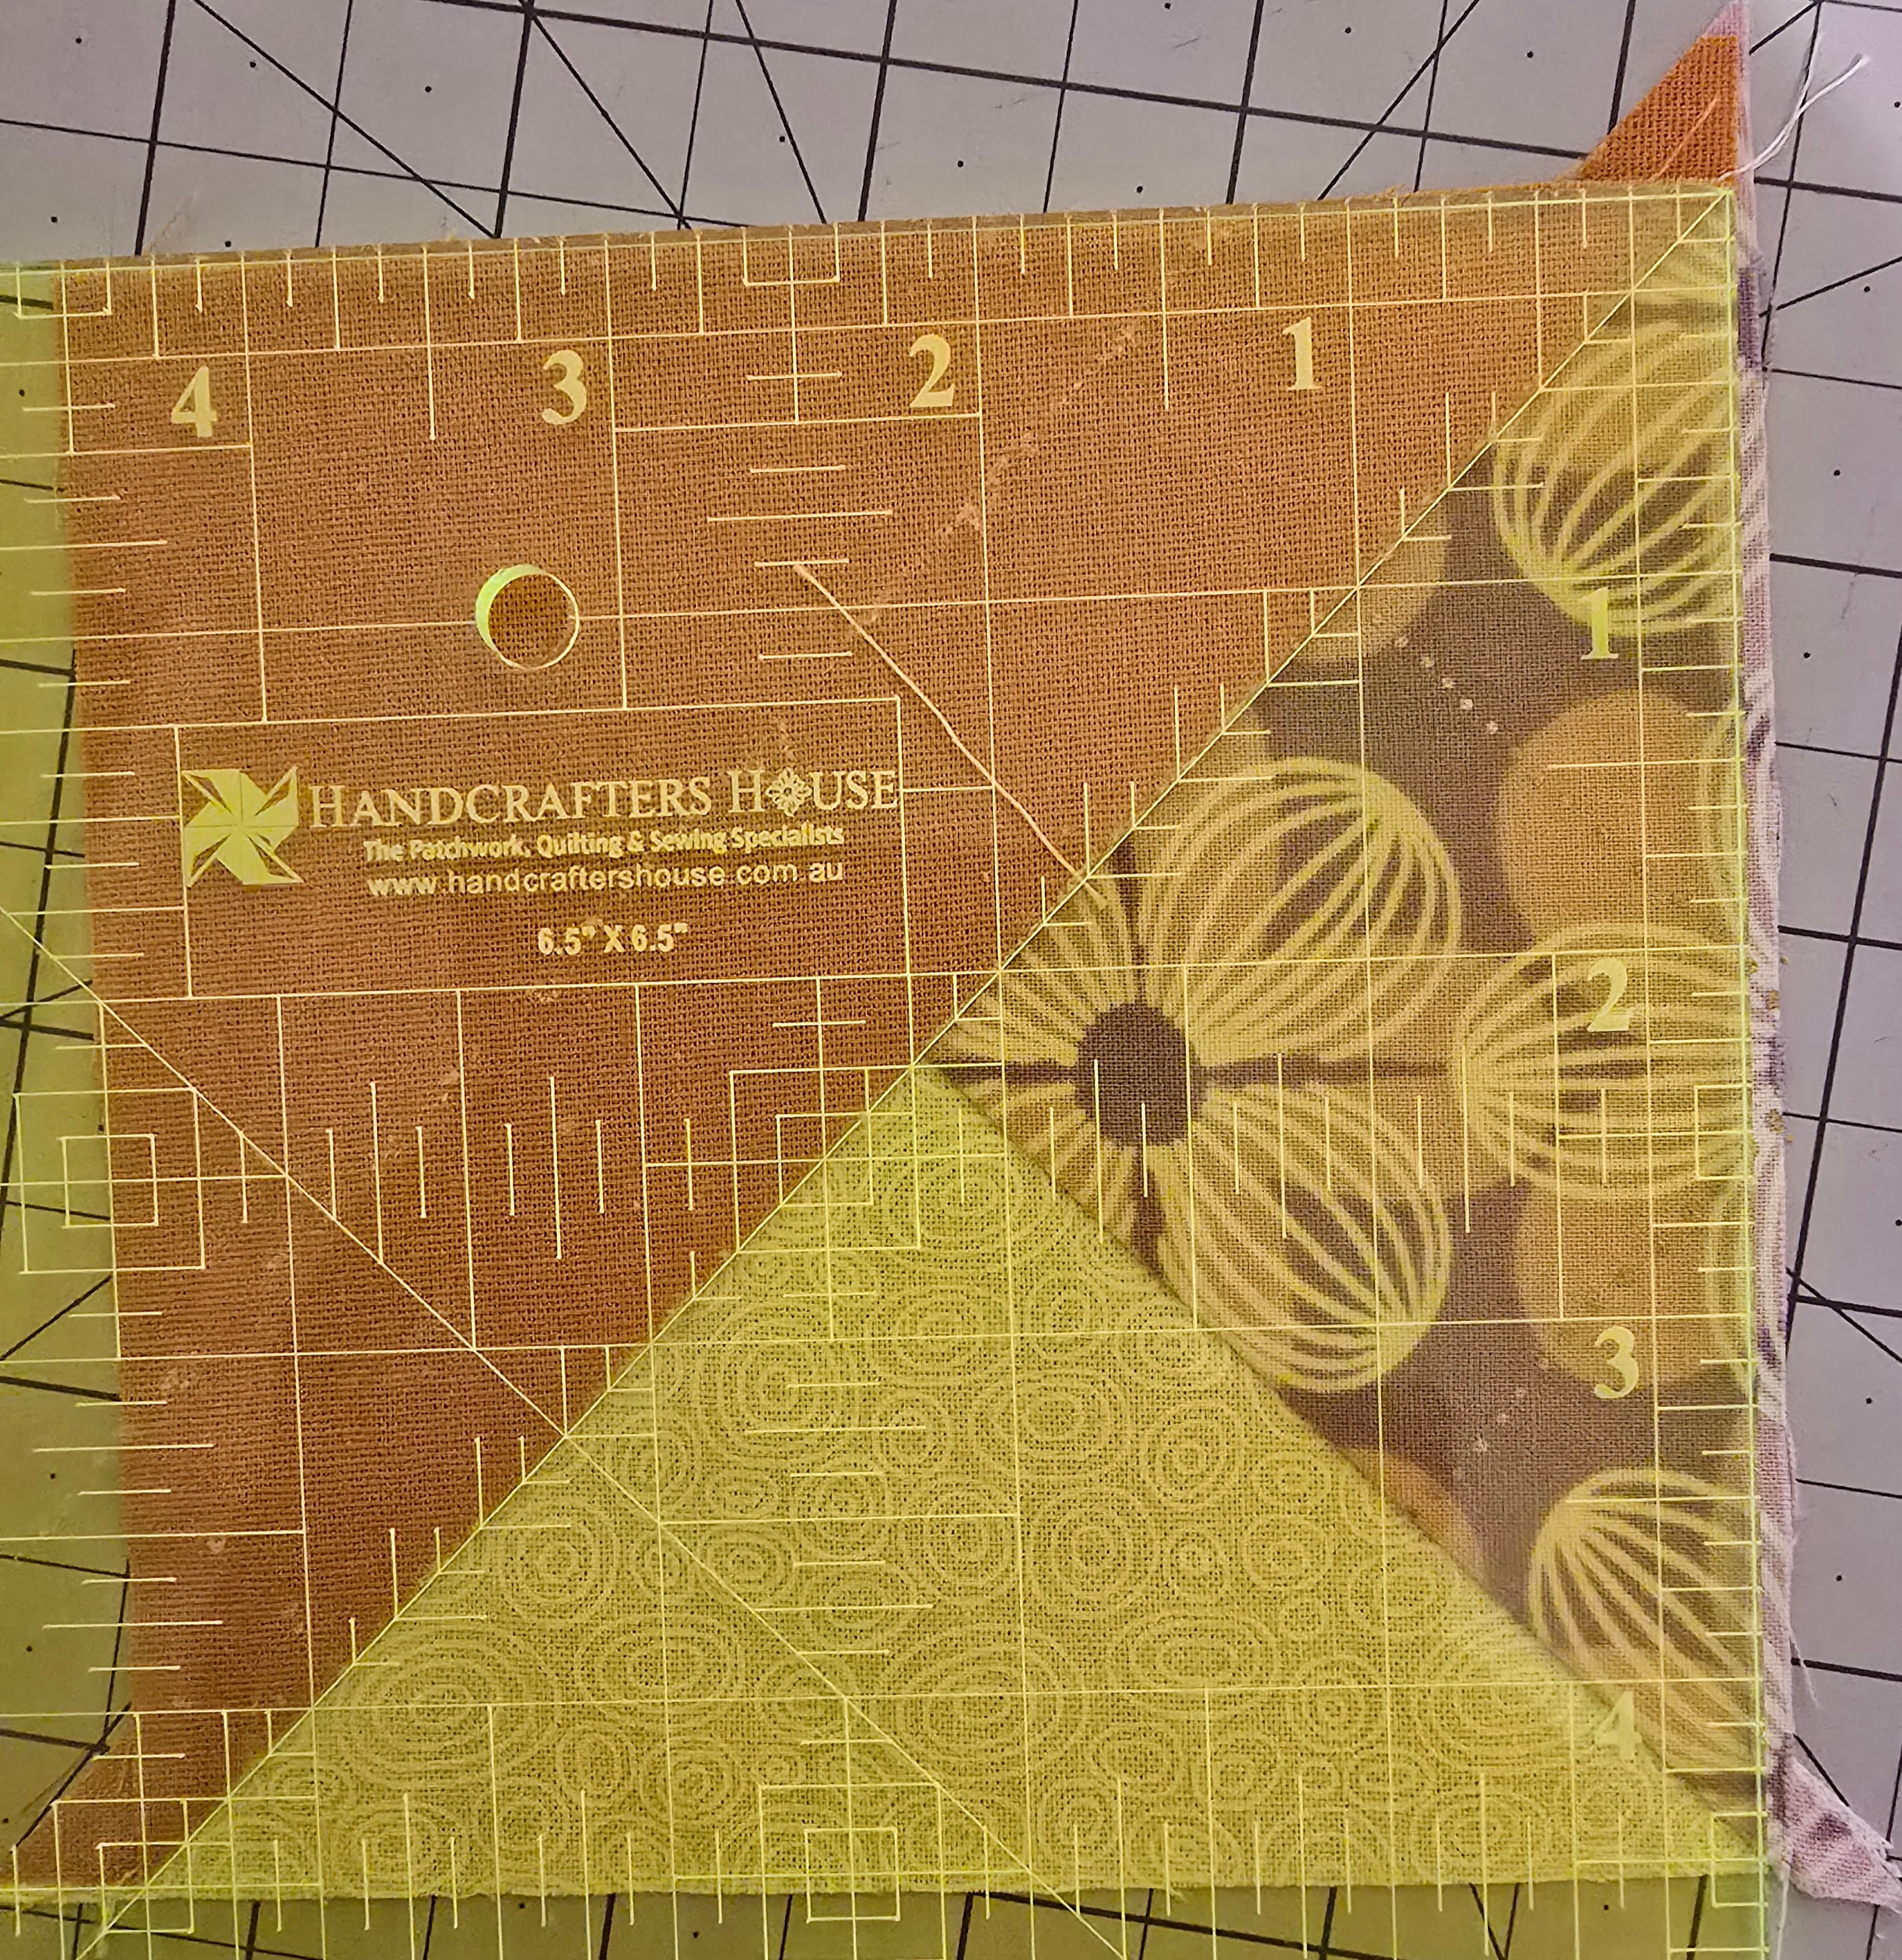
Step-by-Step Instructions for Making Half-Square Triangles (HSTs) Using the Eight-at-a-Time Method
Step 1: Mark the sewing lines
Draw ¼-inch diagonal lines on either side of the centre diagonal line on your fabric squares in both directions, forming an X.
Step 2: Sew along the marked lines
Sew directly on each ¼-inch line to create your stitched HST units.
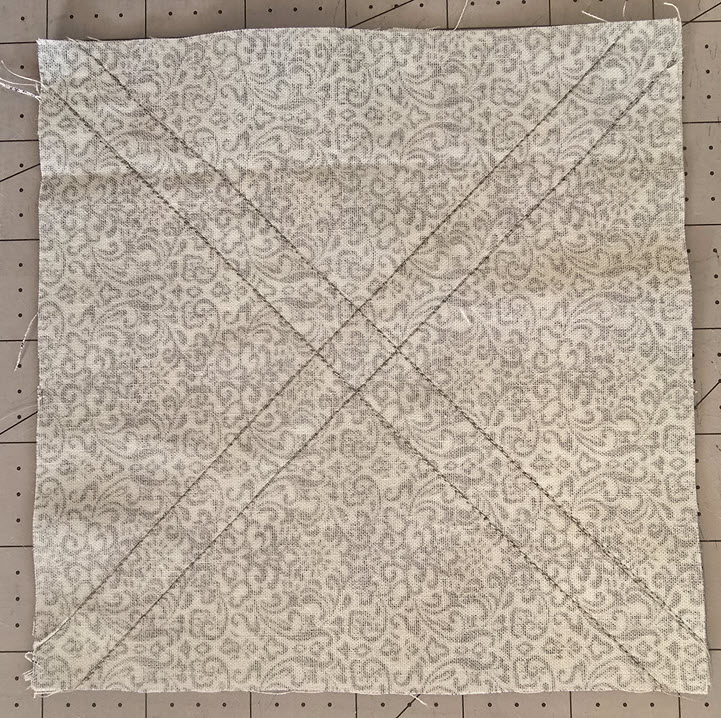
Step 3: Cut the square in half
Cut each square in half vertically and horizontally to create four smaller squares.
Step 4: Cut along the centre diagonals
Cut along the centre diagonal line of each of the four smaller squares to separate them into individual HSTs.
Step 5: Press the HSTs
Open each HST and press the seams. You can press towards one side or open, depending on your preference or pattern instructions.
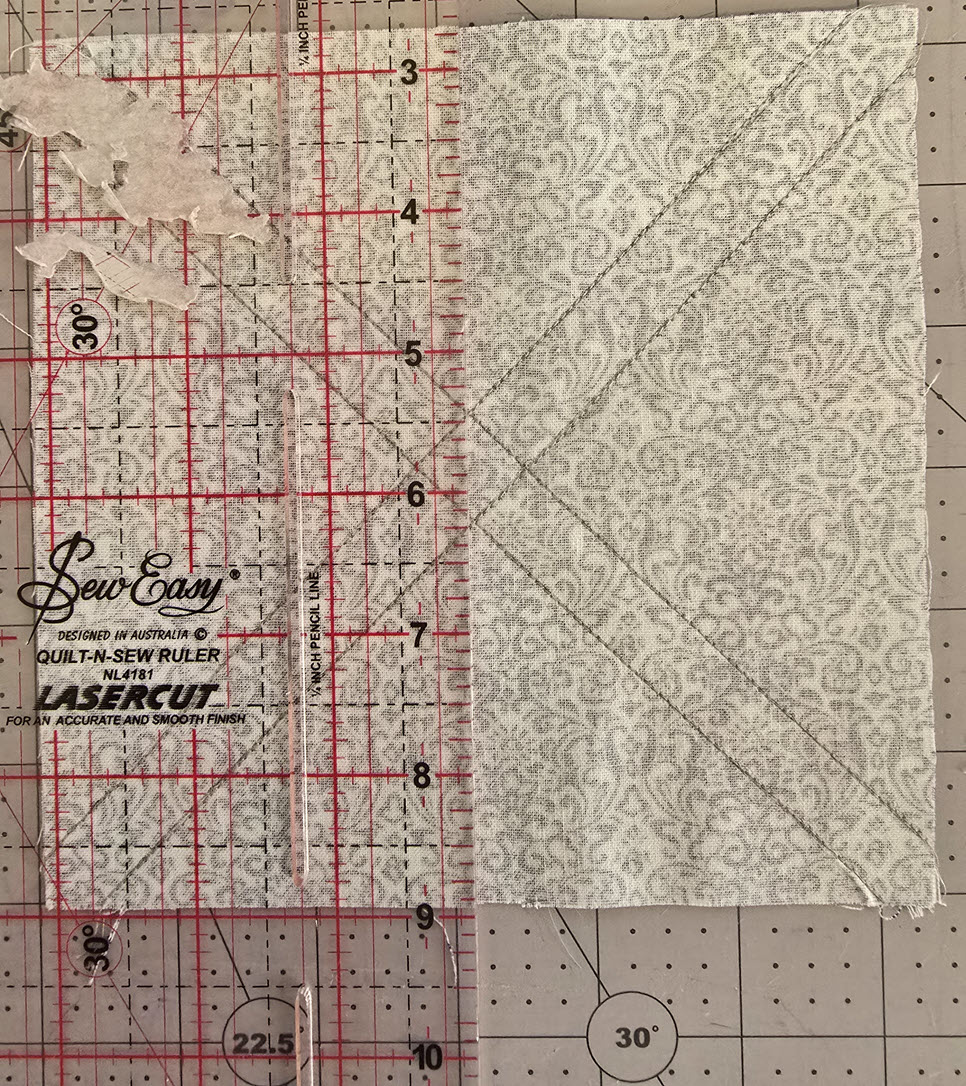
Step 6: Trim HSTs to the required size
Trim the HSTs to the required finished size using the same method as for two-at-a-time HSTs: align the 45-degree mark on your ruler with the diagonal seam, line up the bottom and left edges with the desired size, and trim the top and right edges. Rotate and repeat for accuracy.
Just Get It Done Quilts video, How to Make a Half Square Triangle – 10 Ways to Make a HST, shows how to make two-at-a-time and eight-at-a-time HSTs.
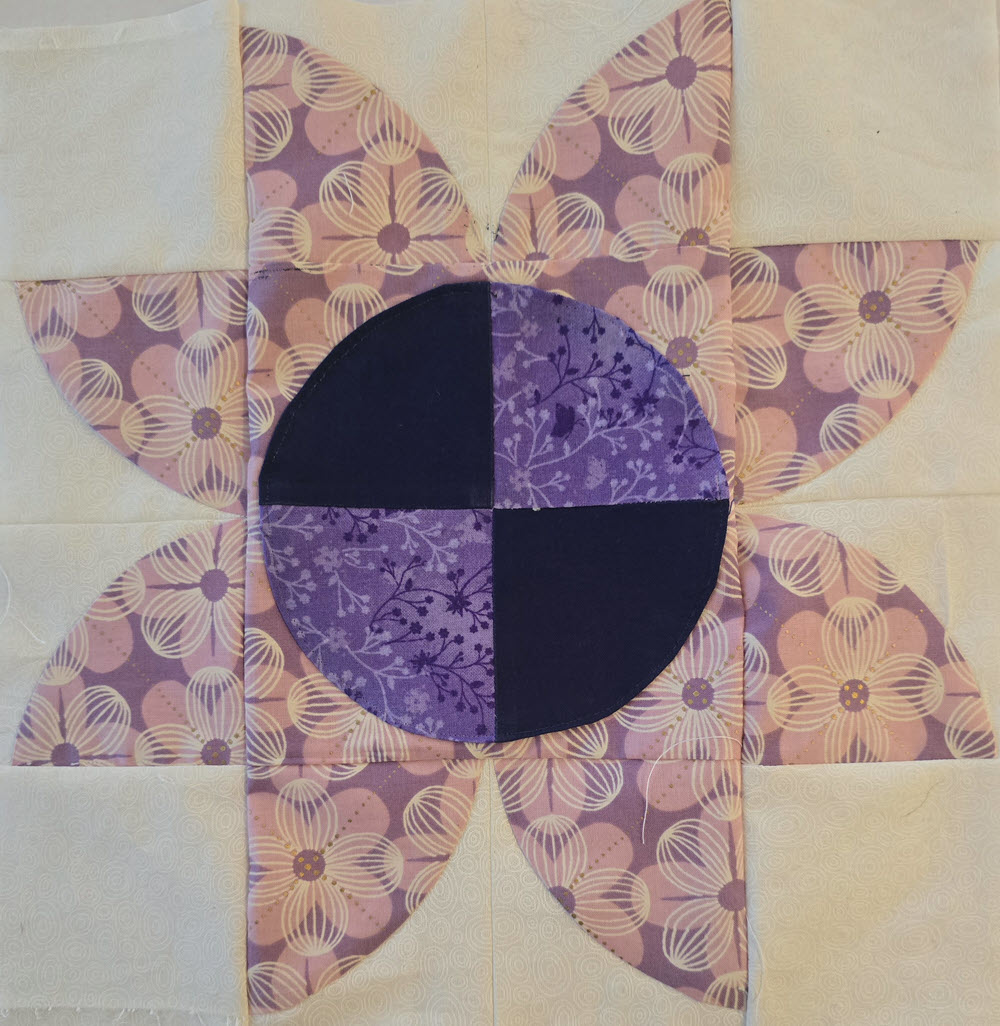
Quarter Square Triangle
I created one block that includes Quarter Square Triangles (also known as hourglass blocks) – Star 5 (week 31).
The two videos I watched for tips on making the Quarter Square Triangles were:
- Mary B’s Quickest Way to make quarter square triangles.
- Leah Day’s How to piece hourglass quilt blocks (watched to see how to trim properly using a square ruler, as Mary B’s shows how to use a perfect slotted trimmer ruler).
Split Half Square Triangles
I made two blocks that included split quarter square triangles—Large Pieced Block 1 (Week 11) and Week 42 (Star 8).

I was caught out badly with the large pieced block 1 (week 11), as the book didn’t explain how to properly trim split quarter square triangles, and I ended up trimming them incorrectly. Thankfully, I found Then Came June’s tutorial, “How to sew and trim split quarter square triangles”, which clearly explained the process and helped me understand where I went wrong.
Half Rectangle Triangles
I made one block, Star 4 block (week 16), that includes Half Rectangle triangles.
The book uses the freezer paper method for trimming half rectangle triangles, but I chose to use the ruler method instead—marking reference points on a square ruler and trimming accordingly. This method is more widely demonstrated in online tutorials, which made it easier for me to follow. I suspect the authors opted for the freezer paper technique either because it’s simpler to explain in print or they felt it would be more approachable for beginners.
The biggest challenge with making half rectangle triangles is that they’re directional, so it’s important to draw the stitching line in the correct direction. Unlike half square triangles, you can’t simply rotate a half rectangle triangle to place the triangle in a different position. You need to carefully work out which fabric goes on each side and draw the line in the right direction to achieve the correct orientation in the finished unit.
Make It in the Shed’s Video shows “how to (and trim!) Half-Rectangle Triangles”.
Log Cabin
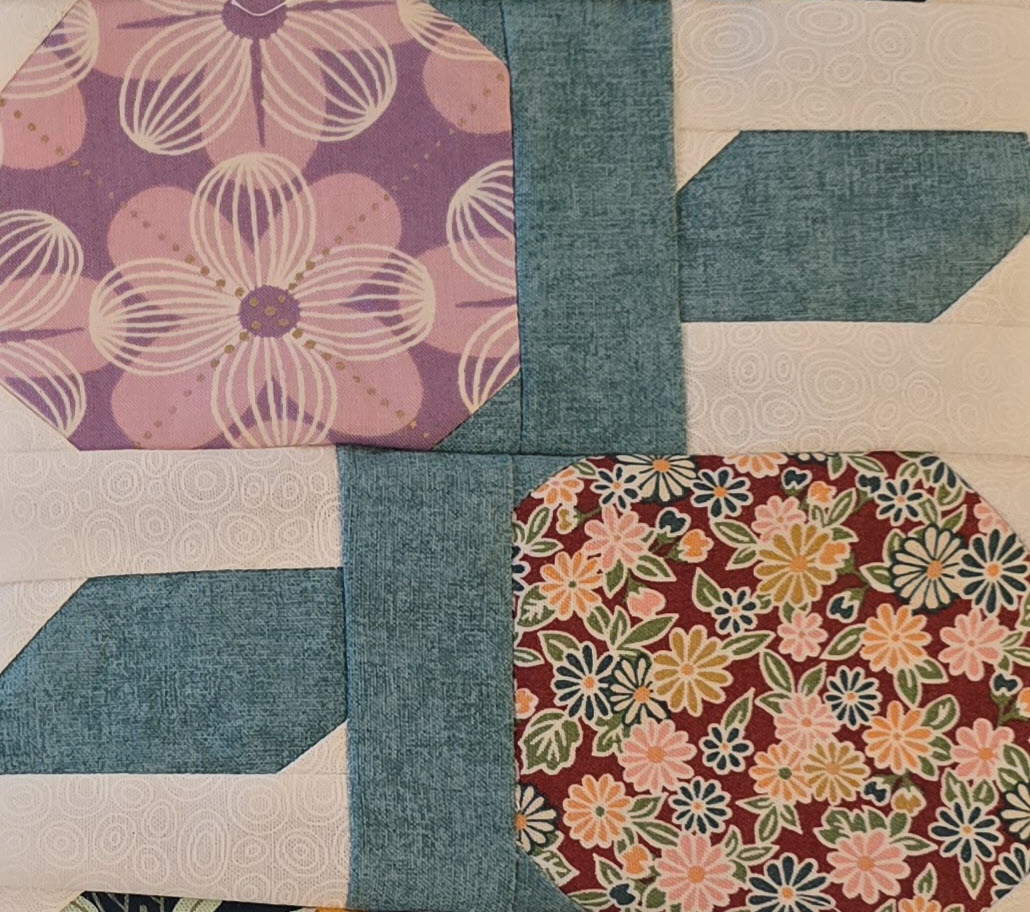
I first worked with the Log Cabin technique in Log Cabin 1 Block (Week 8), Bird 2 block (week 14) and Log cabin 2 (week 33). This traditional style is built by sewing strips of fabric around a central square, which creates a striking geometric effect and is great for showcasing color contrast.
Their task involved sewing together four blocks using a variation of the log cabin technique.
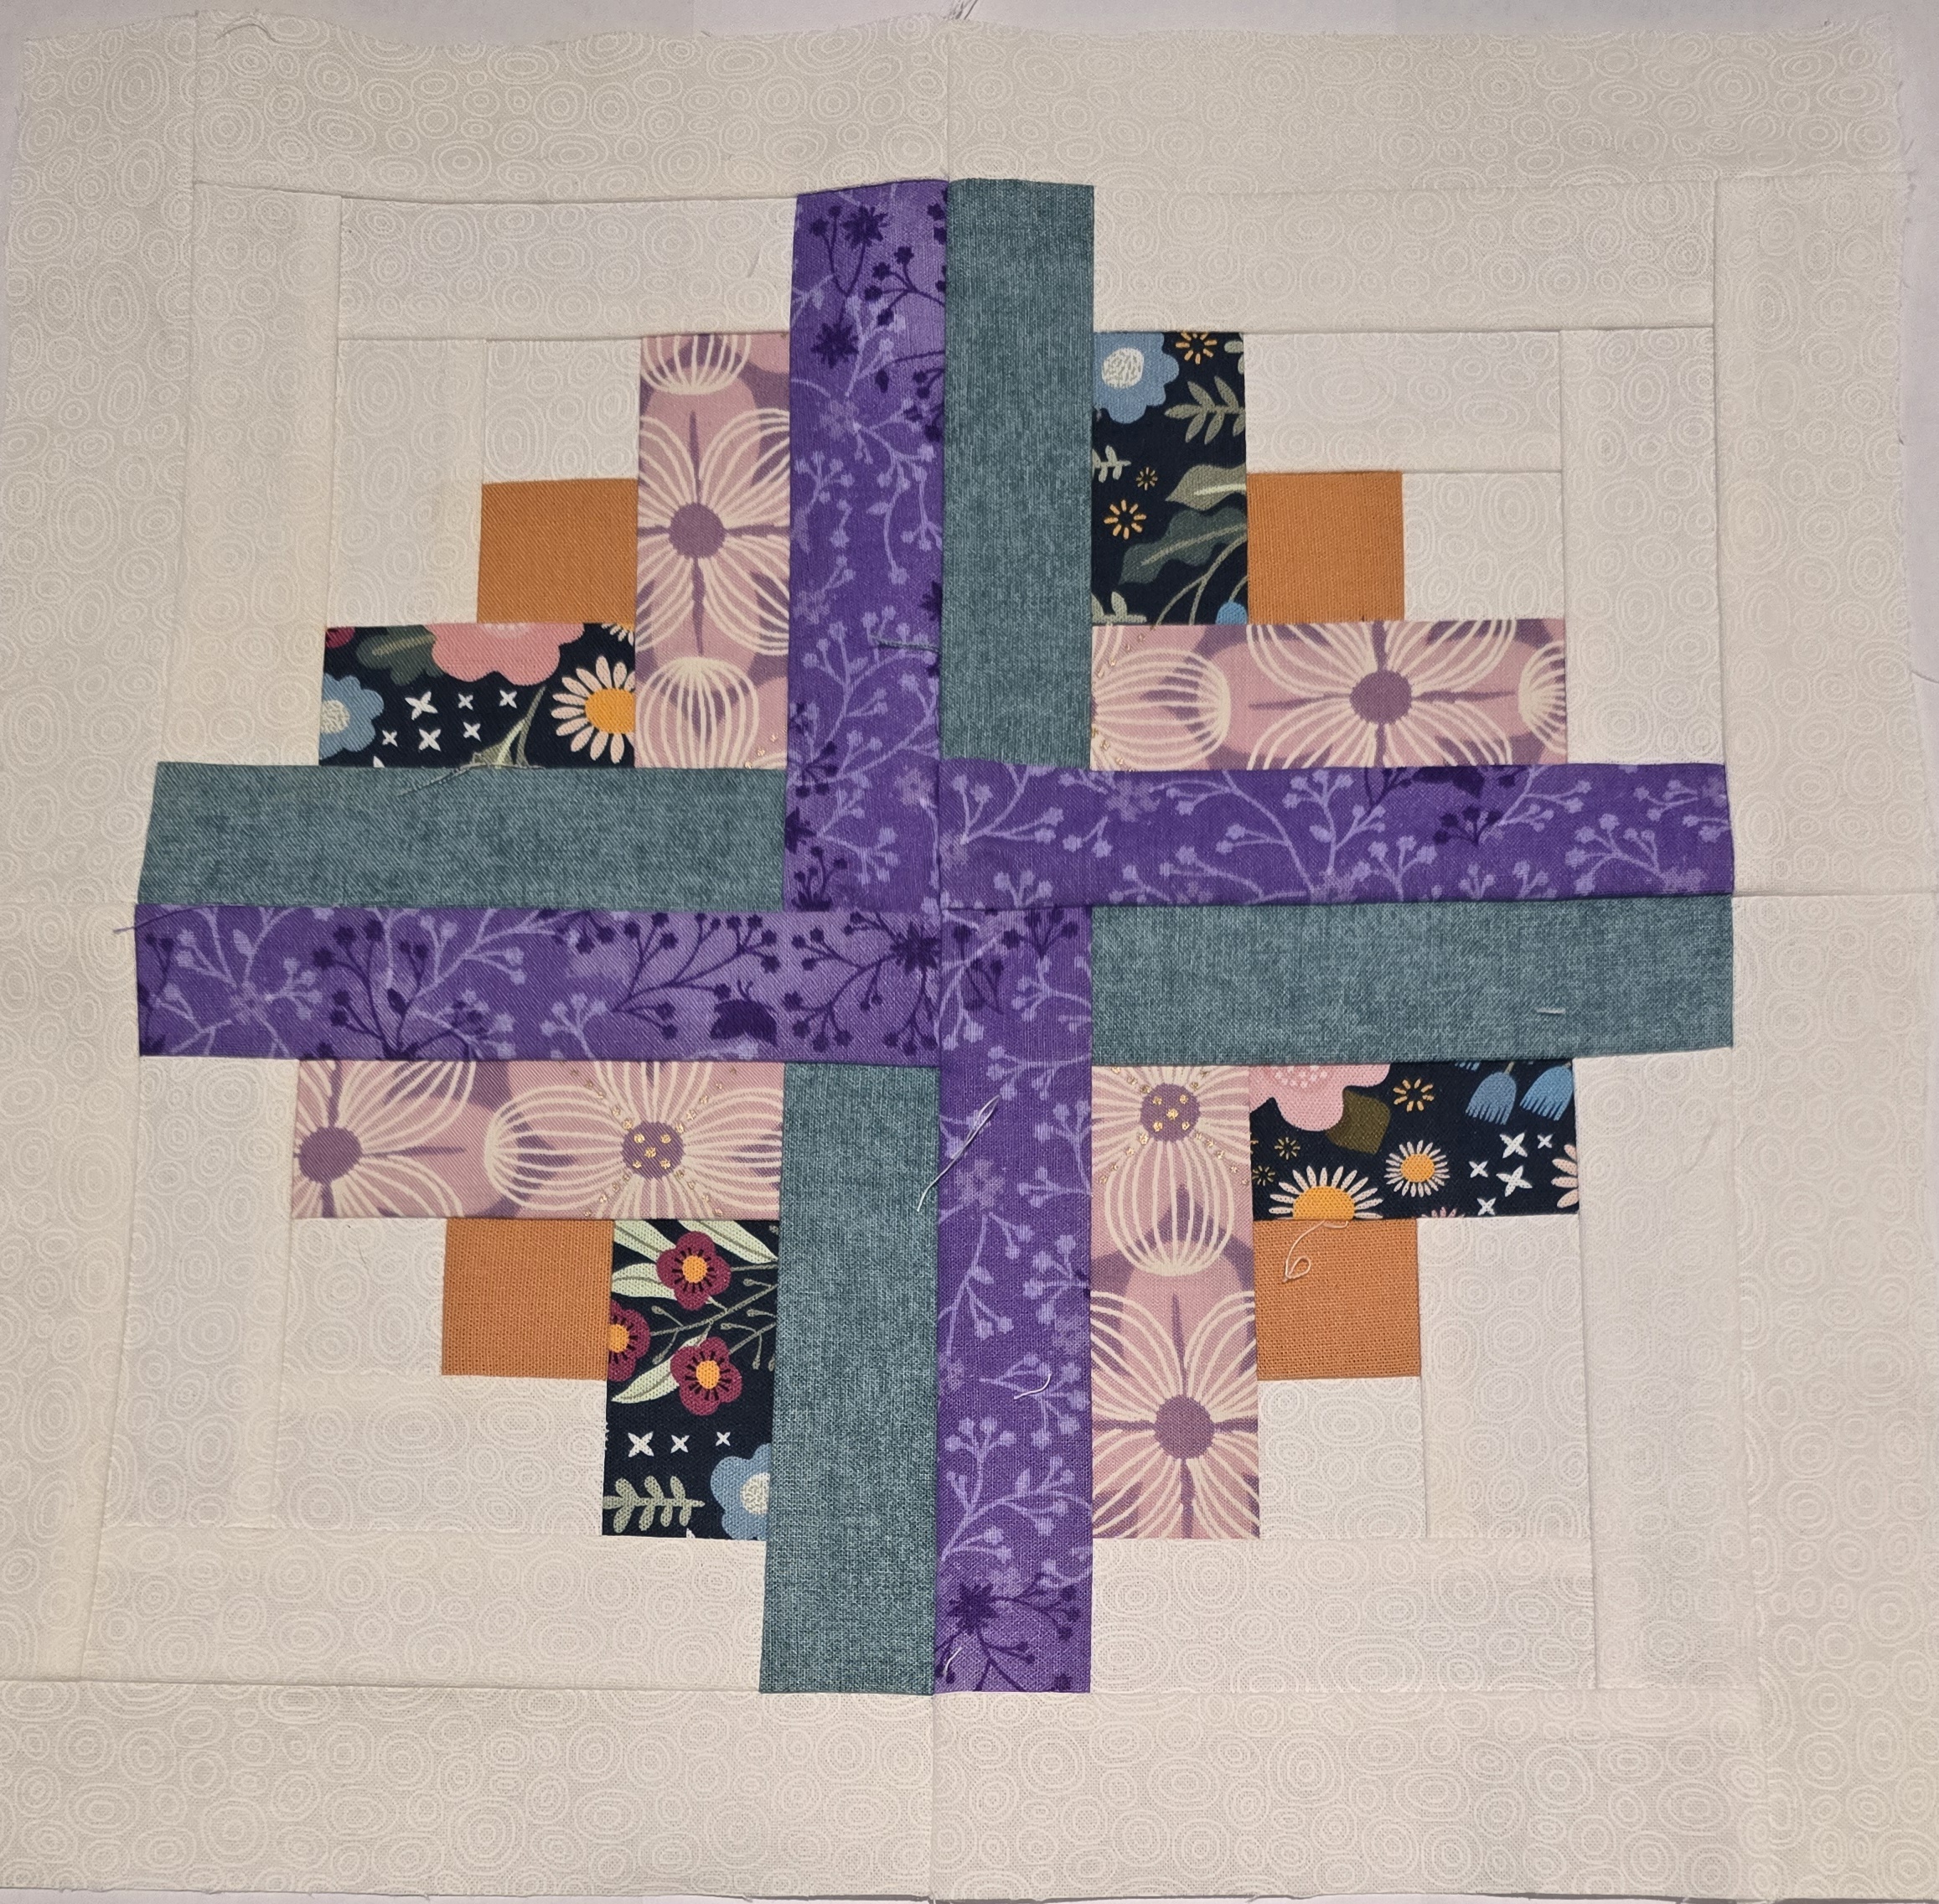

Before getting started with Log cabin 1 block (week 8), I tested my ¼-inch seam guide by sewing together four 2½-inch strips. The measurements looked correct once pressed.
However, when I began sewing the log cabin blocks for Log cabin 1 block (week 8) using 1½-inch strips, it quickly became evident that my seam allowance was slightly off. Fortunately, I was able to use a practice block to fine-tune my seam guide.
I measured the block carefully as each new strip was added, adjusting as needed. Only minor trimming was required in the end, and I achieved the correct unfinished block size of 12½ inches square for this log cabin.
Bird 2 block (week 14) involved using the log cabin technique with single half-square triangles.
The Log cabin 2 block (week 33) was made using on my new sewing machine, the Janome S7 AE, which comes with a ¼” foot and a built-in ¼” seam setting. I used this foot with the default ¼” seam setting to make the log cabin, but my block ended up slightly smaller than it should have been. To fix it, I adjusted the outer strips to 1½” and trimmed the block down to the correct unfinished size of 12½”.
Luckily, I’d watched Sew Sew Studio’s Janome S7 Introduction video and remembered their tip: when using the ¼” foot, change the stitch width setting to 8.7 or 9 to achieve a scant ¼” seam. Switching mine to 9 solved the issue, and now my future blocks are coming out the right size.
Checkerboard
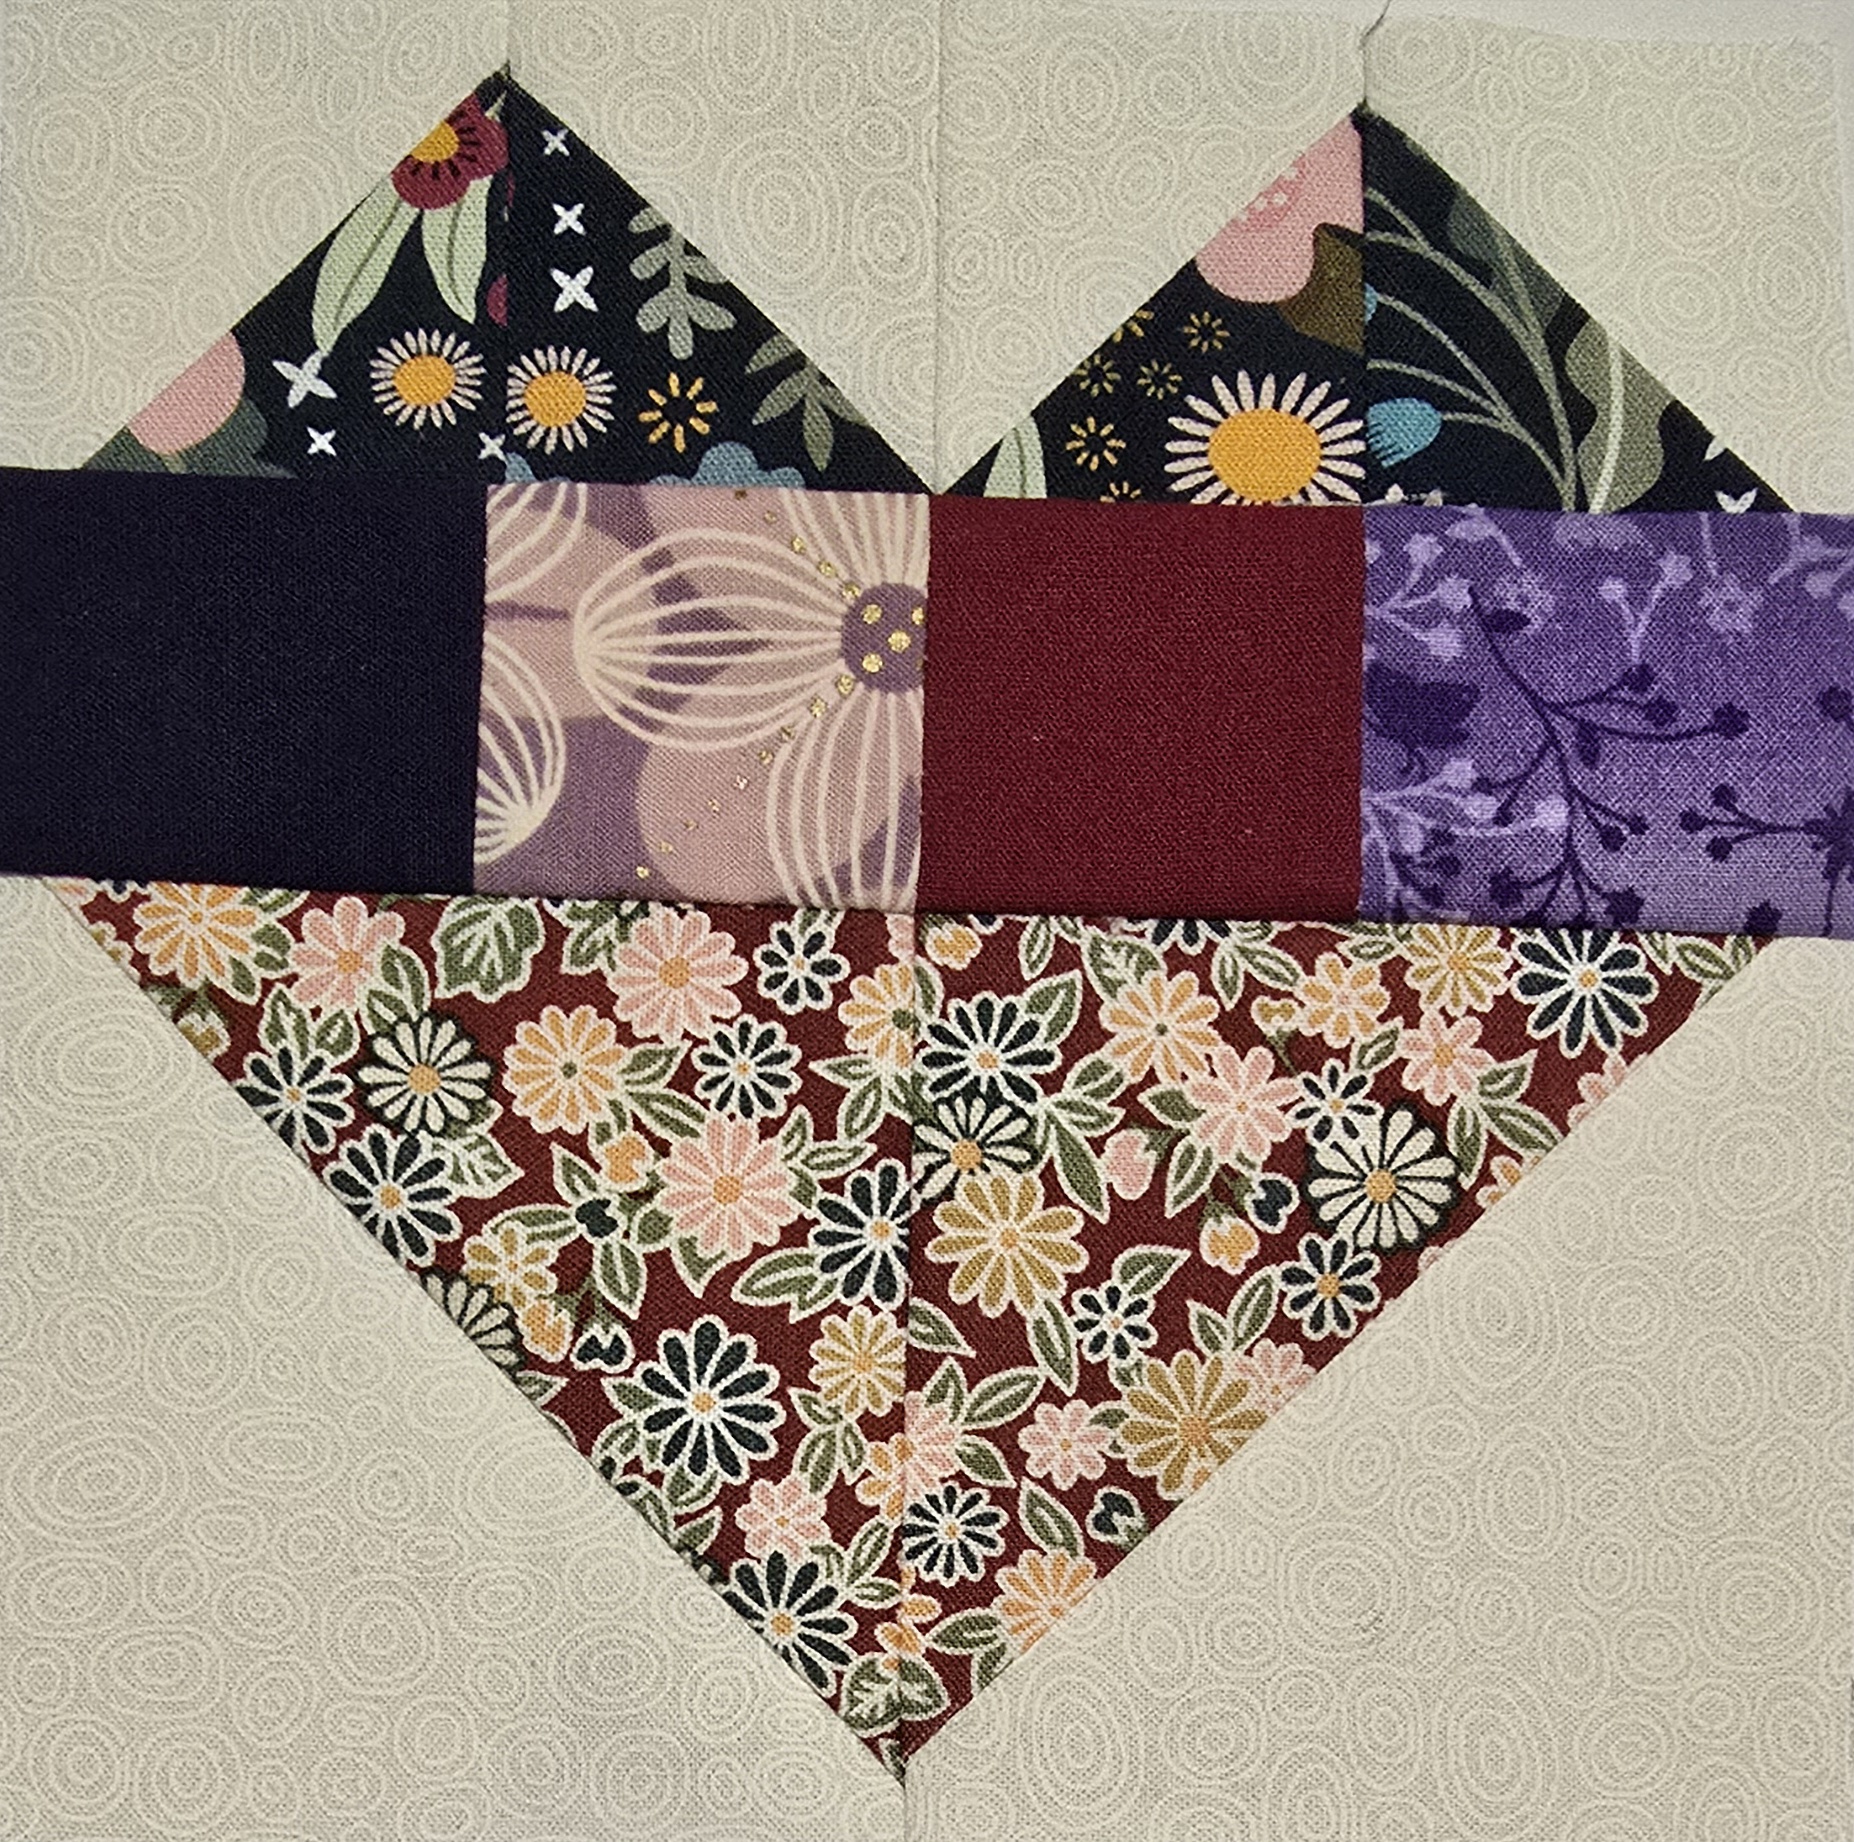
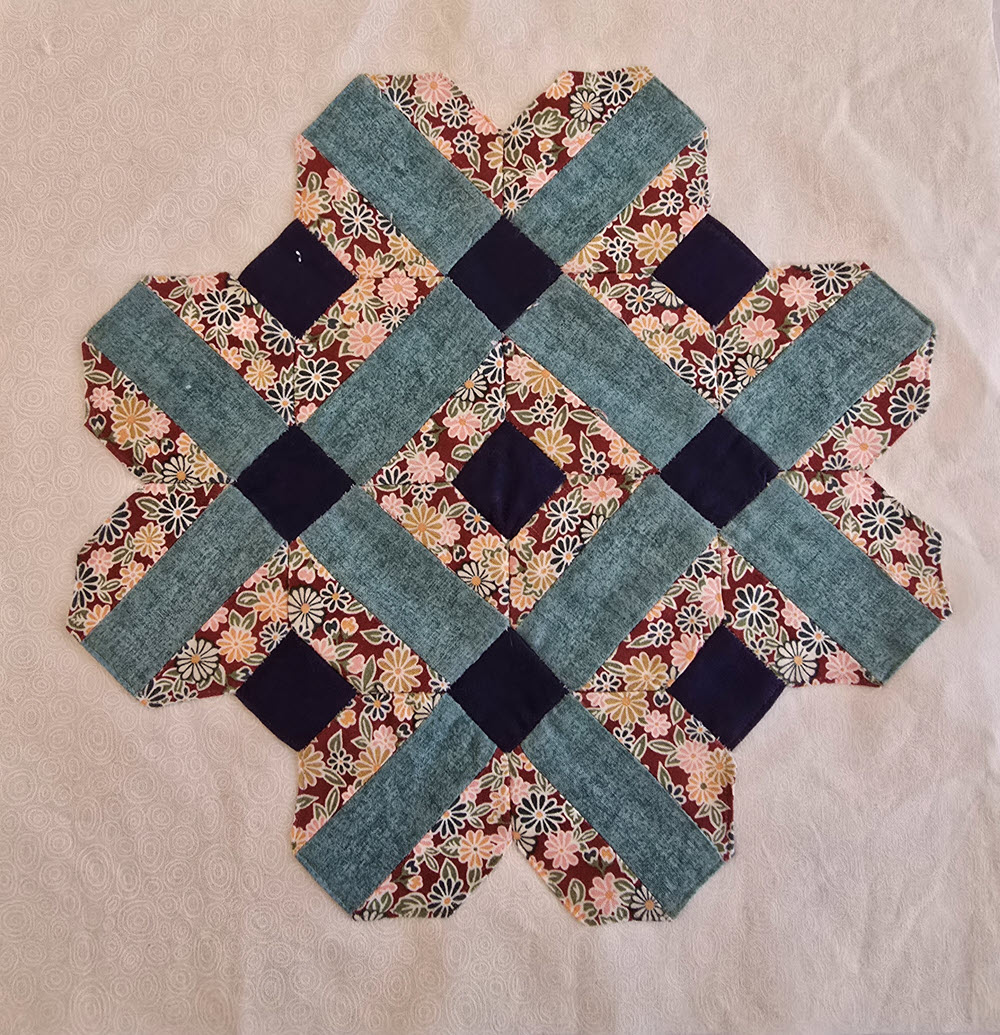
I made five blocks that included checkerboard—the Large pieced block 1 (week 11), Tall Flower 1 (week 17), Small Flower 2 (Week 20), Small Flower 3 (Week 21)and heart 7 (week 34)..
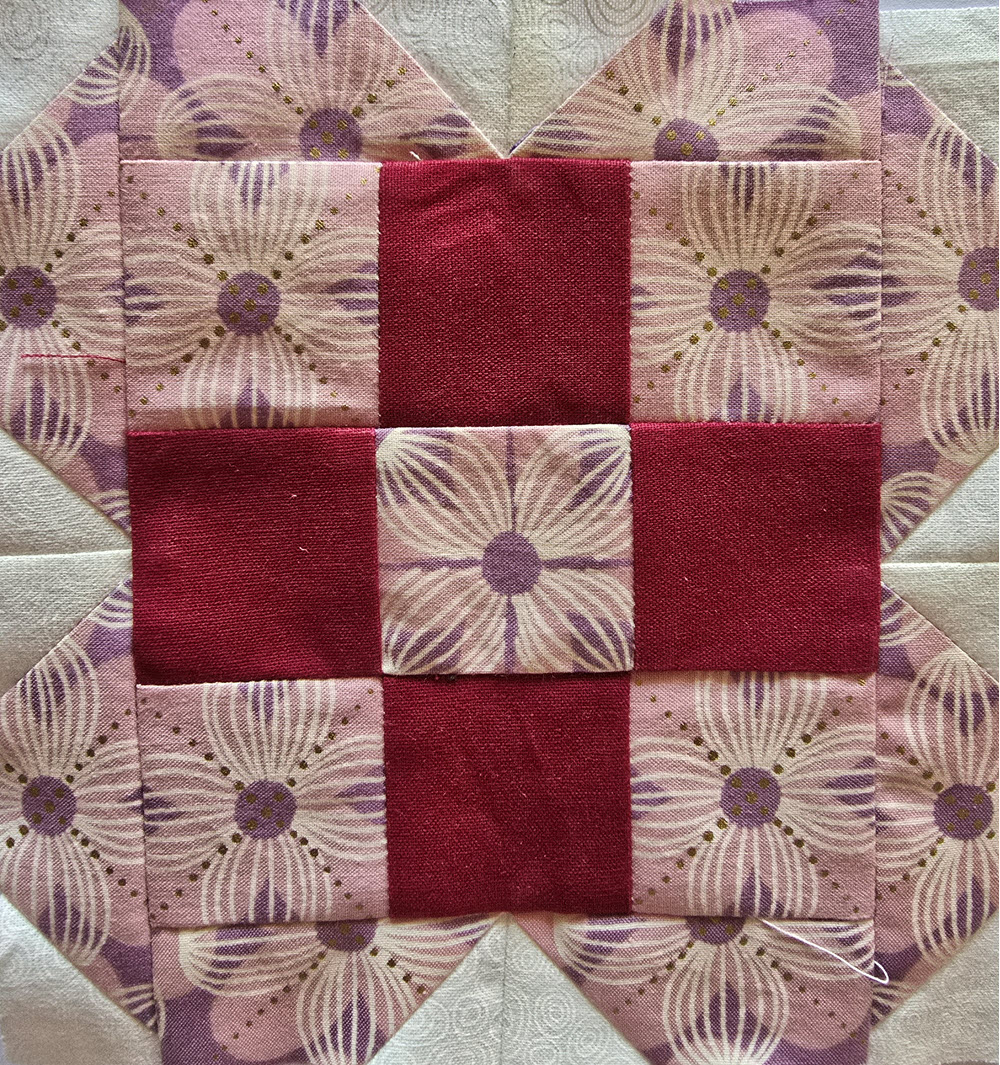

The blocks are made using either Four Patch or Nine Patch checkerboards, which come together quickly. The most time-consuming part has been working with Fabric D, which has a distinct pattern—I’ve found it looks best when the pieces are fussy cut to highlight the fabric’s design.
However, it did take me some time to work out the technique for the curved shape over the checkerboard in Small Flower 3 (Week 21). I loved how this block looked once it was created.
Snowball
I made five blocks that include snowballs – heart 3 (week 10), tall flower 2 (week 24), tall flower 3 (week 39), basket 2 (week 40), and flying geese 4 (week 46).

The book lists the techniques for these blocks as machine piecing. I’m referring to them as snowballs, as this is the method being used. Snowballing a block involves taking any size square or rectangle, adding smaller squares to its corners, sewing diagonally across each corner, trimming the seam allowance to ¼”, and then flipping the fabric open to form a triangle.
After making a few snowball blocks, I started to feel discouraged—my accuracy was all over the place, and the results just weren’t what I wanted. I decided to dig a little deeper and found Mary B’s video 2 Easy Snowball Block Methods: Stitch and Flip – Cut and Stitch!. Watching it was such a relief. She explained why the stitch-and-flip method is often inconsistent (which made me feel better about my struggles, knowing that an experienced quilter like Mary B has the same challenge!), and it showed how the cut-and-stitch method makes snowballs so much more accurate. I now know that if I need to be really accurate when making snowballs, the cut-and-stitch method is the better option.
Square within a Square
I made one block that includes a square within a square – Star 8 block (week 42).
The only trouble I had making this block was working out how to accurately trim a square within a square, and My Quilting Bee’s video shows how to trim a square in square block demonstrates the method I used.
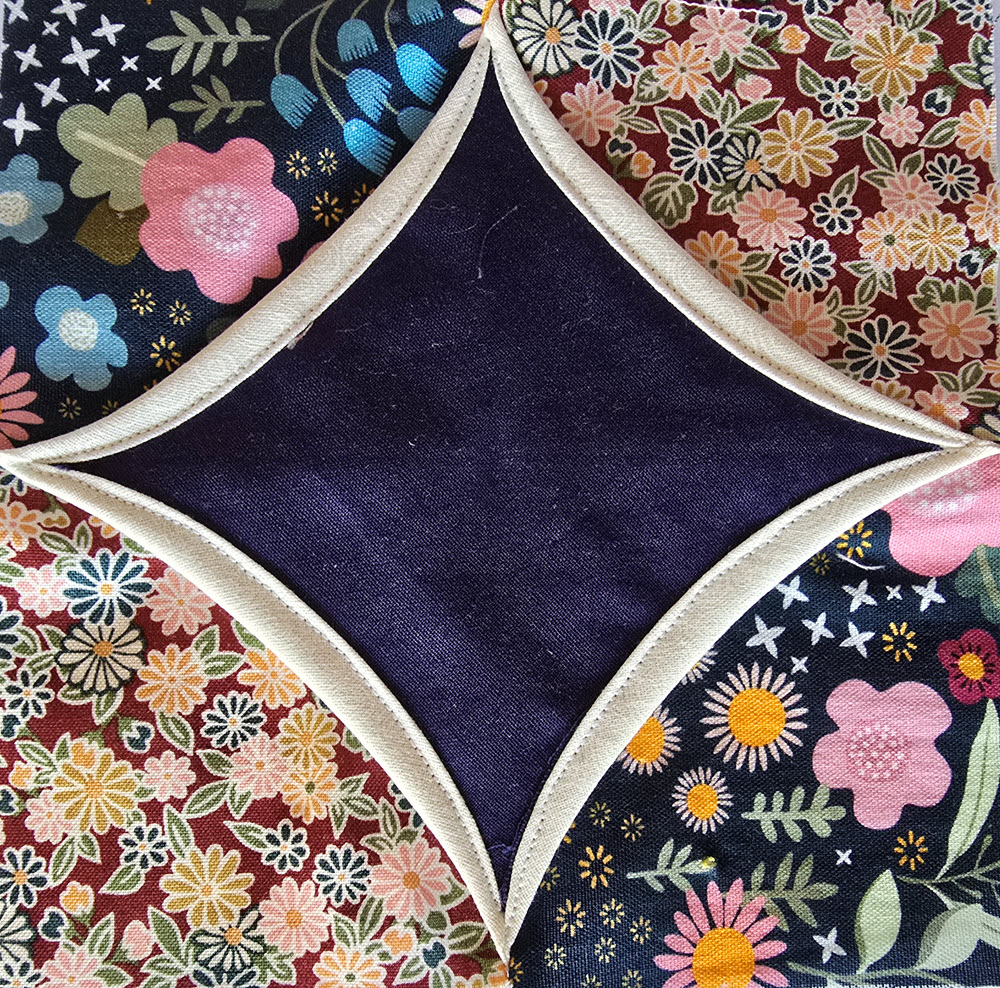
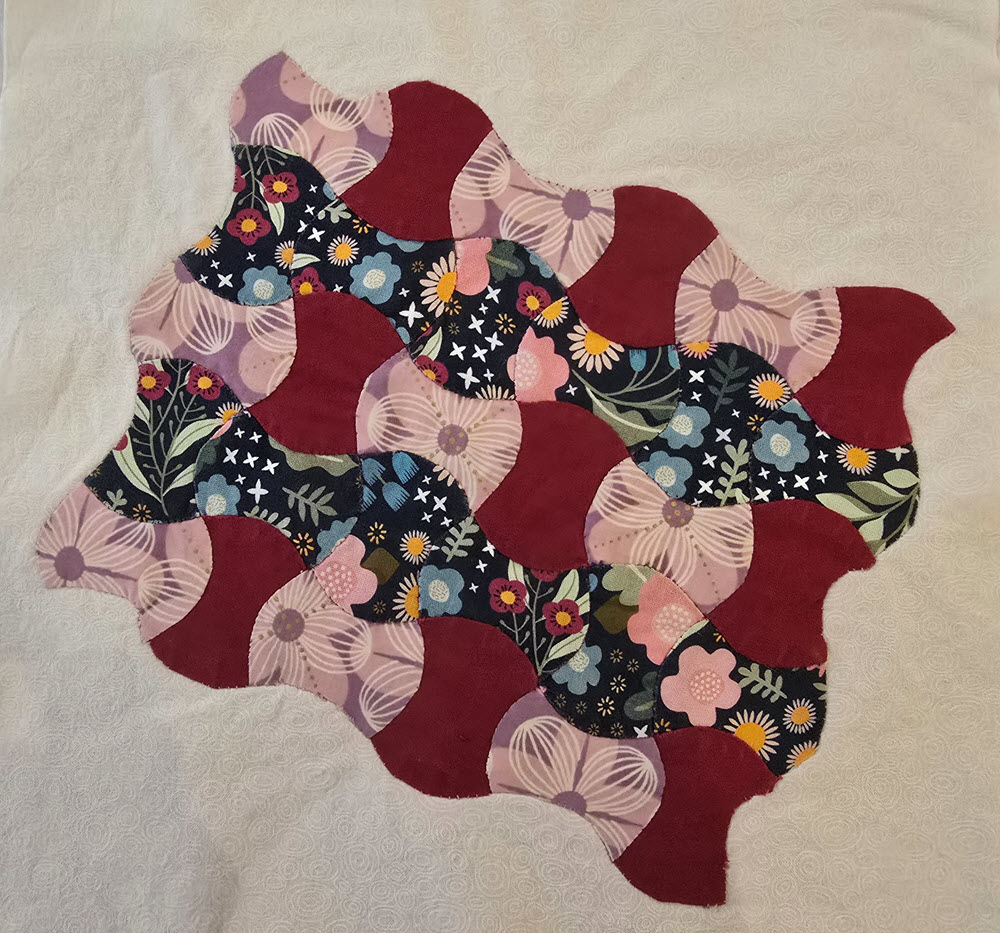
Curved Piecing
I created two blocks using curved piecing with a Drunkard Path template – Curved Piecing 1 (week 27) and Curved Piecing 2 (Week 51).
Drunkard’s Path drove me crazy for a few reasons:
- I initially used the template from the correction for page 171 of A Year of Quilting by Debbie Shore and Melissa Naylor, not realising they had changed the scale of all the templates on that page—including the Week 26 Drunkard’s Path. It wasn’t until I made my first curved piece that I realised something was wrong.
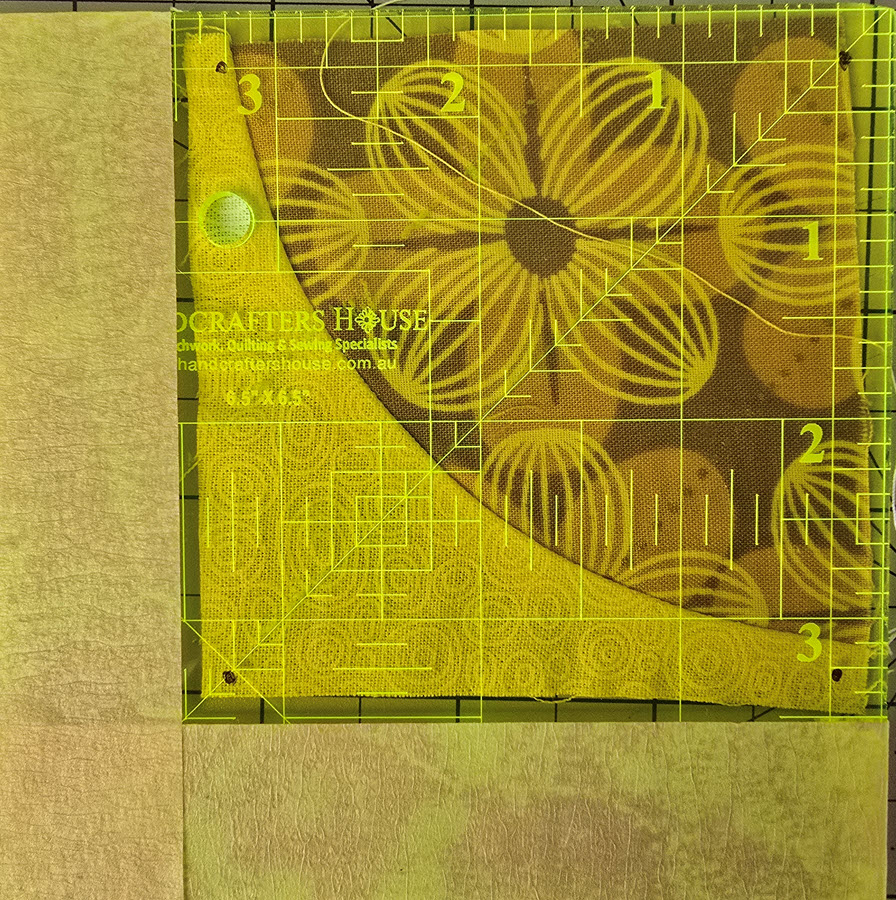
- Their Drunkard’s Path template is designed to create a 3½” finished block, but curved piecing can easily shift, stretch, or distort. My second attempt using their template resulted in a block slightly smaller than 3½”, which was frustrating.
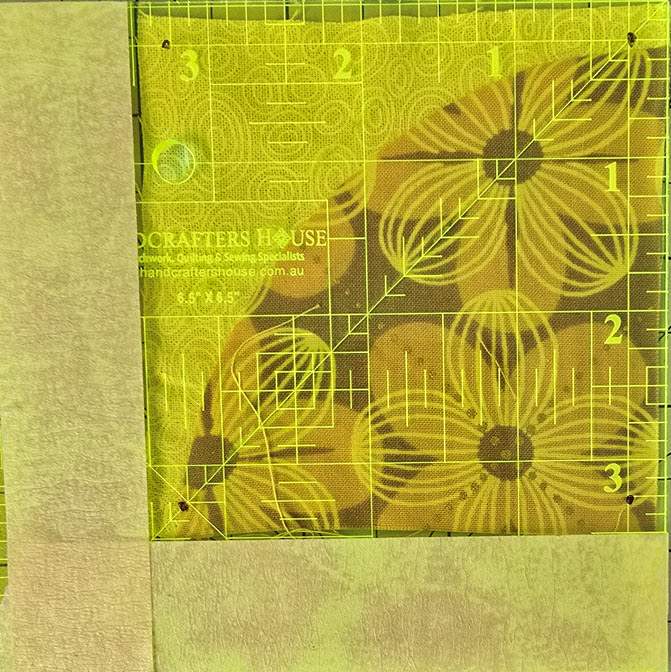
- I decided it was better to create oversized Drunkard’s Path blocks and trim them down to 3½ inch, which is what most quilters do. Trimming makes it easier to achieve accurate sizing and clean, consistent curves. The tricky part was figuring out what size template I needed to start with, and then finding a suitable one online. I ended up using this 4″ Drunkard’s Path template from Springleaf Studio.
- I trimmed the blocks to 3½” by marking the size on my 6½” ruler using tape, including the ¼” points where each curve should land. To trim, I lined up the curve with the ¼” marks, then trimmed the top and right sides. After rotating the block, I aligned the freshly trimmed edges with the tape, checked the curve was still at the ¼” marks, and trimmed the remaining two sides.

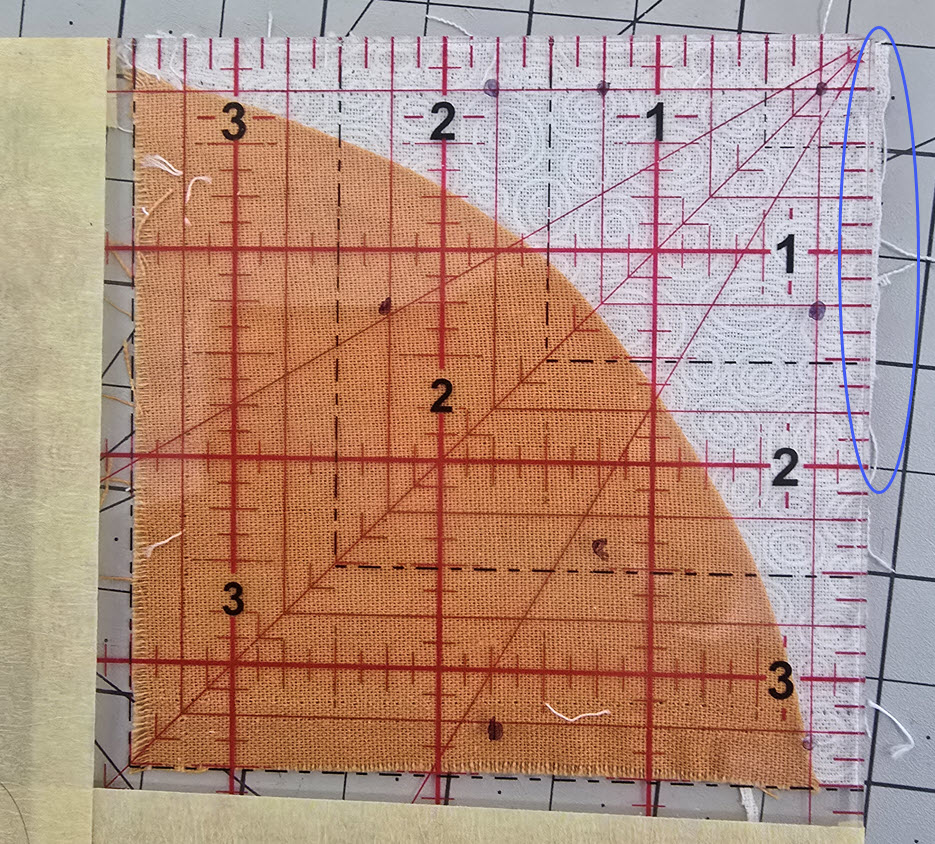
Drunkard path continued to drive me crazy when I created the Curved Piecing 2 in Week 51 for the following reasons:
- I had to buy more white-on-white fabric because I didn’t have enough left, but I accidentally bought the wrong shade. The fabric was very close in color, and I didn’t notice the difference until I had sewn all the drunkard’s paths for the Curved Piecing 2 block together. It was only when the fabrics were placed side by side that the mismatch became obvious. As a result I had to buy more fabric and remake half of the drunkard paths.
- Accurate sewing and trimming are especially important when piecing the Curved Piecing 2 block in Week 51. I later realized that some of my drunkard’s path blocks hadn’t been trimmed to the correct 3½”, which caused problems with the final piecing. To fix it, I had to unpick the blocks and re-trim them before sewing them back together.
- I found that the lines on my 12 ½ ruler were better for trimming drunkard paths compared to my 6½” rule.
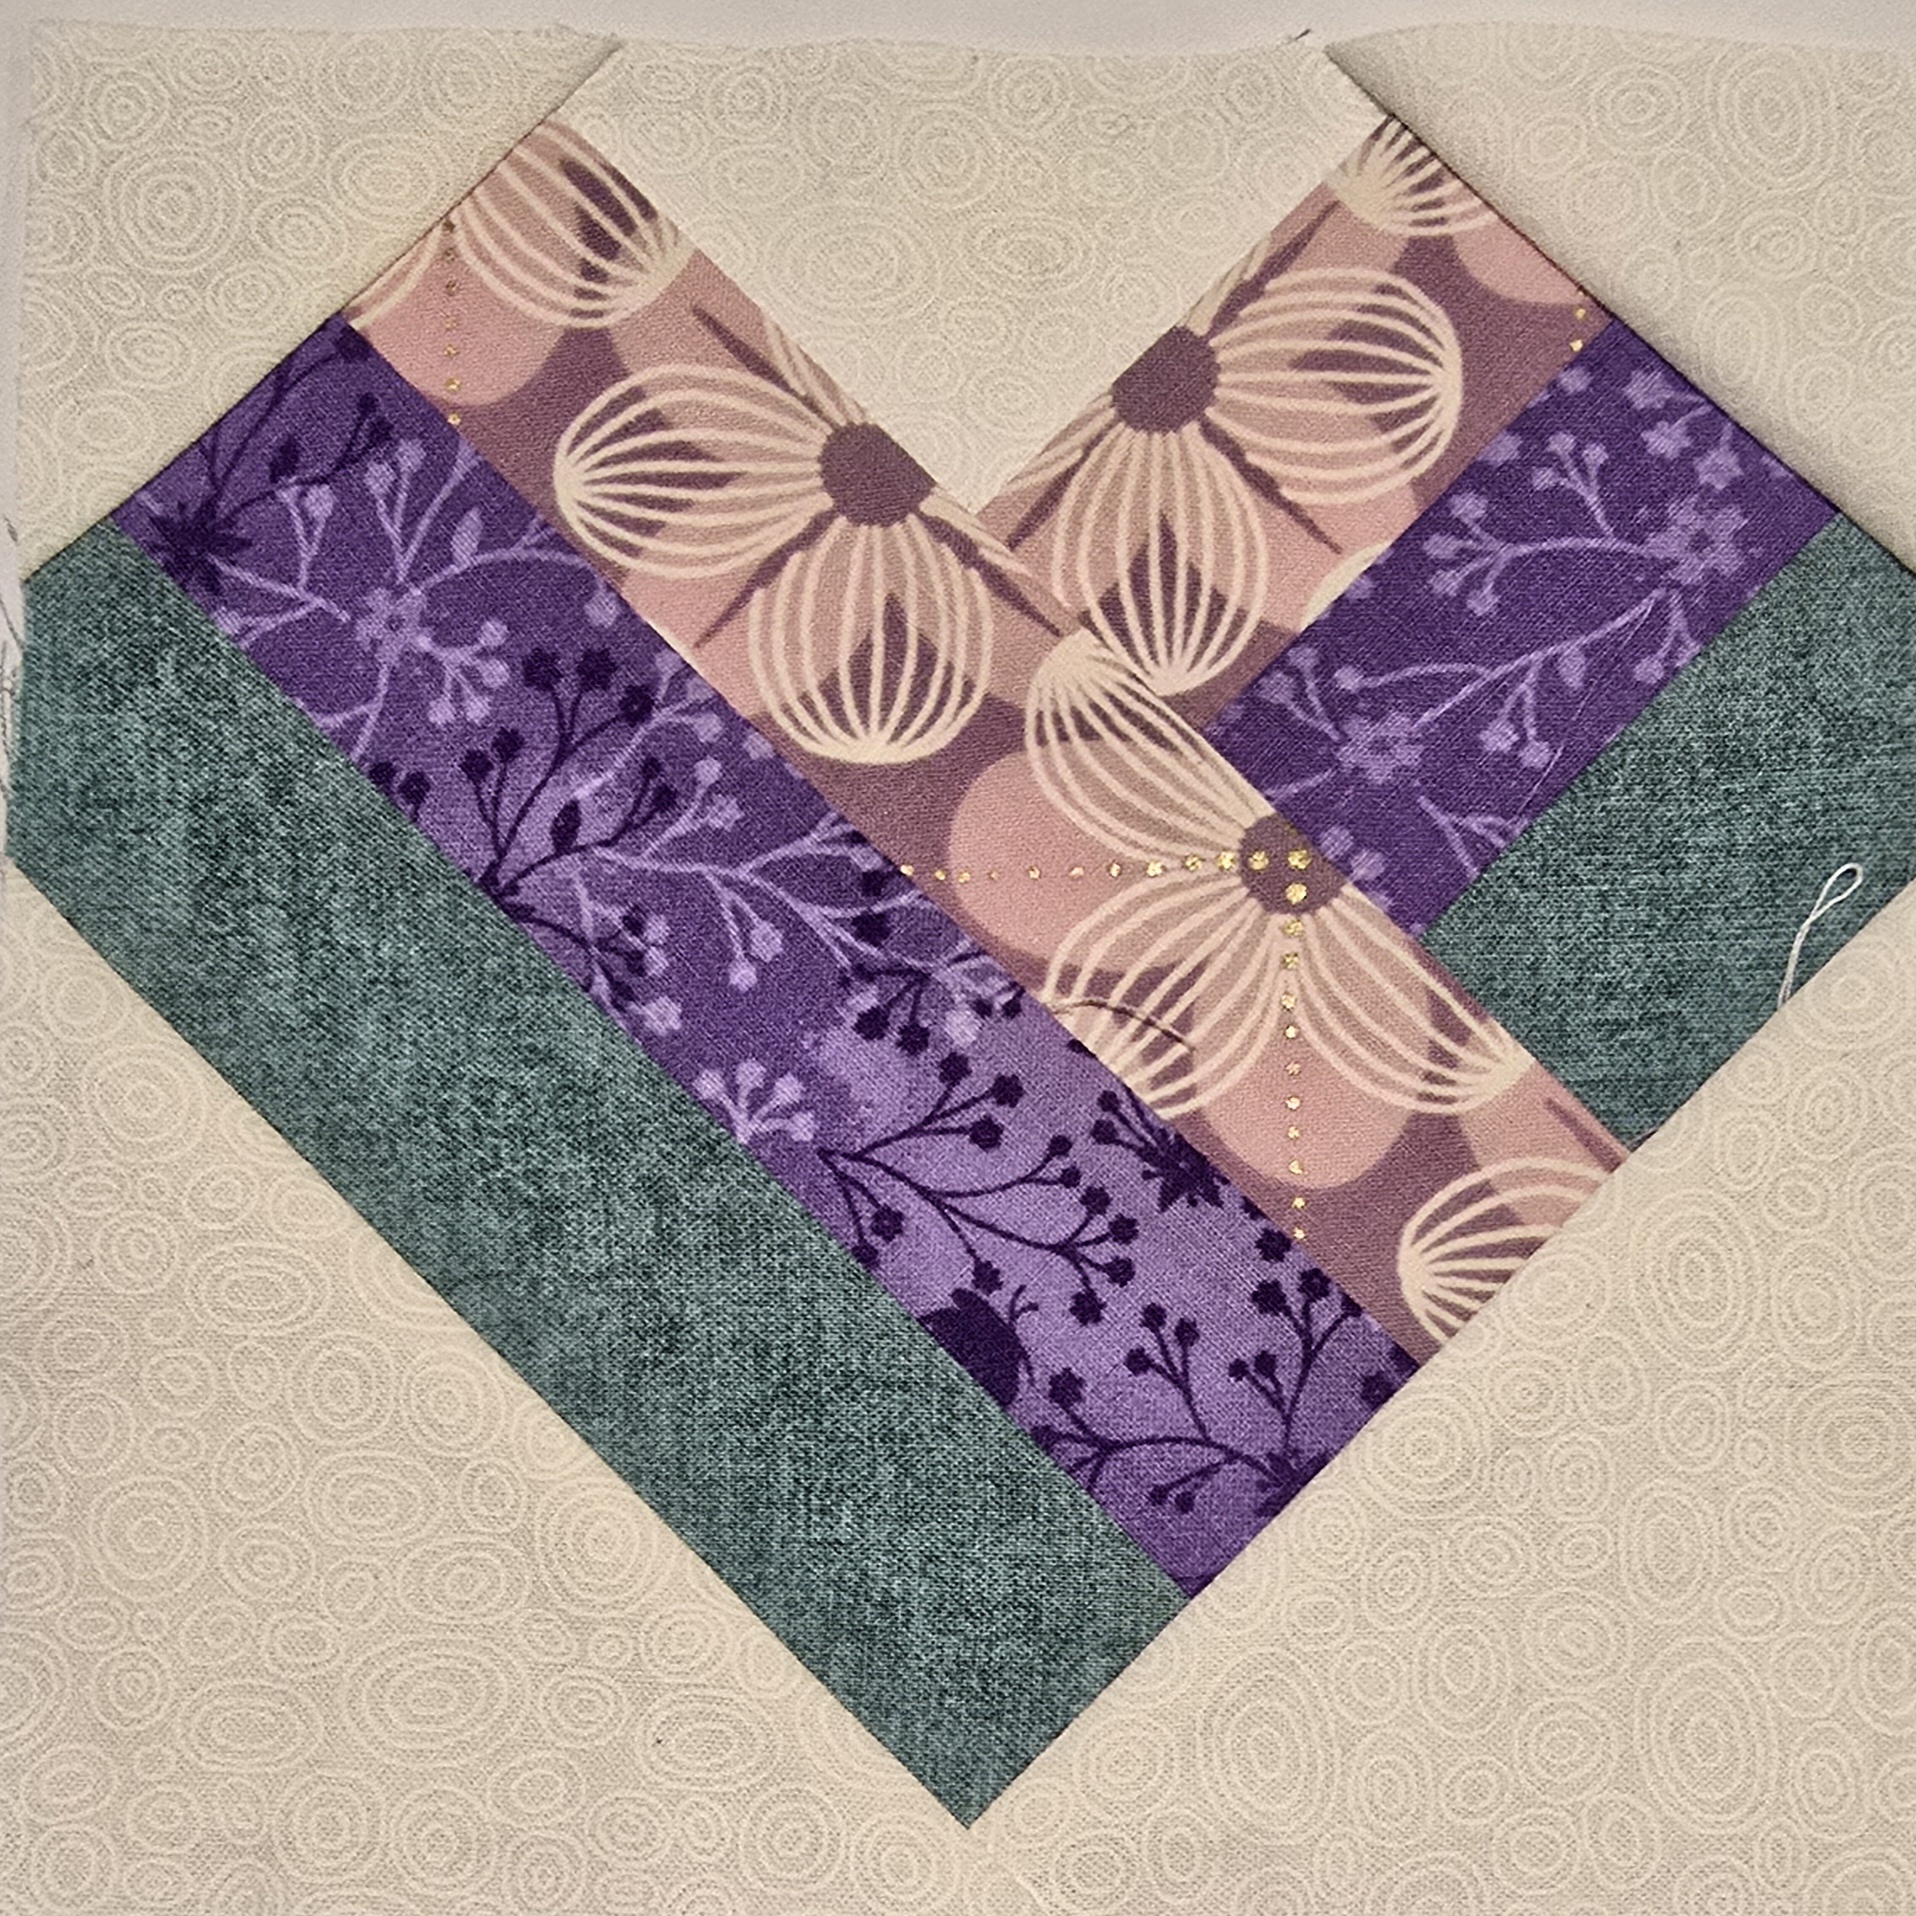
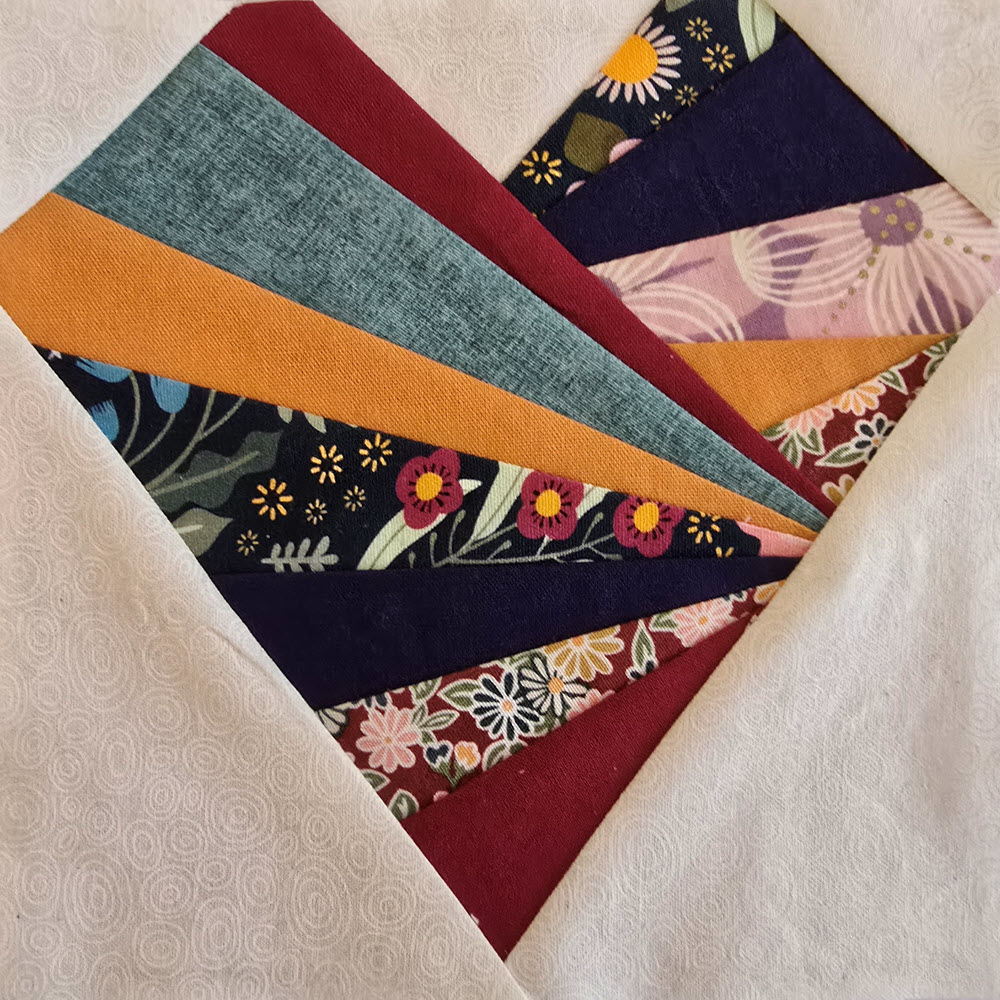
Crazy Patchwork
I used crazy patchwork in one block – Heart 6 (Week 28).

Crazy patchwork was a fun break from the more precise quilting techniques. There’s no strict pattern—just irregular shapes stitched together like a puzzle. It’s a no-rules approach with a simple process, much like foundation paper piecing. I created the crazy patchwork for the Heart 6 block by using scraps as leaders while piecing my main blocks.
The flying geese at the top of this heart block were originally meant to use fabric D, but I adjusted the pattern to incorporate crazy patchwork instead. I felt this approach better complemented the look and feel of the heart block and added a more playful, scrappy touch.
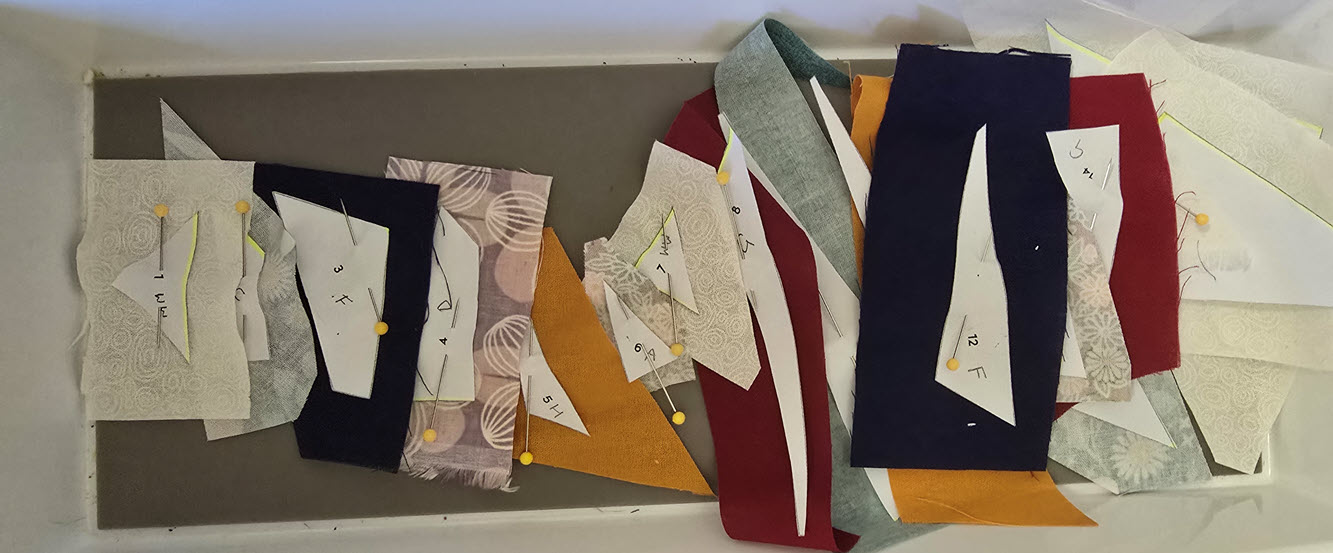
Foundation Paper Piecing (FPP)
I made eight blocks the include Foundation Paper Piecing (FPP) — Heart 1 block (Week 2), Star 2 block (Week 7), Star 3 block (week 13), Heart 5 (Week 18), Bird 3 (Week 25), Star 7 (week 32) and Flying Geese 3 (week 36) and Basket 3 (week 45).

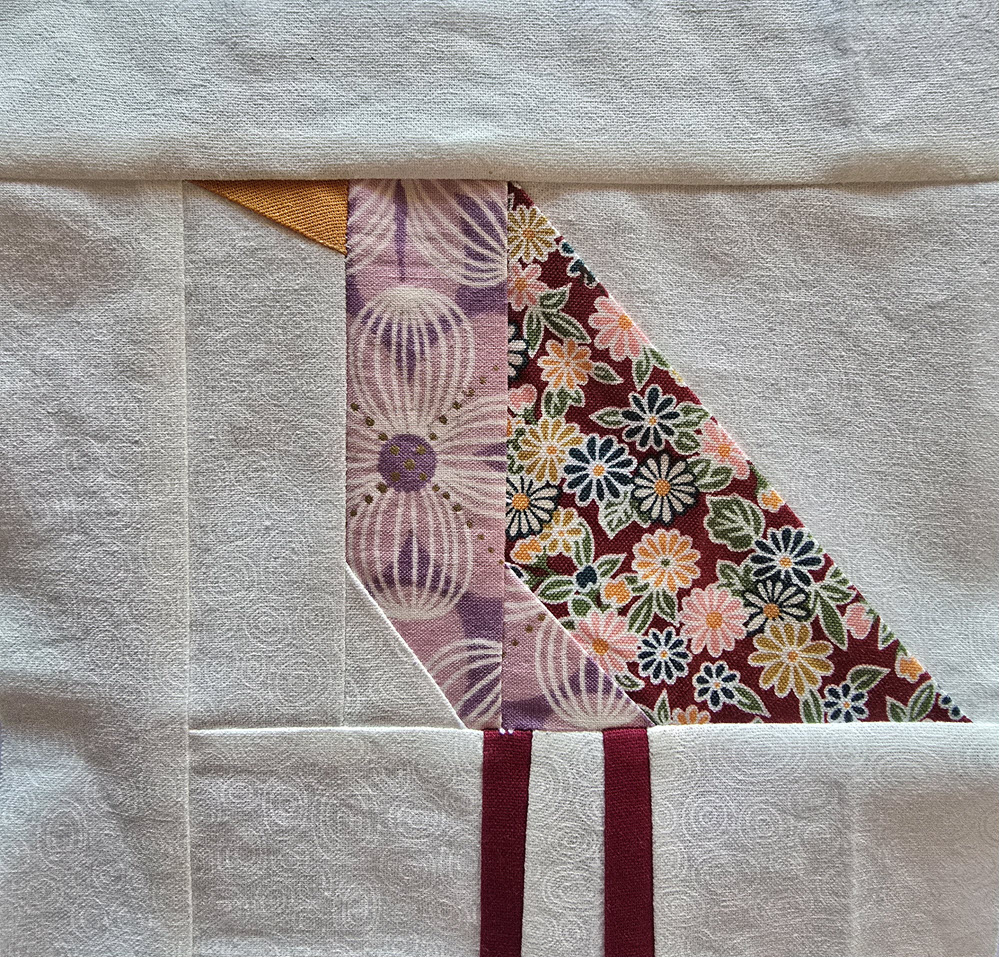

My first exposure to Foundation Paper Piecing (FPP) was in Week 2 when I created the Heart 1 block. FFP was a breath of fresh air after learning how to create Flying Geese in week 1. Stitching directly on the paper template means there’s less need for perfectly precise fabric cutting.
Just Get It Done Quilts video, “Foundation Paper Piecing Tutorial“ was an excellent resource for learning the technique. It walked me through each step clearly and gave me the confidence to try more FPP projects in the future.
I was able to complete Star 2 block (Week 7) using Foundation Paper Piecing (FPP) fairly easily, using the skills I had already learned and practiced in Week 2. I rewatched Just Get It Done Quilts’ video, “Foundation Paper Piecing Tutorial,” and followed along with the tips to guide my sewing.
However, I noticed that the unfinished block ended up slightly smaller than it should have been, which suggests my ¼ inch seam might be a bit off — especially since FPP is usually quite precise. I double-checked my seam allowance in week 8 and adjusted to address the issue.
The later blocks completed using Foundation Paper piecing continued to be fast to sew. The biggest challenges were remembering to place the template pieces to be cut on the wrong size of the fabric, working out which way around to place the fabric when sewing onto the Foundation paper template and making sure the fabric was placed on the template with enough ¼ inch seam allowance on all edges.
I use scrap pieces of fabric and add a ½ inch seam allowance when cutting the fabric using the templates.
I quickly found it was best to organize the fabric pieces I cut in piecing order with their template pinned onto each piece.
My reminders for FFP are:
- Place printed template on wrong side of fabric when cutting fabric.
- Add ½ inch seam allowance when cutting fabric from template.
- Reduce stitch length to 1.5.
English Paper Piecing (EPP)
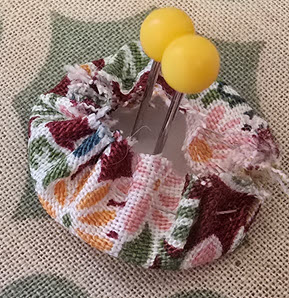
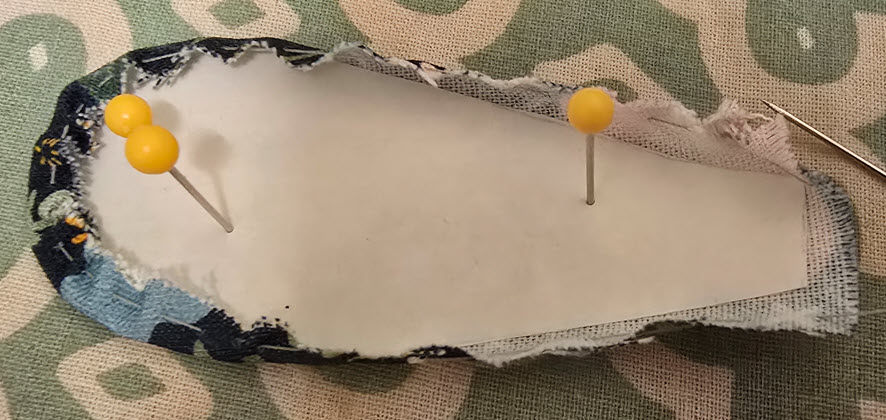
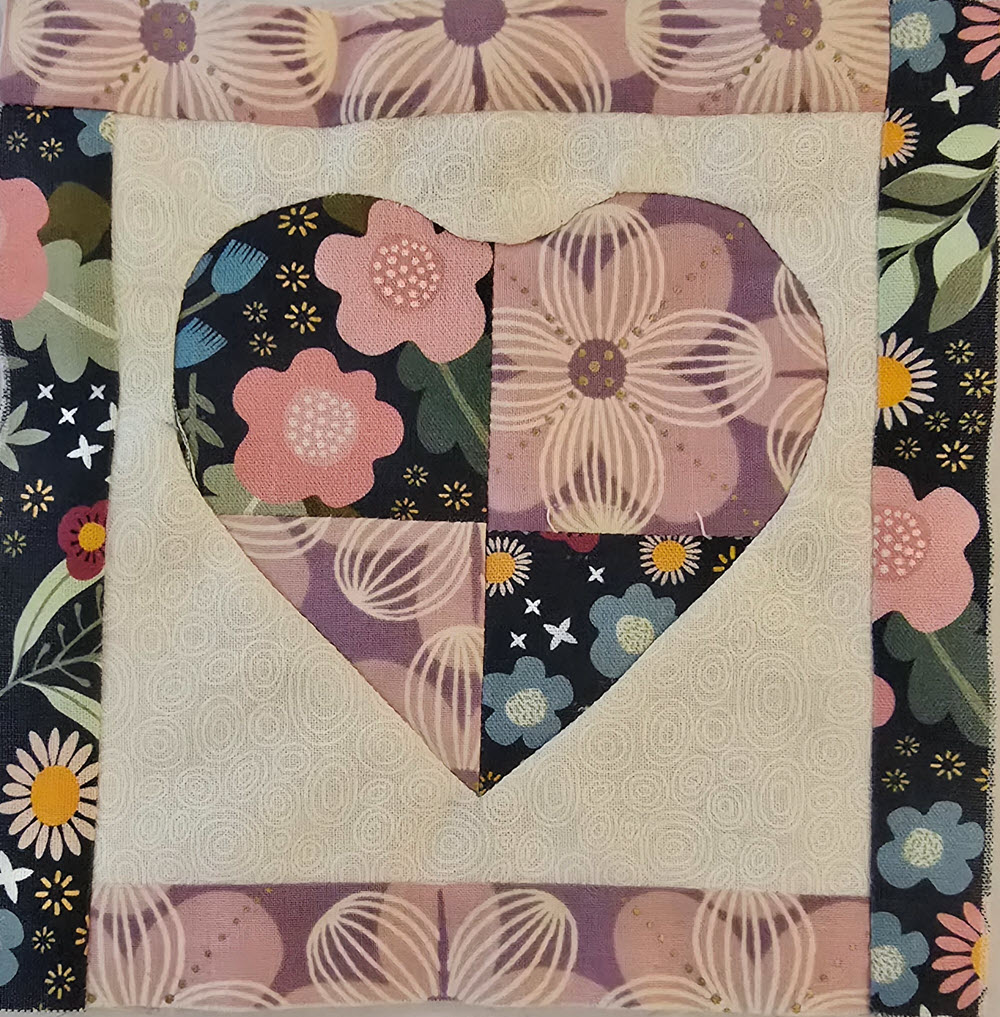
I used English Paper Piecing (EPP) in the Small Flower block (Week 4), Heart 4 (week 12), English Paper Piecing 1 (week 19) and English Paper Piecing (Week 47).
The small flower block involved making a flower using EPP, then appliquéing it to the background. I chose to use the thread I already had instead of specialty thread since there are only few EPP blocks in the book.
For the appliqué, I used invisible thread to attach the stem instead of buying a matching thread. This worked really well and saved me from making an extra purchase since I already had some invisible thread in my sewing kit.
Tip: Creating a practice block for the small flower block really paid off here. The fabric measurements in the book were incorrect.
Watching Just Get It Done Quilts video, “English Paper Piecing Basics” and Emma Jones Vintage Sewing Box video, “Tops Tips to Improve Your English Paper Piecing Technique” really helped me figure out how to create Small Flower block (Week 4) using EPP.
Of all the EPP blocks, I found the English Paper Piecing 2 block in Week 47 the most challenging. It uses an applecore template, which is sewn together a little differently from conventional EPP, and getting the curves to align neatly took some practice. Sue Daley Design’s video, Ep 7: How to Sew Applecores – Sue Daley’s Shape Up English Paper Piecing School, was a lifesaver in helping me figure out the technique. In hindsight, if I ever make these blocks again, I would definitely use pre-cut applecore templates—they would save time and likely give a more accurate shape than cutting my own.
Dresden Plate
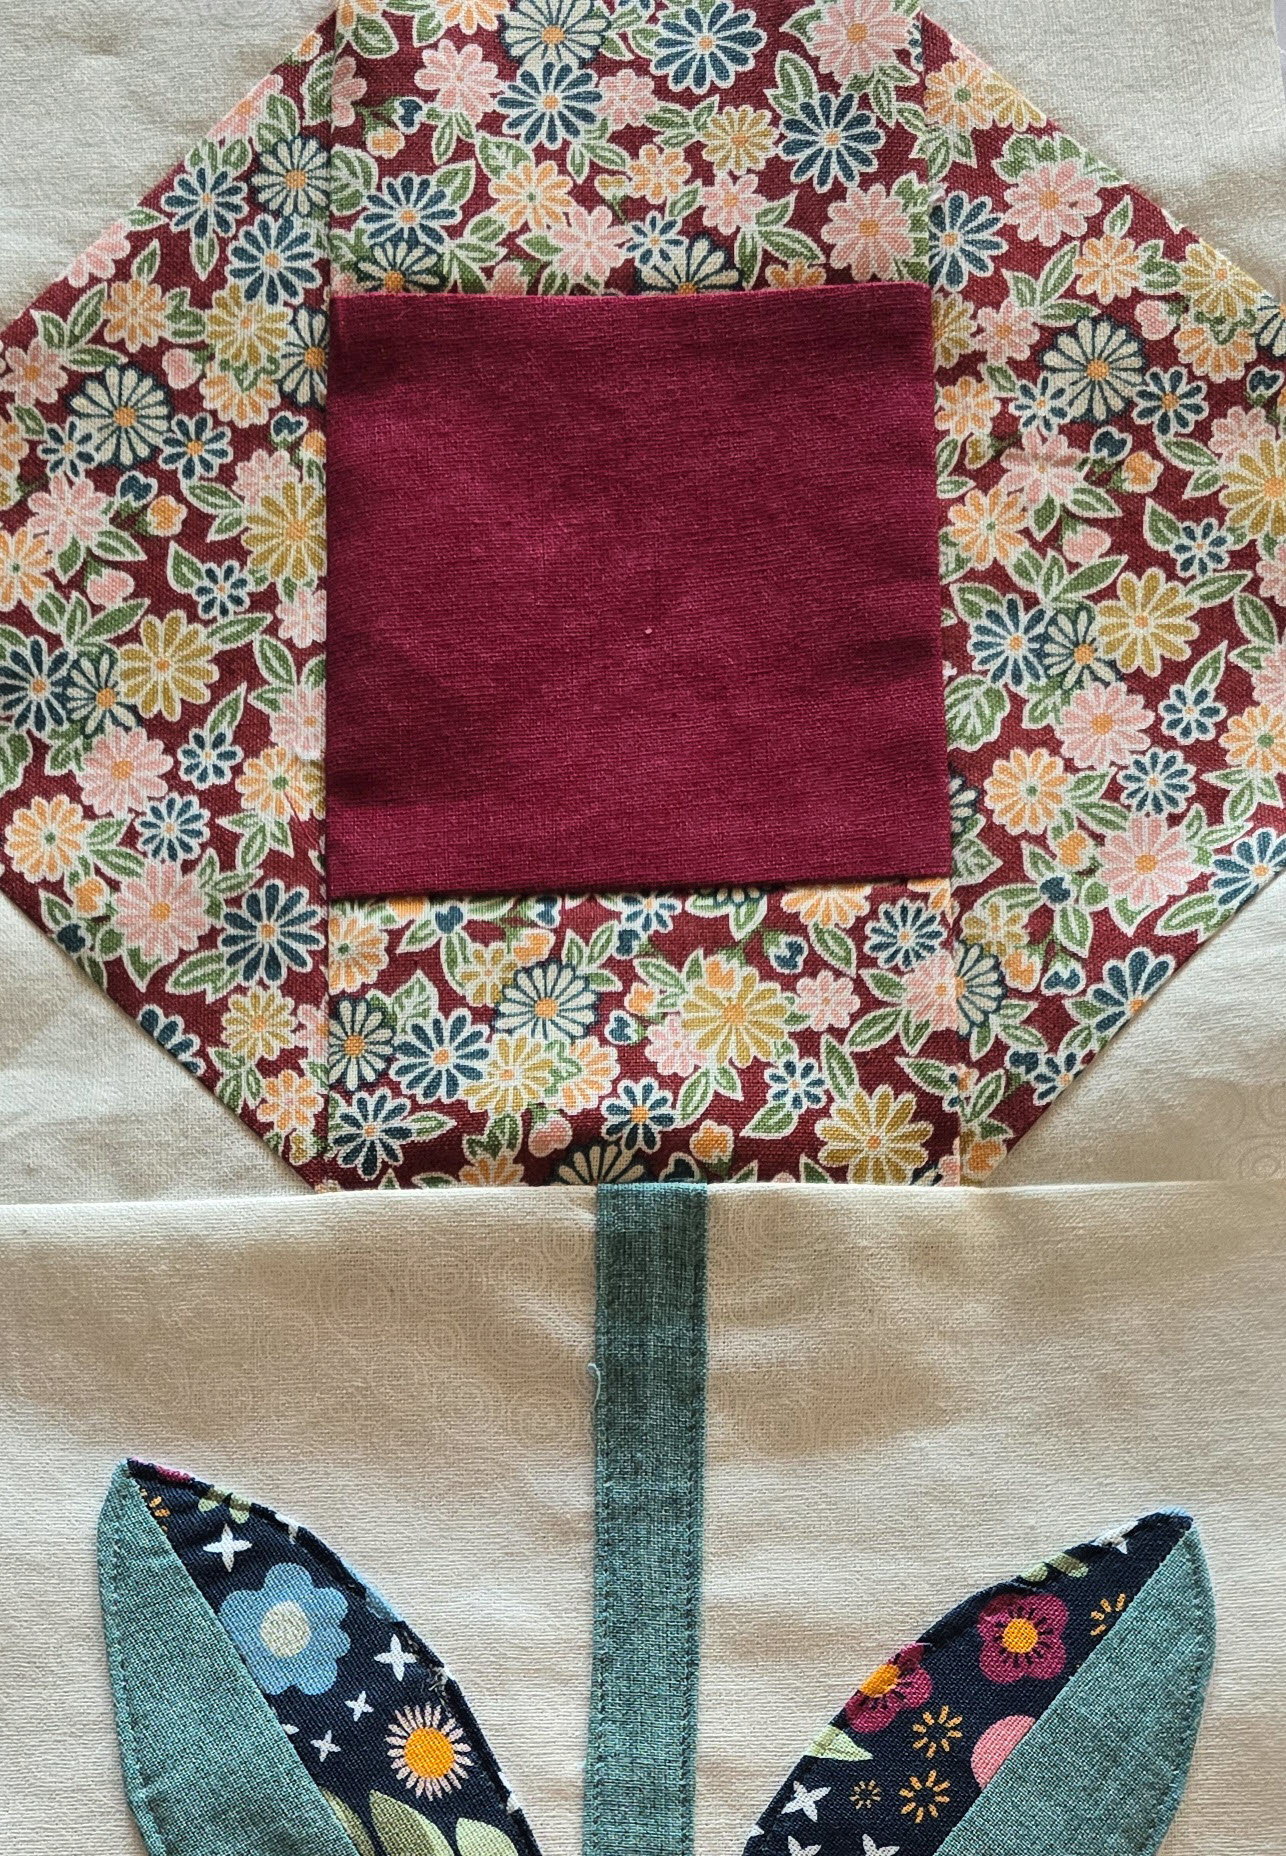
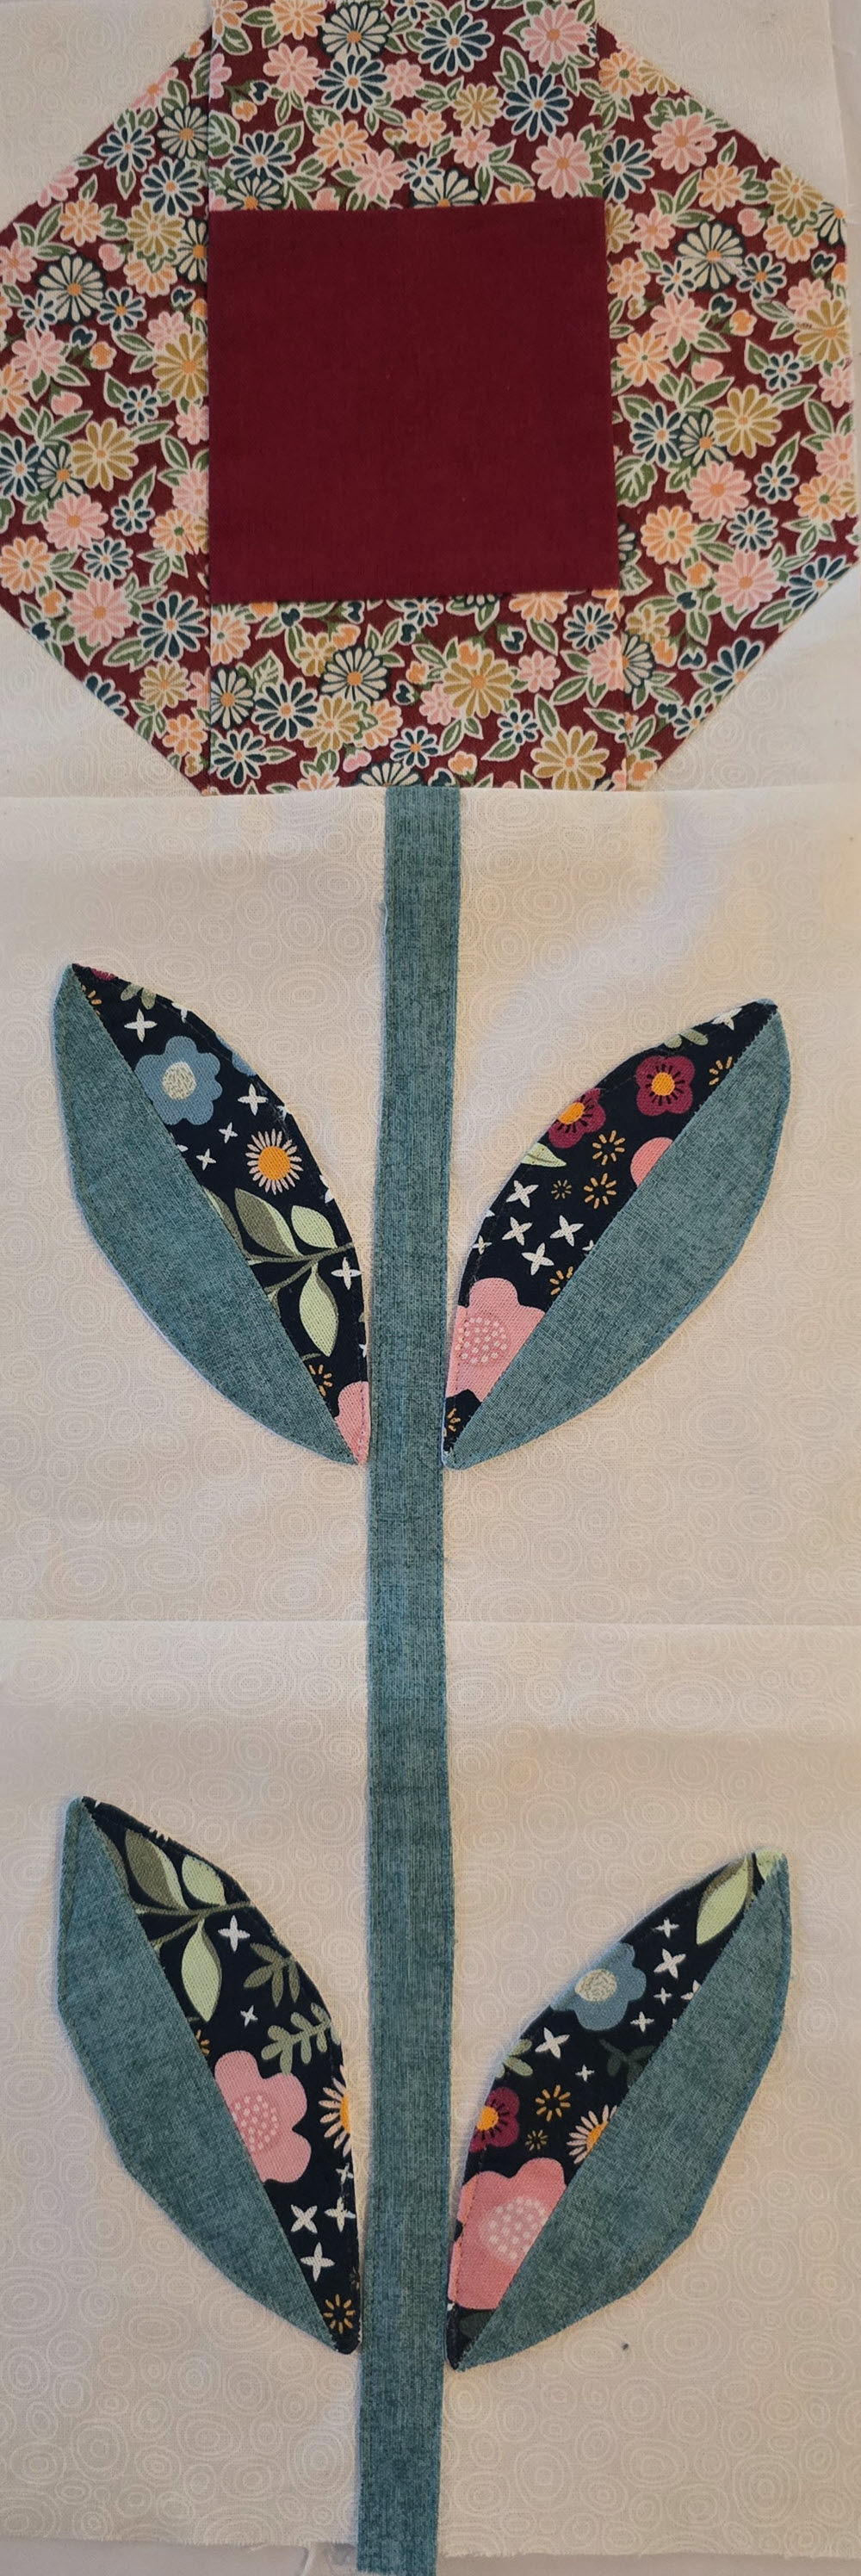
I made two blocks using a Dresden Plate—the Dresden Plate Block (Week 15) and Dresden 2 block (week 41).
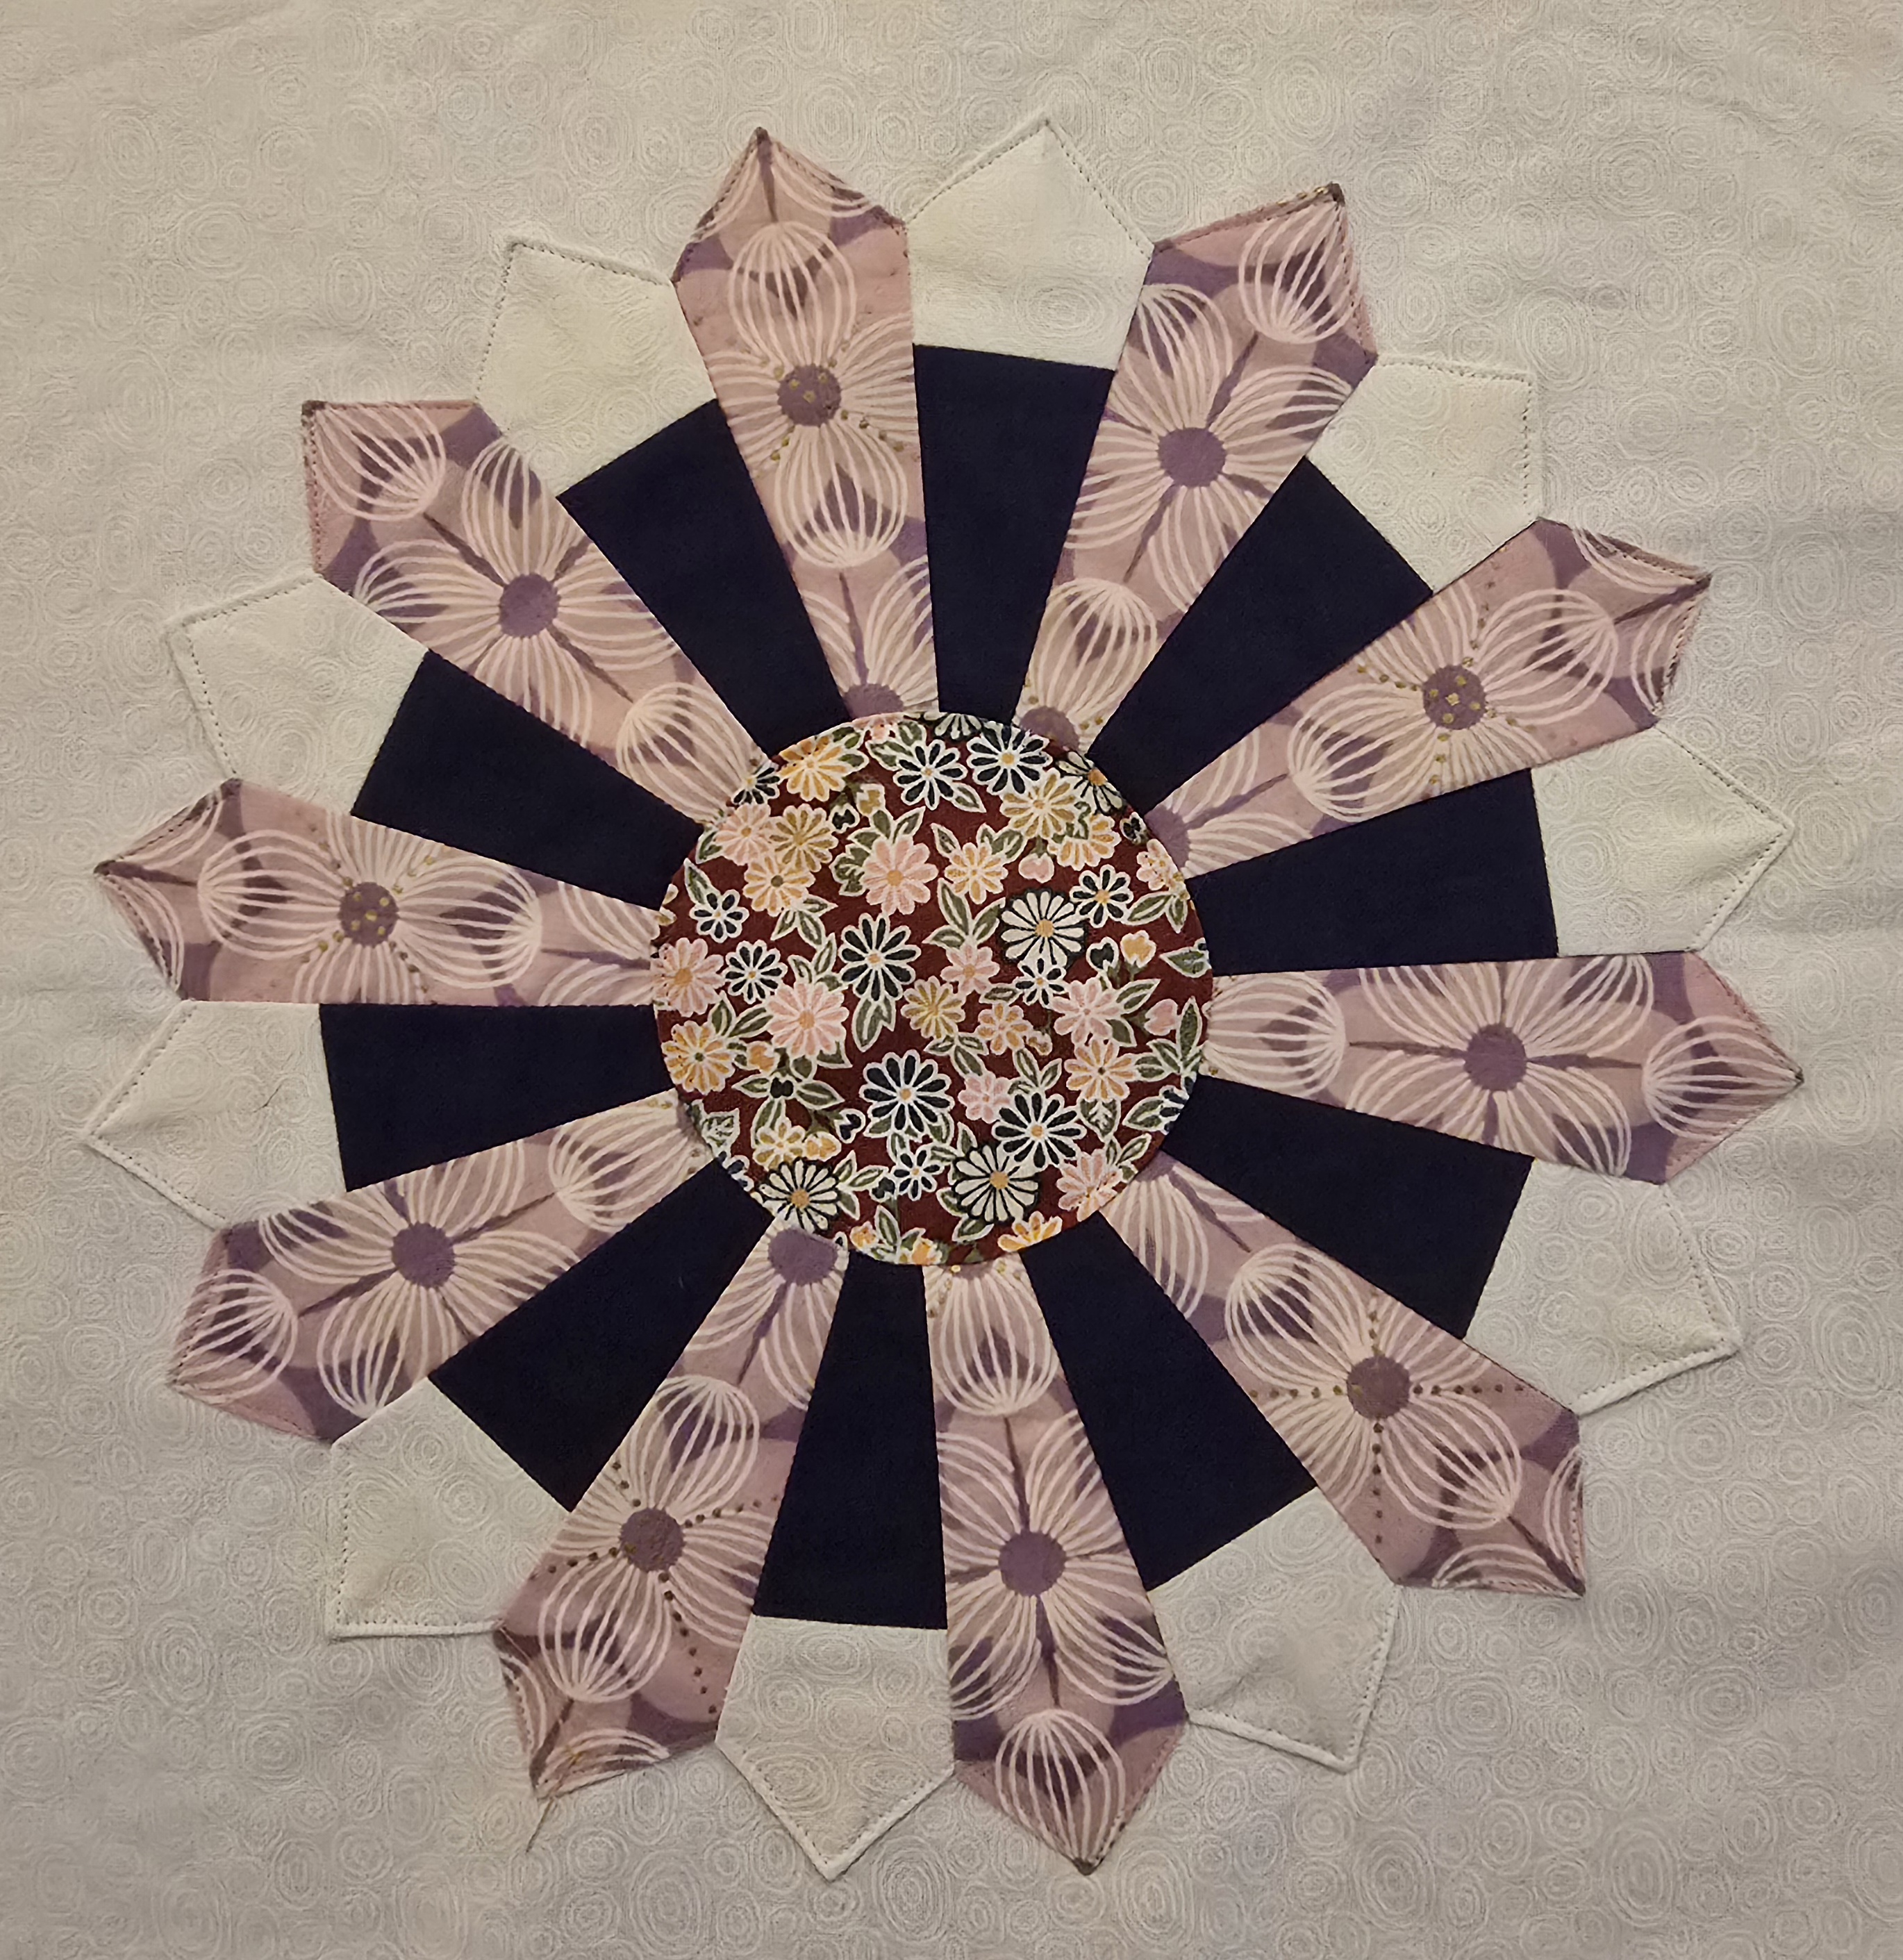

I watched several videos to learn the technique for creating the the Dresden Plate Block (Week 15) and found Jessica Dayon’s video the most helpful.
Her tips for shaping the centre plate, starting around the 25-minute mark, really helped me get a smoother, more even circle. One tip I especially appreciated was how to apply starch to the plate’s edge. I had been struggling with Best Press, as spraying it directly often soaked the fabric too much. Jessica suggested pouring a small amount into the lid and using your finger to dab it along the edge—simple but effective, and it made a big difference!
The Dresden Plate Block (Week 15) was a traditional Dresden Plate with Pointed Blades and Appliquéd Circle Center whereas Dresden 2 block (week 41) was a Modern Dresden Plate with Pieced Blades and Octagon Center. The techniques used to construct each were slightly different.
The Dresden 2 block (Week 41) came together more quickly, but I ran into an issue with the octagon center. The template provided in the book turned out too small—I’m not sure if it was a problem with the template itself, my technique, or a misread on my part. To fix it, I enlarged the octagon template by photocopying it at 125%, which increased the size to 3¾”. To get smooth edges, I used the English paper piecing technique, then machine-appliquéd the octagon to the Dresden block with a top stitch.
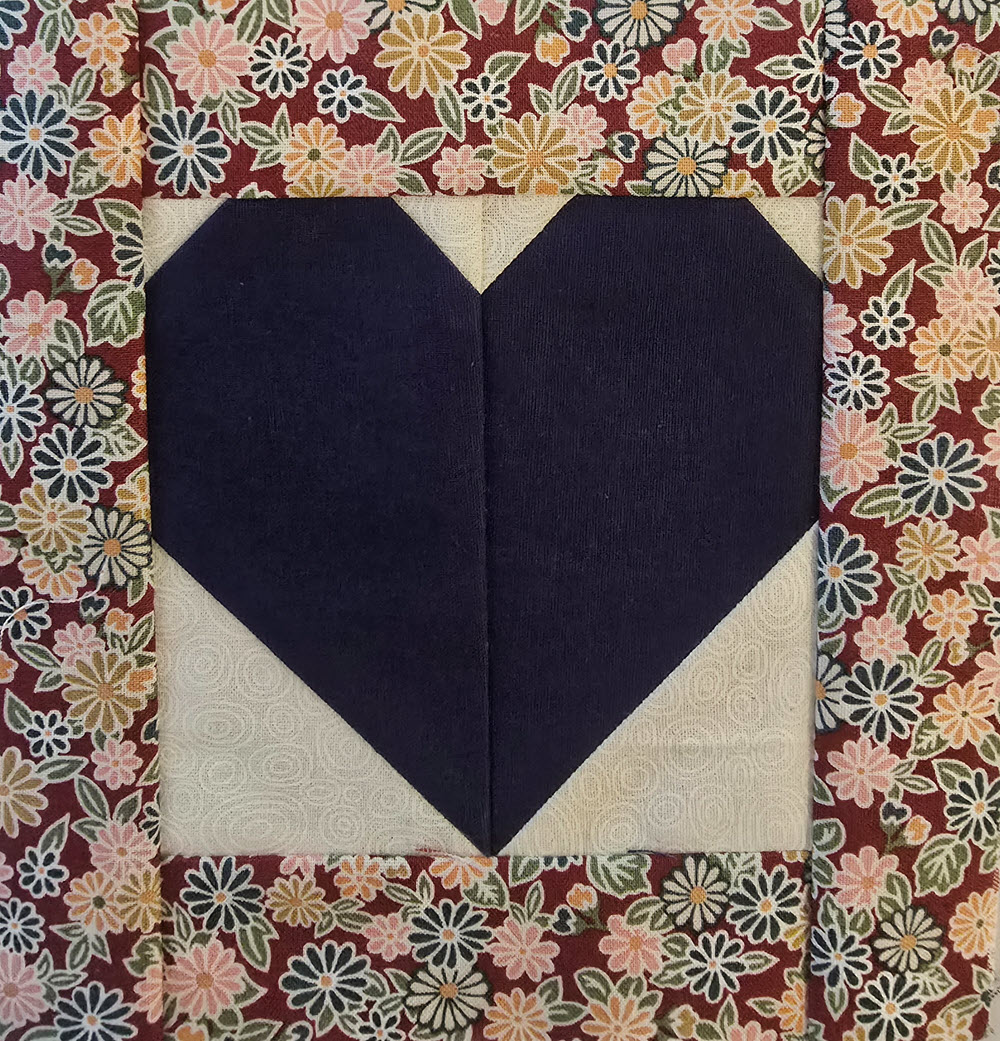
Raw Edge Appliqué
I used Raw Edge Appliqué in seven blocks— Centre Panel 1 block (Week 9), Tall Bird 1 (Week 22), small flower 4 (week 26), heart 7 (week 34) and bird 4 (week 37), bird 5 (week 44) and centre panel 2 (week 49).


My first exposure to raw edge appliquéing was in week 9 when I created the Centre Panel 1 block by appliquéing six heart shapes onto 3-inch squares. The instructions suggested tracing the heart shapes onto the paper side of the adhesive sheet, cutting them out, and then ironing each one onto the fabric. I used Vliesofix (bondaweb-style iron-on adhesive), but found it easier to take a different approach: I first ironed a rectangular piece of adhesive sheet—large enough to fit all six hearts—onto the back of the fabric. Then I drew the heart shapes on the paper side and cut them out. Because the heart shapes were small, they were fiddly to handle if cut from the adhesive first and then applied to the fabric. My method gave me more control and resulted in neater shapes.
I also struggled with appliquéing the hearts onto the squares, as the book recommended using machine stitching but didn’t include any guidance on stitch width or length. To figure this out, I watched several videos and experimented with different settings. In the end, I used a zigzag stitch with a stitch length of 1.0 and a stitch width of 2.0, which gave a neat finish without overwhelming the small shapes. One video I found particularly helpful was from Pattern Pool TV, which demonstrates three different machine appliqué options—great for beginners trying to decide which method to use.
I also had some trouble figuring out the machine stitches for the Tall Bird 1 block from Week 22. The book uses blanket stitch to appliqué the main parts of the bird’s body, so I had to experiment with my machine settings to get a similar effect. On my Janome 419S, I found that the F setting worked best for blanket stitch, with a stitch length of 0.5 and a width of 3. For satin stitch, I used the setting C with the stitch length close to zero and the width set to 2.0.

I treated myself to a new sewing machine – the Janome Skyline S7 – after accidentally snapping the presser foot lifter on my Janome 419s while working on a block with Broderie Perse appliqué. The Skyline S7 is designed with quilting and sewing in mind, and it comes with features that make raw-edge appliqué much easier, including a range of preset stitches to choose from. To keep my blocks consistent with those I made on the Janome 419s, I added a zigzag stitch to my Skyline S7’s favorites in the Utility section, setting the stitch length to 1.0 and the stitch width to 2.0.
Applique with interfacing
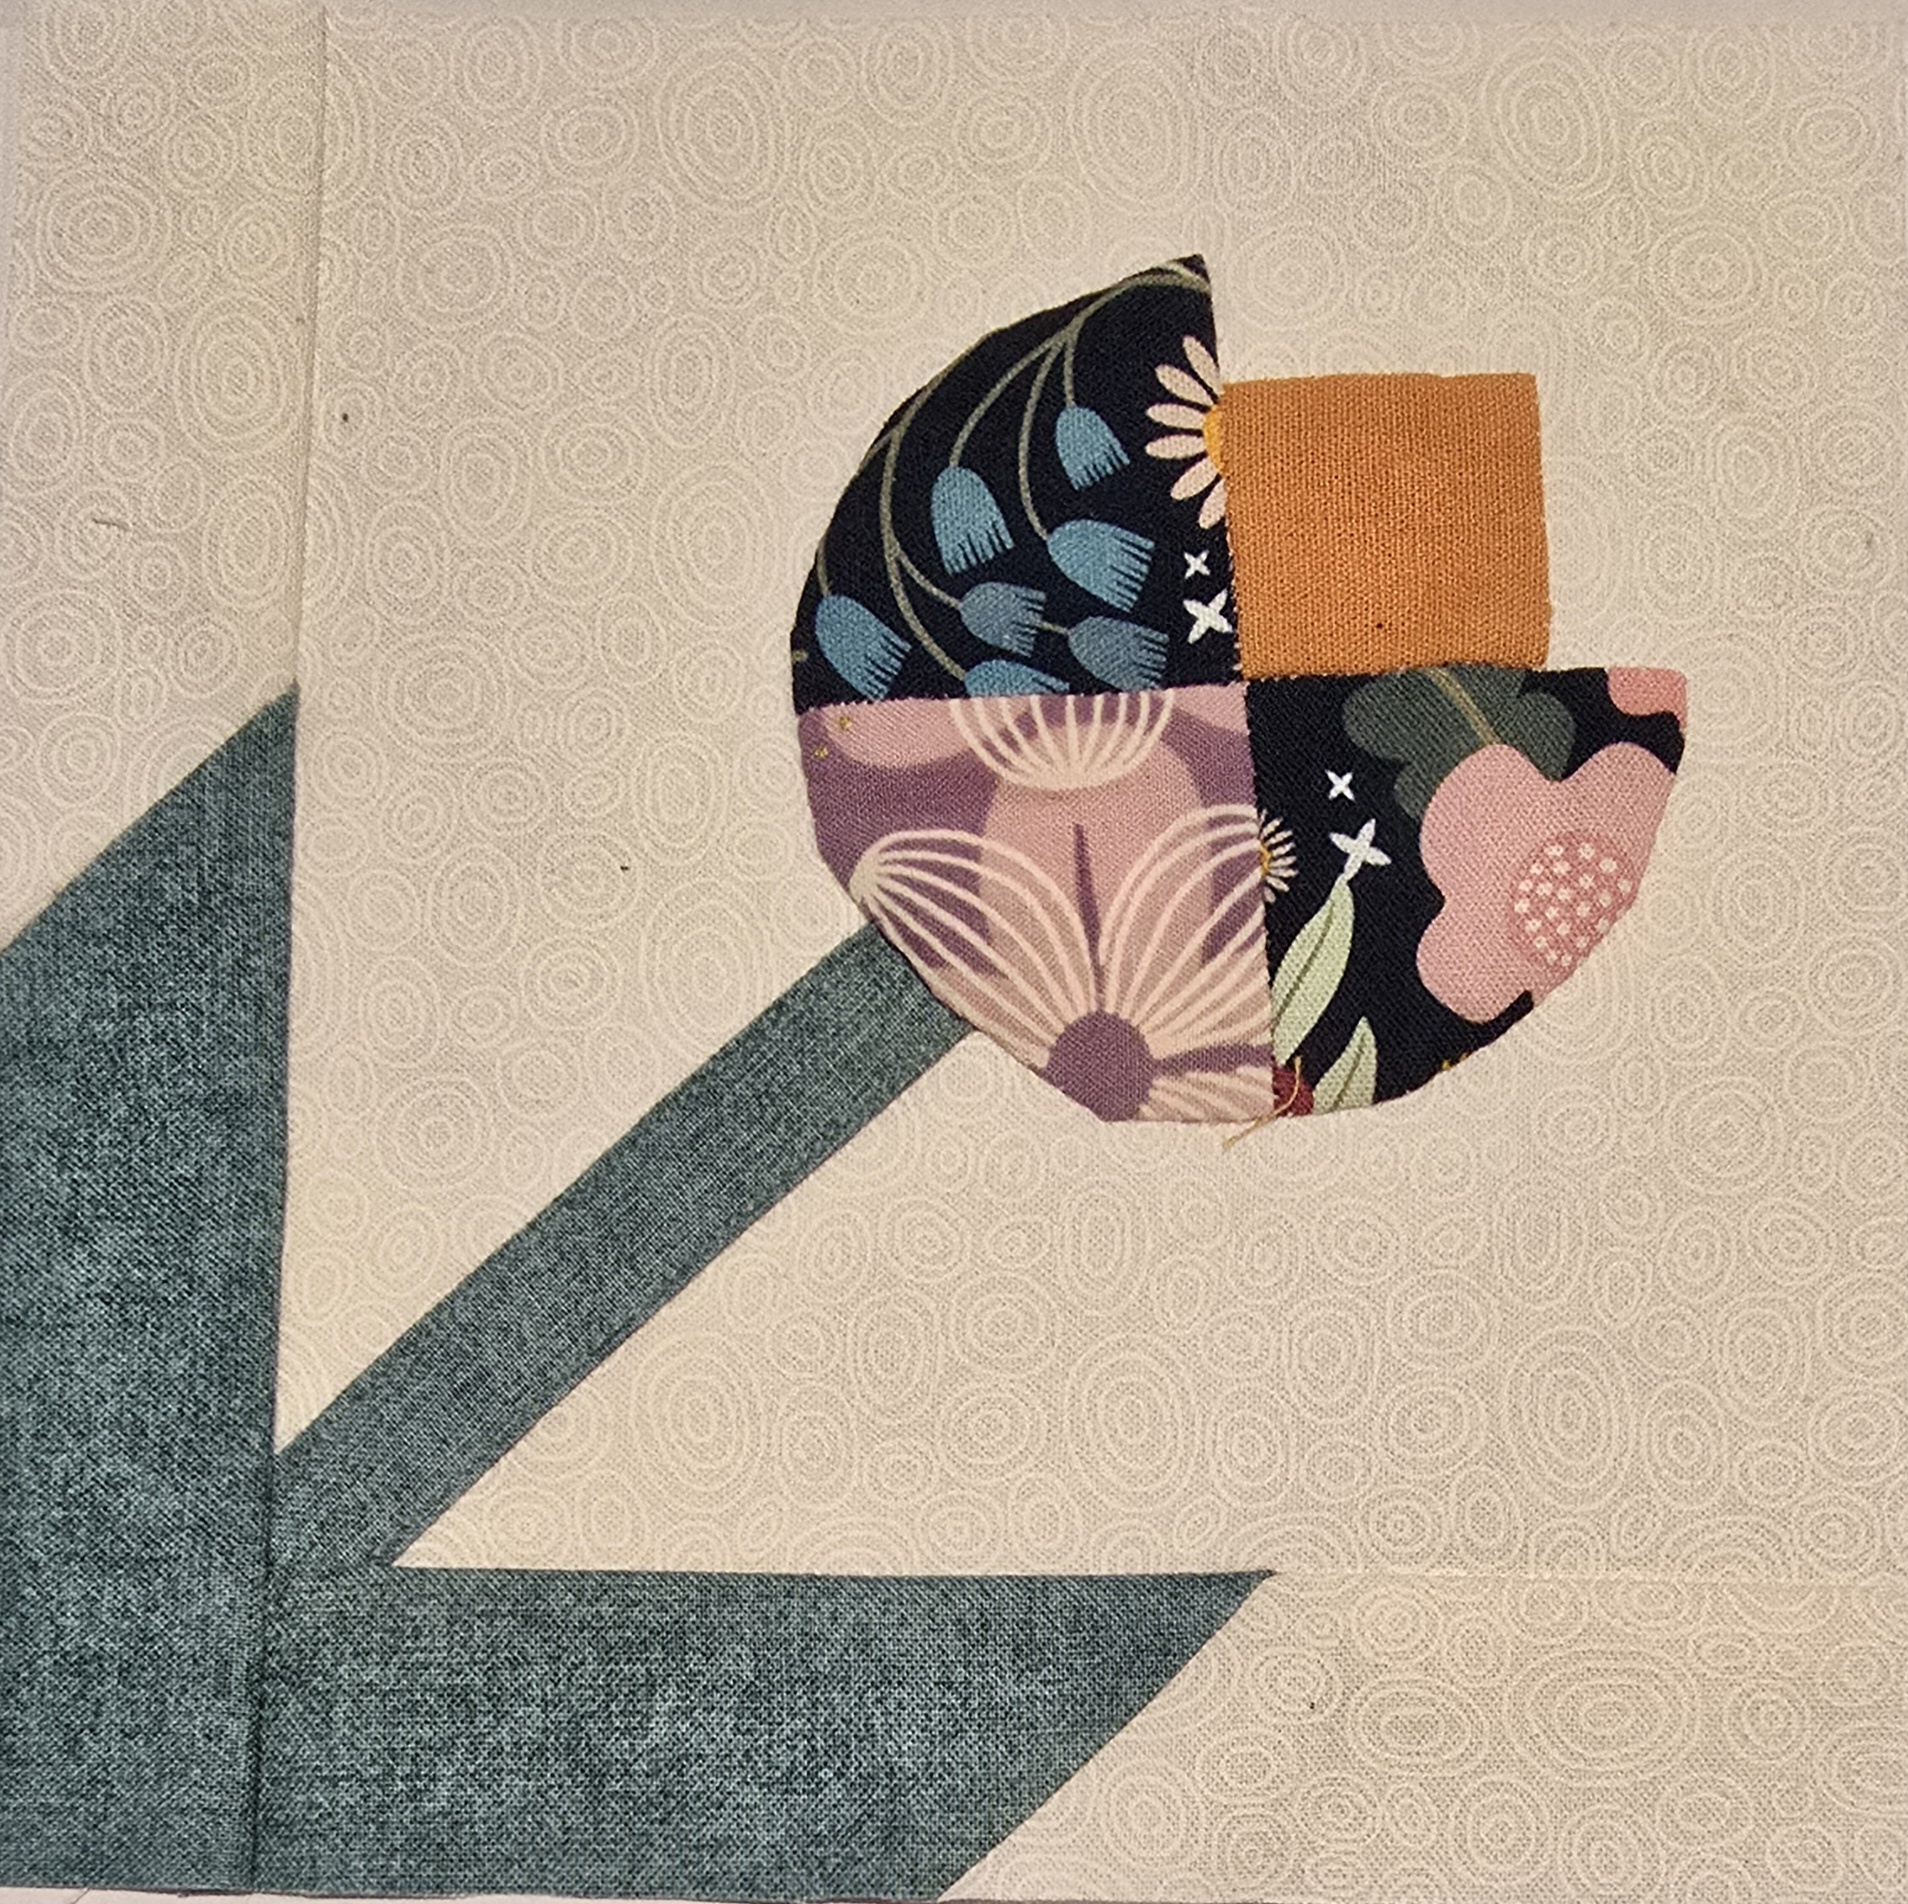
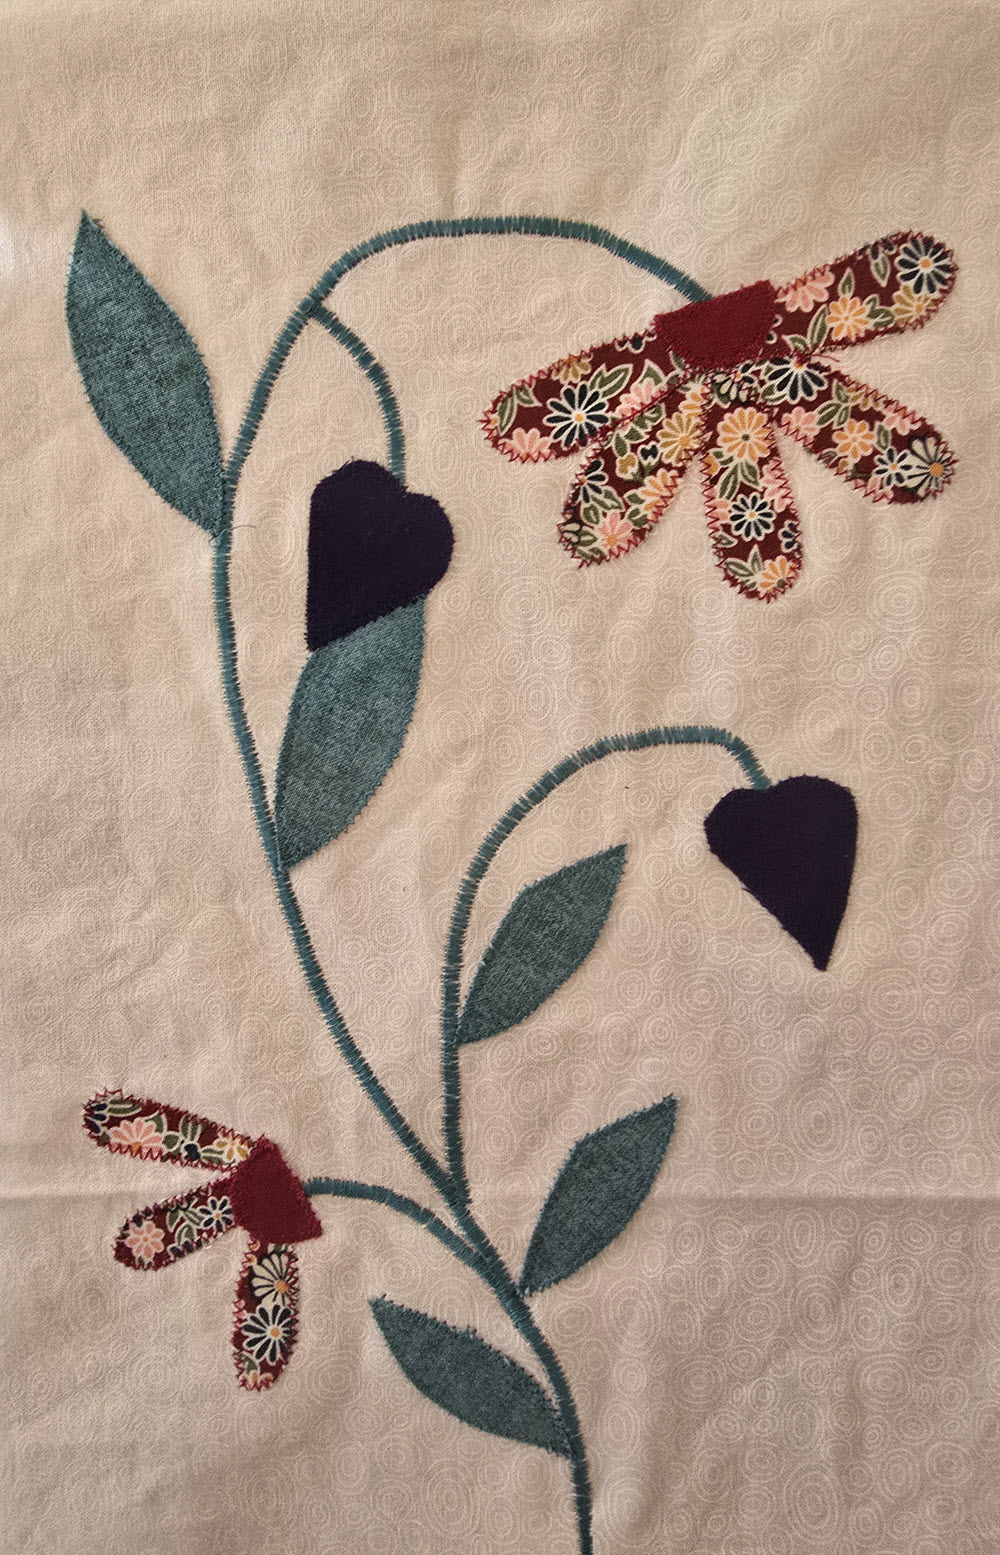
I made one block using applique with interfacing – Tall Flower 2 (Week 24).

For the Tall Flower 2 block, I used interfacing to create the appliquéd leaves. While the book recommended lightweight interfacing, I found that mine tore too easily during the turning process. Switching to a medium-weight interfacing gave me much better results—it held its shape well and was easier to work with.
One thing I initially struggled with was figuring out how long to make the lengthwise slit in the back of the interfacing for turning the shape right side out. A video by BillhillsCraft titled How to APPLIQUÉ HEARTS with INTERFACING and Machine Blanket Stitch was really helpful—it clarified how to cut the slit and turn the shape smoothly, especially for those curved leaf edges.
The book suggests using either fusible or sew-in interfacing. I only had fusible on hand, which worked fine, but I can see how sew-in interfacing might have been a better option. With fusible interfacing, I couldn’t iron the shape flat before positioning it on the block, which limited my options for shaping and pressing.
I ended up making the leaves twice as I wasn’t happy with my original leaves.
Applique with Freezer Paper
Applique with freezer paper was used for two different blocks – Small Flower 5 (Week 43) and Tall bird 2 (week 52).
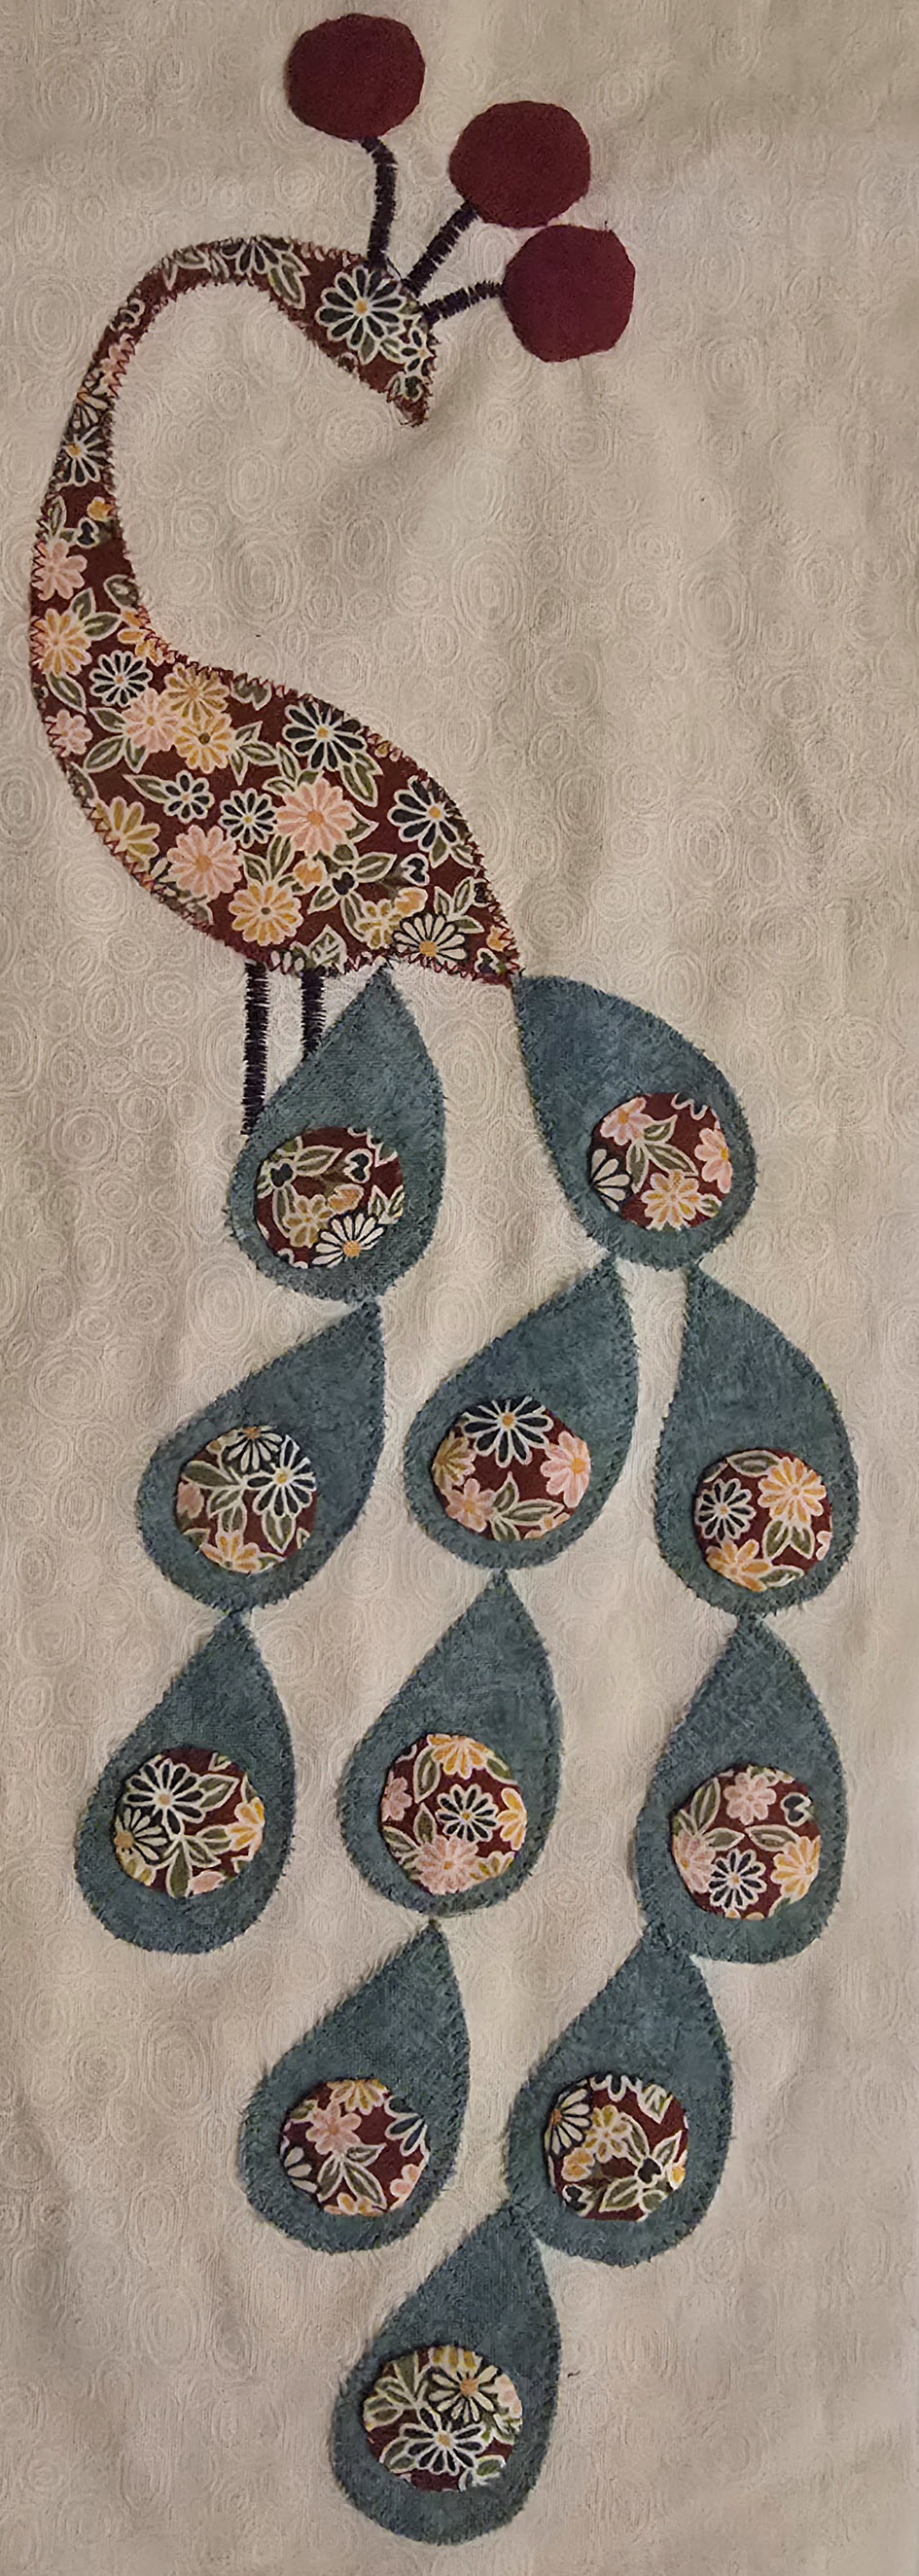
I first tried using freezer paper with the tall bird in week 52. as the tall feather circles and head plumes were especially challenging because of their small size and the number required. After watching several tutorials on how to make the perfect appliqué circle, I found that using freezer paper with a technique similar to appliqué with card worked best. None of the videos demonstrated the exact technique I ended up using, and some suggested tools for making appliqué circles that I found unsuitable for my project due to the small size and large number of circles required.
Since the circles were the same size as a bobbin, I used a bobbin as a template to trace them onto freezer paper.
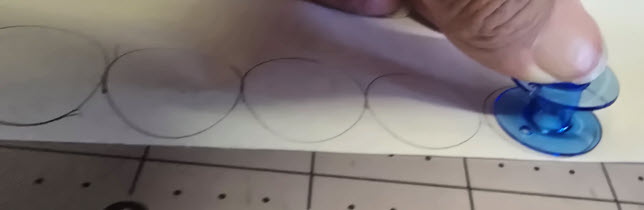
I then ironed the freezer paper circles onto the wrong side of the fabric and cut them out, leaving about a ¼-inch seam allowance. To shape each circle, I pinned it to the ironing board, stitched around the edge of the seam allowance, and pulled the thread to gather it in. Using a cotton bud, I gently applied starch to the edge before pressing with the iron, which produced neat, crisp circles.
I first tried sewing the petals for the Small Flower 5 block using needle-turn appliqué, but I wasn’t happy with the shape of the petals.

After using the freezer paper to make the appliqué circles for the tall bird 2 in Week 52 I decided to see if I could use the same technique for the petals for the small flower 5 in Week 52. Using the same approach I discovered that it allowed me to create nice crisp petals for the flower.
Broderie Perse
I created one block that includes broderie perse – Basket 1 (Week29).

The trickiest part of the Broderie Perse block wasn’t the appliqué—it was picking the fabric (not easy without a stash!) and getting those basket-top strips lined up just right. I kept misaligning them and I ended up unpicking them more than once.
What should have been a calm bit of appliqué quickly turned into drama when the presser foot lifter on the Janome 419s snapped mid–Broderie Perse. Off it went for repairs, leaving me machine-less. The upside? Since the Janome was only on loan from my niece, it gave me the perfect excuse to treat myself to my very own sewing machine at last.
Reverse applique
I made one block that uses reverse appliqué – Heart 8 (week 38).
Jen Wagner’s video, How to Reverse appliqué helped me work out the process for the Heart 8 block. I decided to try machine-stitching the heart shape using her technique, but when I reached the top of the heart I realized it wouldn’t work in this situation. To finish, I switched to hand stitching and used a slip stitch for the top section.
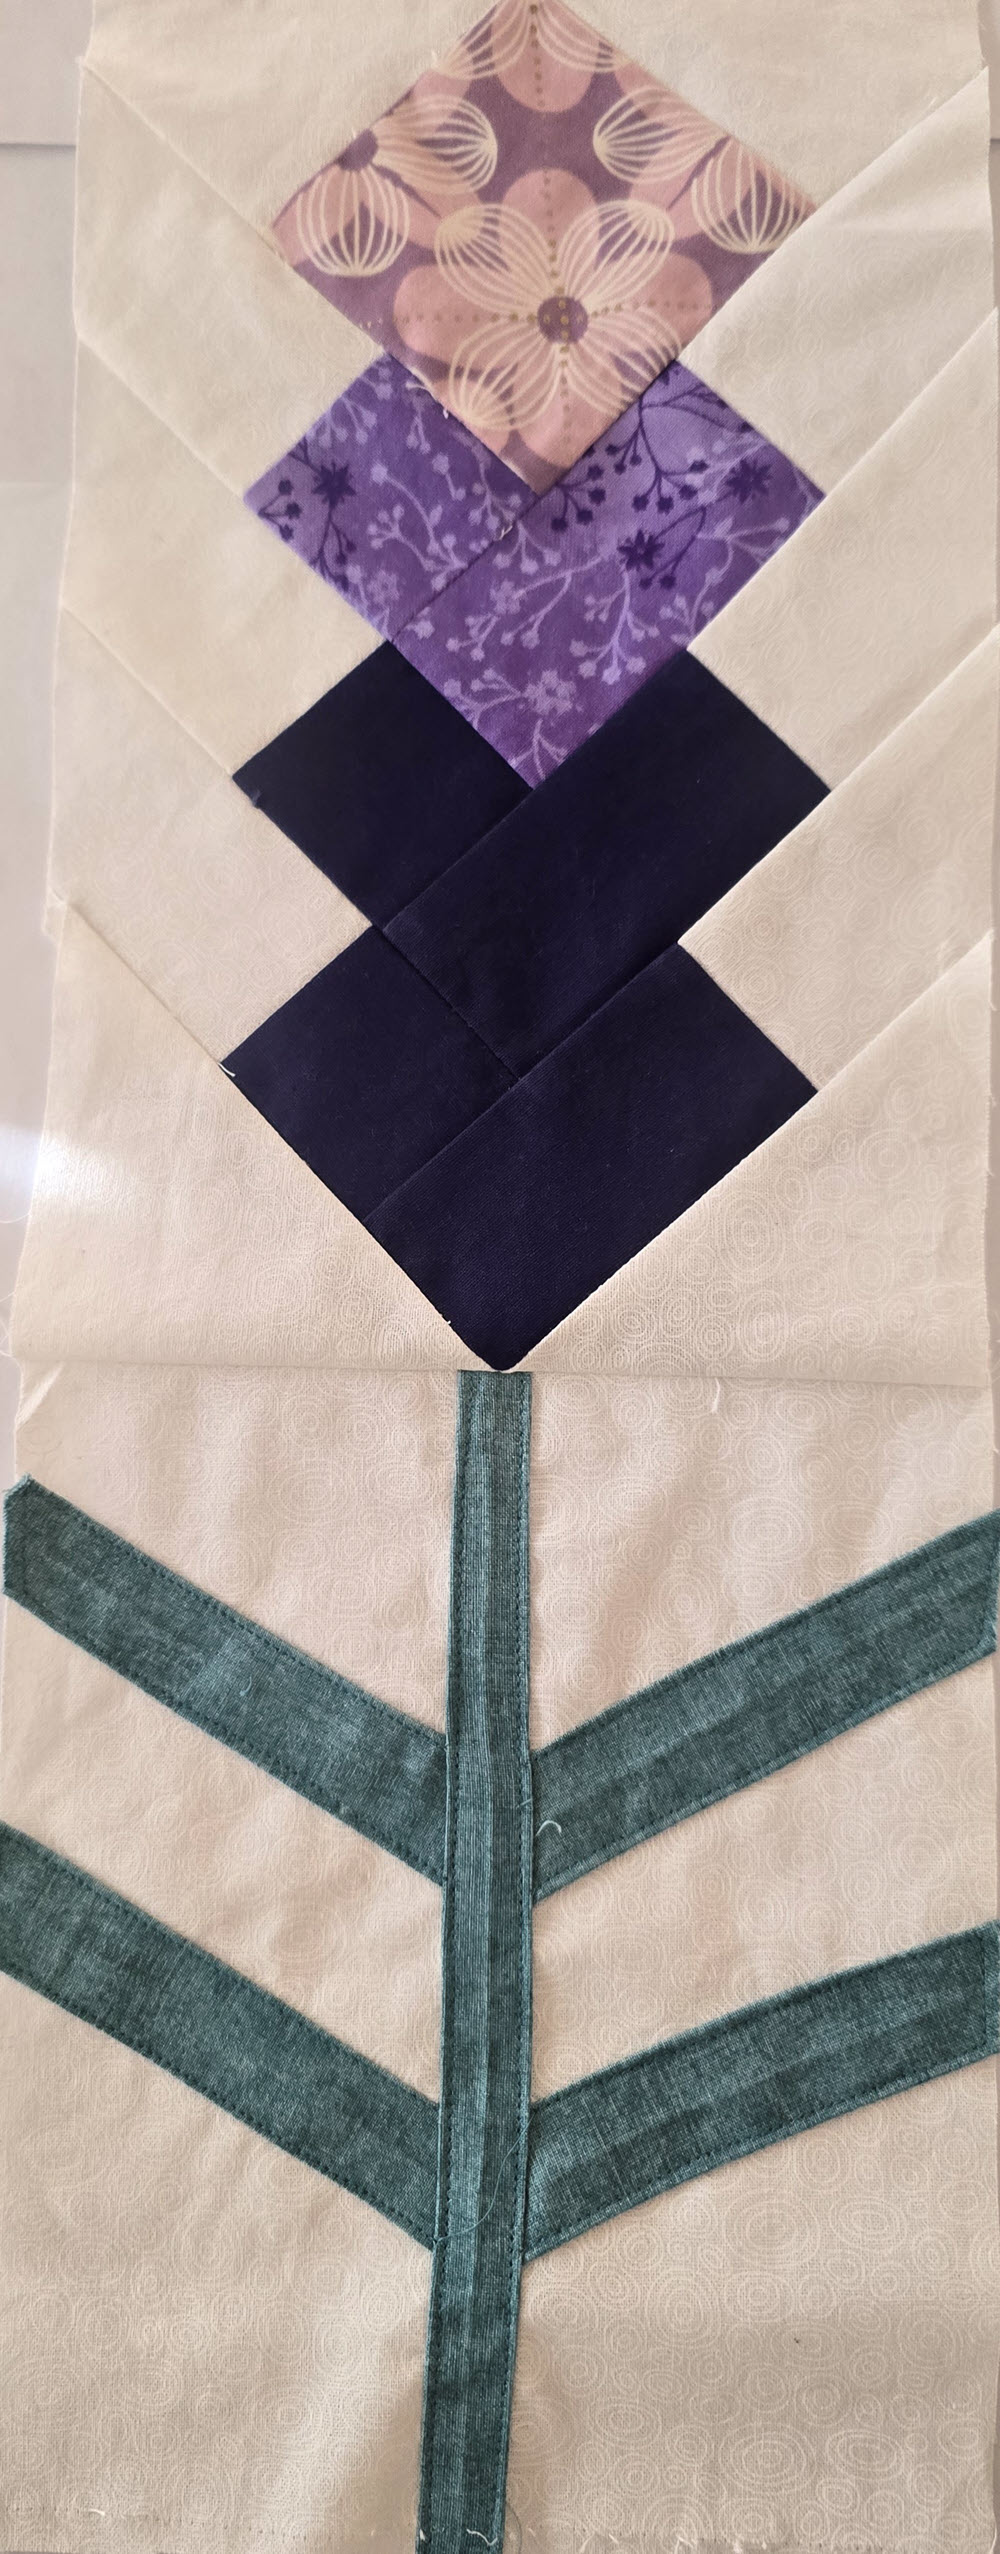
Bias and straight strips
I created six blocks that include bias or straight strips – small flower 1 week 4, tall flower 1 week 17, tall flower 2 week 24, basket 2 week 40, basket 3 week 45 and, tall flower 4 week 48,
In the book, bias and straight strips are used for elements like flower stems, leaves, and the basket handle. The strip is cut either on the straight grain (for straight shapes) or on the bias (when it needs to curve). After cutting, the strip is pressed and folded, then appliquéd onto the block.

Beyond the Sewing Table: Learning on the Go
While walking, I often listened to quilting videos that deepen my understanding of techniques, history, and the creative process. Even away from my machine, I’m continuing to learn and grow as a quilter — making the most of my walks by turning them into valuable learning time.
I’ve found the following Just Get It Done Quilts playlists particularly well-suited to listening while I walk:
What makes these especially great for walking is that they’re easy to follow without watching — the content is rich in conversation, tips, and storytelling, so you can still learn a lot just by listening.
An added bonus of listening to Karen Brown’s Just Get It Done Quilts playlists is that she often shares practical tips that go beyond quilting. Her advice on building habits—like using a timer for tasks you don’t enjoy or incorporating a bullet journal into your routine—has been especially helpful in organizing both my creative time and daily life.
Final Thoughts
As I look back on the blocks I created, I’m struck by how much I’ve learned—not just about techniques like Flying Geese, Foundation Paper Piecing, and English Paper Piecing, but about the time, precision, and creativity that go into making a quilt.
Working through each block has given me a much deeper appreciation for quilting as a craft. I now understand how much thought goes into fabric choice, seam accuracy, pressing, and even something as seemingly simple as trimming. Every quilt I see now feels more meaningful because I have a better sense of the skill and care behind it.
I’ve also enjoyed finding ways to make this project my own—like choosing methods that suit my current skills, and repurposing materials I already had on hand.
I really enjoyed making the 52 blocks and was thrilled to complete them in just six months instead of the planned twelve. It felt rewarding to see steady progress and reach the finish line so much earlier than expected. The only hiccup was running out of white-on-white fabric, but even that became part of the learning experience. A more experienced quilter might have cut the larger pieces of white-on-white fabric before starting?
If you have tips for working through this book, favorite tutorials, or ideas for using up scraps, I’m all ears! Let’s trade ideas and keep learning together.


Leave a reply to steppingintospain Cancel reply